
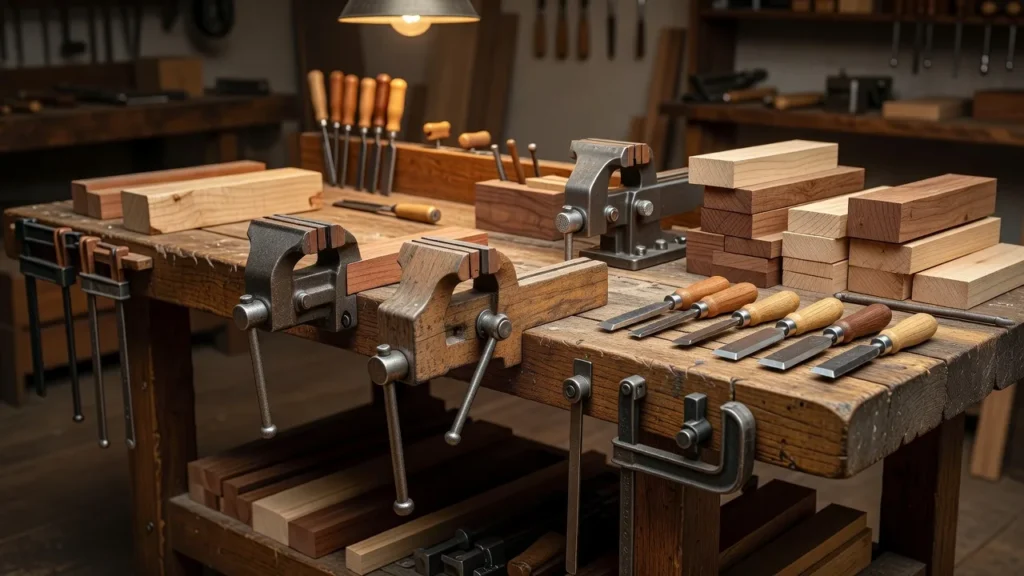

Woodworking vises stand as the unsung heroes in any serious workshop, providing the rock-solid grip needed for precision cuts, shaping, and assembly. When you first set up your bench, selecting the right woodworking vises transforms chaotic workflows into seamless operations. However, many beginners overlook how these tools directly influence project quality and safety. Therefore, understanding their mechanics becomes essential before investing time or money.
Understanding the Core Mechanics of Woodworking Vises
Every woodworking vise operates on a simple yet powerful principle of opposing jaws that clamp materials firmly in place. The screw mechanism advances one jaw toward the other, creating adjustable pressure that holds wood without damaging surfaces. Additionally, quick-release levers on modern models allow rapid adjustments, saving precious minutes during repetitive tasks. Furthermore, the mounting position on your bench determines accessibility, with front and end vises serving distinct purposes in daily operations.
Historically, woodworkers relied on wooden vises crafted from the same species as their benches for seamless integration. These traditional designs used wedges or basic screws, yet they lacked the durability of cast iron or steel counterparts available today. Consequently, contemporary options blend old-world reliability with advanced materials for superior holding power. Notably, the jaw faces often feature replaceable pads made from leather or cork to prevent marring delicate woods during glue-ups.
Real-world examples illustrate their importance clearly. Consider building a tongue and groove project where consistent pressure prevents slippage and ensures tight joints. Without stable woodworking vises, even minor movements can ruin hours of layout work. Similarly, when crafting larger pieces like coffee tables, end vises provide the extra leverage needed for planing edges square. Indeed, professionals emphasize that a quality vise reduces physical strain and improves accuracy across all skill levels.
Transitioning from basic understanding to practical application requires examining how vise size correlates with bench dimensions. A vise that is too small fails to secure wider boards, while oversized models crowd valuable workspace. Therefore, measure your bench thickness and available mounting area first. This foundational knowledge sets the stage for exploring specific types in greater depth later.
Exploring Different Types of Woodworking Vises for Every Project
Front vises mount along the front edge of your bench and handle most clamping duties during sawing or chiseling. Their parallel jaws distribute force evenly, making them ideal for edge jointing or tenon cutting. However, some models incorporate a quick-action handle that speeds up setup when handling multiple similar pieces. Consequently, these vises prove indispensable for general-purpose tasks that form the backbone of furniture making.
Tail vises, positioned at the opposite end, excel at holding long boards for planing or routing. The sliding mechanism allows the jaw to travel along a track, accommodating varying lengths without repositioning the entire workpiece. Additionally, many tail vises feature a dog hole system that works with bench dogs for expanded holding options. Furthermore, this configuration proves especially useful when flattening tabletops or assembling frames that exceed standard vise capacity.
Bench vises designed specifically for wood often include wooden jaws lined with cork or leather. These softer faces protect figured woods during carving sessions. In contrast, metalworking vises with serrated jaws can leave permanent marks if misused on fine stock. Therefore, dedicated woodworking vises remain the preferred choice for cabinetmakers seeking pristine surfaces. Real examples include using a tail vise combined with dogs to secure a wide panel while applying finish, preventing any movement that could cause drips or uneven coats.
Specialized variants such as patternmaker’s vises tilt and rotate for three-dimensional access. These prove valuable when shaping curved components or carving details that require constant reorientation. Nevertheless, they demand more bench real estate and higher investment. Ultimately, matching the vise type to your primary projects avoids unnecessary complications and maximizes workshop efficiency over time.
Selecting the Best Woodworking Vises for Your Specific Bench Setup
Choosing the best woodworking vises begins with evaluating your bench height and thickness. A proper fit ensures the jaws sit at elbow level for comfortable operation during extended sessions. Moreover, consider the maximum opening width required for your typical stock thicknesses. This measurement prevents frustration when clamping thicker timbers for resawing or joinery work.
Material construction influences longevity significantly. Cast iron models resist flex under heavy torque, yet they add substantial weight that may stress lighter benches. Steel alternatives offer similar strength with reduced mass, making them suitable for portable setups. Conversely, budget-friendly aluminum versions suit hobbyists but may wear faster under daily professional use. Therefore, balancing durability against cost remains crucial for long-term satisfaction.
Installation strategies vary by model, yet proper alignment with bench dogs expands versatility dramatically. For instance, pairing a front vise with a series of dog holes allows secure holding of oversized panels during glue-ups. Real-world tutorials often demonstrate how incorrect mounting leads to racking and uneven pressure. Consequently, double-checking level and square during installation avoids rework later.
Additionally, reviewing user feedback on jaw smoothness and screw action helps identify reliable performers. Many woodworkers report that premium vises maintain consistent performance even after years of heavy service. In comparison, lesser models develop play in the mechanism that compromises holding power. Ultimately, investing in proven designs pays dividends through improved project outcomes and reduced maintenance needs.
Step-by-Step Woodworking Vises Tutorial for Proper Installation
Begin by marking precise locations on your bench for the vise mounting holes. Use a template supplied by the manufacturer to ensure accuracy, then drill pilot holes to prevent splitting the wood. However, always verify that the chosen position allows full jaw travel without interference from legs or aprons. This preliminary step sets the foundation for smooth operation throughout the vise’s service life.
Next, attach the vise body using lag screws or through-bolts depending on bench construction. Apply thread-locking compound to prevent loosening from vibration during use. Furthermore, shim any gaps between the vise and bench underside to achieve perfect parallelism. Consequently, the jaws will close evenly across their entire surface area, distributing clamping force without twisting the workpiece.
After securing the hardware, test the mechanism by clamping scrap pieces of varying thicknesses. Adjust the dog holes or add auxiliary supports if needed for optimal workflow integration. Real examples from experienced builders show how adding a quick-release feature dramatically speeds repetitive tasks like cutting multiple mortises. Similarly, incorporating leather jaw pads protects surfaces during final assembly stages.
Finally, calibrate any integrated bench dog systems to align perfectly with existing holes. This attention to detail transforms your bench into a versatile clamping station capable of handling complex projects. Nevertheless, periodic checks of bolt tightness remain advisable, especially after the first few weeks of heavy use. Through these methodical steps, your woodworking vises will deliver reliable performance for years ahead.
Essential Strategies and Maintenance Practices for Woodworking Vises
Regular cleaning of the screw threads prevents dust and resin buildup that can hinder smooth action. Apply a light coat of paste wax or silicone-free lubricant monthly to maintain effortless operation. However, avoid over-lubrication that attracts additional debris over time. Consequently, consistent care extends the functional lifespan considerably beyond basic expectations.
Inspect jaw faces periodically for wear or damage that could transfer imperfections to your work. Replace cork or leather pads when they become compressed or uneven. Furthermore, check for play in the guide rods and tighten any adjustment mechanisms provided by the manufacturer. These proactive measures ensure that clamping pressure remains consistent across every project.
Advanced users often develop custom strategies such as creating auxiliary jaw inserts for specific tasks like holding round stock or irregular shapes. These adaptations expand the vise’s utility without requiring additional equipment purchases. Real-world applications include using magnetic strips on jaw faces to secure small hardware during assembly, streamlining workflow significantly.
Meanwhile, storing vises in a climate-controlled environment minimizes corrosion risks on metal components. Cover unused vises with breathable fabric when the shop sits idle for extended periods. Indeed, such attention to detail reflects professional craftsmanship standards that separate casual hobbyists from dedicated woodworkers committed to excellence.
For complementary guidance on related tools, explore our detailed miter saw for woodworking resource. You may also find value in reviewing diy wooden coffee table plans blueprint to see how vises integrate into larger builds. Additionally, consult this external authority on tool maintenance at Popular Mechanics tool care guide and cross-reference with Fine Woodworking techniques for advanced applications.