
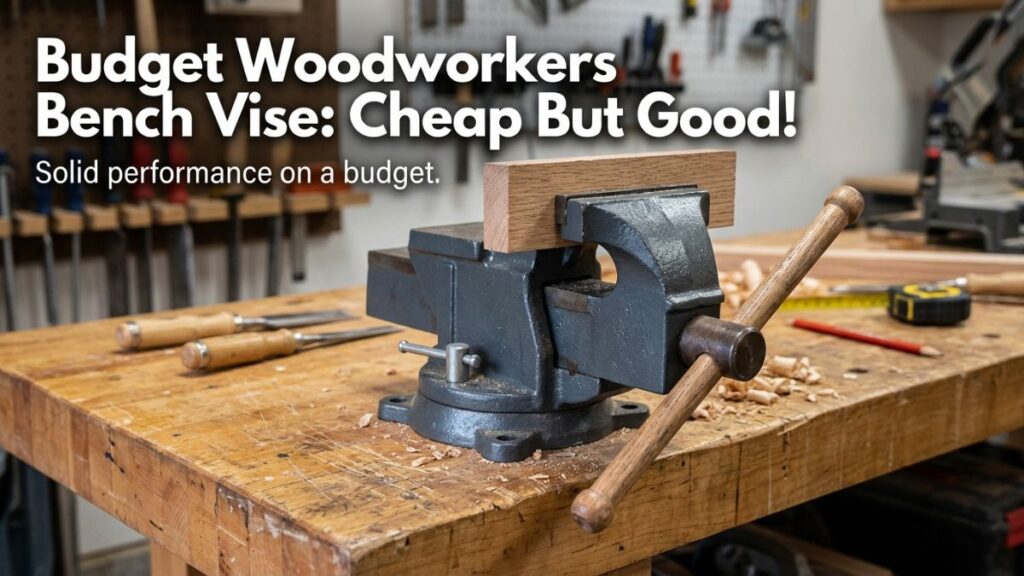

Hello friends my name is Udit Das from easydiywood.com and today I want to share something which I struggled with when I started woodworking last year.
When I first heard about woodworkers bench vise I thought it was some fancy expensive tool that only proffesional carpenters use. Boy was I wrong!
A woodworkers bench vise is basically a clamping tool that holds your wood pieces tight so you can work on them properly without things moving around.
I remember my first project was a small shelf and I tried to plane the wood without any vise and the wood keep slipping everywhere.
My friend Raj told me to get a basic woodworkers bench vise but I was worried about the cost since I had very limited budget at that time.
Why Every Beginner Needs A Woodworkers Bench Vise
When I started searching for my first woodworkers bench vise I was total confused with all the options available online.
There are so many types and price ranges that my head was spinning for days. I made mistake of buying cheapest one I found on amazon without reading reviews properly.
That woodworkers bench vise broke within two weeks of use and I felt so stupid. But this mistake taught me important lesson that I want to share with you all today.
A good woodworkers bench vise dont need to be expensive but it should have certain basic features that actually work for beginners like us.
I learned that the jaw width opening capacity and material quality matters more than fancy brand names when you are just starting out with basic wood projects.
I think the main problem for most beginners in USA is they see youtubers using expensive bench vises and think they need same ones.
But trust me when I say this a simple woodworkers bench vise that costs around 30 to 50 dollars can do 90 percent of what beginners need.
I have been using my second woodworkers bench vise for almost eight months now and it still works perfectly fine for all my small projects.
The key is understanding what features actually matter for your type of work rather than getting confused with all technical specifications that proffesional woodworkers talk about.
Different Types Of Woodworkers Bench Vise You Should Know
Before buying your first woodworkers bench vise you should at least have basic idea about different types available.
The most common ones are front vise which attaches to front of your workbench and end vise which goes on the end side.
For beginners I always recommend front woodworkers bench vise because it is more versatile and easier to install.
There are also quick release vises which can open and close fast with single lever and these are really helpful when you need to change wood pieces frequently.
I personally use a basic front woodworkers bench vise with quick release feature and it was around 45 dollars from Woodcraft which is pretty reasonable for beginners budget.
Another type you might hear about is shoulder vise but that is more advanced and not needed for simple projects we beginners usually do.
Some woodworkers bench vise models also come with wood jaws which prevent marking on your work pieces and this is actually important feature to look for.
My first cheap vise had metal jaws only and it left marks on soft wood which ruined my projects many times.
So when you are selecting your first woodworkers bench vise make sure to check if it has protective jaws or if you can add wooden jaw pads later.
You can also check Fine Woodworking for more detailed comparisons if you want to understand technical differences between vise types.
Budget Friendly Woodworkers Bench Vise Options That Actually Work
Now coming to the most important part which is finding woodworkers bench vise that fits in your limited budget.
After my first vise broke I spent almost two weeks researching and asking in facebook groups about affordable options.
The yost vises are quite popular in USA for budget conscious beginners and their 4.5 inch front vise costs around 35 dollars which is pretty good deal.
Another option is wilton vises which are slightly more expensive but very durable.
I ended up buying a small brand called pana vise which was just 28 dollars on sale and it has been working great for my basic needs.
The important thing about budget woodworkers bench vise is checking the casting quality and making sure the screw mechanism moves smoothly without too much wobble.
Some friends suggested me to look for second hand woodworkers bench vise on craigslist or facebook marketplace and this can save you even more money.
Old american made vises from brands like record or wilton can be found for 20 to 30 dollars if you are lucky and these are actually better quality than new cheap chinese vises.
But the problem is you need to be careful about condition because sometimes the screw might be damaged or jaws might be bent.
If you are buying used woodworkers bench vise make sure to check the threads on the screw and see if the jaws align properly when closed.
I found one reconditioned record vise for 25 dollars but it had slight bend in one jaw so I passed on that deal.
Simple Steps To Install Your First Woodworkers Bench Vise
Installing woodworkers bench vise might seem scary if you have never done it before but actually it is quite simple process.
First thing you need is proper workbench because the woodworkers bench vise needs to be mounted on sturdy surface.
My first mistake was trying to attach vise to folding table which was bad idea.
If you dont have proper workbench yet you can check my woodworking bench legs guide where I show how to make simple budget workbench.
The basic tools you need for installation are drill some bolts and washers and maybe some wood blocks for spacing.
The most important part of installing woodworkers bench vise is positioning it at right height.
I learned this the hard way when I first mounted mine too low and got back pain after just one hour of work.
Generally the top of your woodworkers bench vise jaws should be at same level as your elbow when standing next to your workbench.
For mounting you need to cut a recess in your bench so the vise body sits flush or slightly below the surface.
This requires some careful measuring and cutting but take your time with this step because once you drill holes you cannot undo them.
I used simple hand saw and chisel to make the recess for my woodworkers bench vise and it took me almost whole afternoon but the result was worth it.
Common Mistakes Beginners Make With Woodworkers Bench Vise
After using woodworkers bench vise for almost a year now I have made many mistakes that you can avoid.
The biggest one is over tightening the vise which can damage both your workpiece and the vise itself.
I used to tighten my woodworkers bench vise with all my strength thinking tighter is better but this actually caused the screw to develop play over time.
Another mistake is not using proper padding between vise jaws and workpiece especially when working with soft woods.
I ruined many good pieces of wood because my metal vise jaws left deep marks that I could not sand out later.
Many beginners also make mistake of trying to hold too large pieces in small woodworkers bench vise which puts stress on the mechanism and can cause damage.
Your woodworkers bench vise has specific jaw width and opening capacity and you should respect these limits.
I tried to hold a 12 inch wide board in my 4 inch vise once and the whole thing almost came off the bench.
Also make sure to clean and lubricate your woodworkers bench vise screw regularly because dust and wood chips can get into the threads and cause stiffness.
I use simple wd40 once a month on my vise screw and it keeps everything moving smoothly.
You can also read about f-clamps for woodworking which work great alongside your vise for holding larger pieces.
How I Maintain My Budget Woodworkers Bench Vise
Maintenance of woodworkers bench vise is not difficult but many beginners neglect it completely.
I learned maintenance tips from my uncle who has been doing woodworking for 30 years in his small workshop in kolkata.
The most important thing is keeping the screw clean because wood dust mixed with moisture can create gummy residue that makes the vise hard to operate.
Every week I take dry cloth and wipe down the entire screw of my woodworkers bench vise removing any dust or debris.
Once a month I apply thin coat of light machine oil on the screw and work the vise back and forth several times to distribute the oil evenly.
Another maintenance tip for woodworkers bench vise is checking the mounting bolts regularly because they can loosen over time from vibration.
I found this out when my vise started wobbling slightly and I discovered three of the four bolts had become loose.
Now I check the bolts every two weeks and tighten them if needed.
The jaw faces of your woodworkers bench vise also need attention especially if you use them without wooden jaw pads.
Metal on metal contact can cause rusting over time so I always keep my vise jaws clean and dry.
Sometimes I apply small amount of paste wax on the jaw faces which helps prevent rust and also makes the surface slightly smoother so workpieces slide in easier.
When To Upgrade Your Beginner Woodworkers Bench Vise
This is question I get asked often in comments and messages that when is right time to upgrade from budget woodworkers bench vise to better one.
Honestly I think most beginners rush into buying expensive tools before they actually need them.
I have been using my 28 dollar woodworkers bench vise for eight months now and it still does everything I need for my simple projects.
The only reason to upgrade your woodworkers bench vise would be if you start doing more advanced joinery work that requires very precise clamping or if your current vise breaks beyond repair.
Some signs that you might need better woodworkers bench vise include excessive play in the screw mechanism that affects accuracy jaw misalignment that cannot be fixed or if the vise frequently slips under pressure.
My first cheap vise had these problems which is why I replaced it but my current budget woodworkers bench vise has none of these issues.
Another consideration is if you start working with larger pieces regularly then you might need vise with wider jaws and greater opening capacity.
But for most beginner projects like small shelves boxes or simple furniture a basic 4 to 6 inch woodworkers bench vise is more than enough.
I always tell people to save that upgrade money for better quality chisels or hand planes which actually make bigger difference in your woodworking than expensive vise does at beginner level.
Alternative Clamping Methods Before Getting Woodworkers Bench Vise
If you are really tight on budget and cannot afford even the cheapest woodworkers bench vise right now there are some alternative methods you can use temporarily.
I used these for first two months before buying my first vise.
The simplest option is using bar clamps or f clamps to secure your workpiece directly to your workbench.
This works okay for light work but is not as stable as proper woodworkers bench vise.
Another method is making simple wooden bench dogs that fit into holes in your workbench and using wedges to hold workpieces against them.
Some woodworkers also use simple batten clamps which are just wooden strips screwed to the workbench with wedges inserted between the batten and workpiece.
These methods require more setup time than woodworkers bench vise but cost almost nothing if you have scrap wood available.
I actually made set of wooden hand screws which are traditional clamping tools that work pretty well for many tasks.
They took me one evening to make from scrap hardwood and they still get used sometimes even after I got my woodworkers bench vise.
The point is dont let lack of proper vise stop you from starting woodworking because there are always workarounds for beginners with limited budget.
Frequently Asked Questions About Woodworkers Bench Vise
Can I install woodworkers bench vise on any table? No you need proper sturdy workbench because regular tables are not strong enough and vise will damage them.
What size woodworkers bench vise is best for beginners? For beginners 4 to 6 inch jaw width is perfect for most simple projects and fits in small budget too.
Do I need both front and end vise on my workbench? No beginners can manage with just one front woodworkers bench vise for first year at least before deciding if they need second one.
How much should I spend on my first woodworkers bench vise? Between 30 to 50 dollars is good budget range for quality beginner woodworkers bench vise that will last long time with proper care.
Conclusion About Choosing Budget Woodworkers Bench Vise
So friends this is my complete journey and learnings about finding good woodworkers bench vise without spending too much money.
I hope my mistakes and experiences help you make better decision than I did initially.
Remember that expensive tools dont make you better woodworker practice does.
A simple budget woodworkers bench vise in hands of someone who practices regularly will create much better results than fancy expensive vise in hands of someone who rarely uses it.
I still use my cheap 28 dollar vise and have made many projects I am proud of using it.
The key is understanding your needs as beginner and not getting influenced by what proffesional woodworkers use because their requirements are completely different from ours.
If you are just starting out in woodworking like I was last year please dont feel pressure to buy expensive tools right away.
Start with basic woodworkers bench vise that fits your budget and upgrade later when you actually feel the need.
I wasted money on my first vise because I did not do proper research so learn from my mistake and take time to understand what features matter for your specific projects.
Woodworking is beautiful hobby that should not require huge investment to begin with.
Focus on learning techniques and making simple projects first and your tools will naturally upgrade as your skills improve.
Thank you for reading my experience and happy woodworking friends.