
So okay, let me just be honest with you all. When I first heard the word woodworking epoxy, I literally Googled it like three times before I even understood what it was. I thought it was some big, proffesional thing only for fancy workshop people with expensive machines.
Then one day I had this old wooden dining table. Big ugly crack right through the middle. My wife said just throw it away. I said nope. Went to the hardware store, picked up a small woodworking epoxy kit for around 12 dollars and just tried it.
It worked. The crack is gone. The table still looks great today.
So that’s why I’m writing this. If I can do it, trust me, you can too.
What is Woodworking Epoxy and Why Should You Care?
Simple answer first.
Woodworking epoxy is a two-part sticky material. One part is the resin, the other part is the hardener. You mix them and it becomes super strong, clear stuff that bonds to wood really really well.
Think of it like fevicol’s stronger big brother. Except this one also fills gaps, seals cracks, and gives a shiny glass-like finish on top of your wood piece.
The woodworking epoxy resin is mostly used by beginners for three things.
One, filling cracks and holes in wood. Two, making a strong bonding joint. Three, giving a glossy clear surface on tables or boards.
And it works on all types of wood, pine, oak, plywood, anything really.
Why Use It Instead of Normal Glue?
Because normal glue just cannot do what this material does. And that too at a very low cost.
First thing, waterproof epoxy resin for wood is fully waterproof once it hardens. You dont have to worry about spills, water damage, or outdoor use.
Second thing, after it sets fully it can be sanded, drilled, even painted over. So it becomes almost like part of the wood itself.
Third thing, when you use it as a woodworking epoxy filler for knot holes or cracks, the result is so clean and smooth. You cant even tell there was a hole or crack before.
And if you are doing a table project, epoxy resin for wood table gives that beautiful glossy look that honestly looks very expensive. But it costs very little when you do it at home yourself.
Types of Woodworking Epoxy You Need to Know
Look, don’t overthink this part. There are mainly a few types as a beginner you should know.
Casting Epoxy Resin
This is the liquid pouring type. Used for river tables and filling large deep cracks. Its very thin and flows easily by itself. Great for those cool blue river effects you see on Pinterest or Instagram.
Coating or Tabletop Epoxy
This is used to put a clear shiny coat on top of your wood surface. Like a protective glass layer. Works perfectly for epoxy resin for wood table projects. Self-leveling types are even easier to use.
Woodworking Epoxy Filler or Putty
This is a thicker paste type. You push it into small cracks and holes with your fingers or a flat tool. Best for small repairs around the house. Very beginner friendly.
Marine Grade Epoxy for Wood
This one is specially made for outdoor or wet projects. If you are building something for the garden or near water, marine grade epoxy for wood is what you want. Extra strong and fully moisture resistant.
Two Part Starter Kits
The most common one you’ll find in stores. A basic woodworking epoxy kit comes with both resin and hardener already measured out. Easy to follow, just mix and go.
For more details on choosing the right resin type for your specific project, Upstart Epoxy’s beginner wood resin guide has some really helpful information that explains it very clearly.
If you are just starting out, I’ll say go for a beginner kit first. They are cheap, small, and have instructions printed right on the box. You can find one for around 10 to 20 dollars on Amazon or at Home Depot.
How to Use Woodworking Epoxy Step by Step
Okay this is the fun part. Let me walk you through exactly how I do it at home. Nothing fancy, no special machine needed.
What you need:
- A basic two part woodworking epoxy kit
- A plastic disposable mixing cup
- Wooden stir stick
- Gloves (please use gloves, trust me on this one)
- Sandpaper in 120 grit and 220 grit
- Painters tape
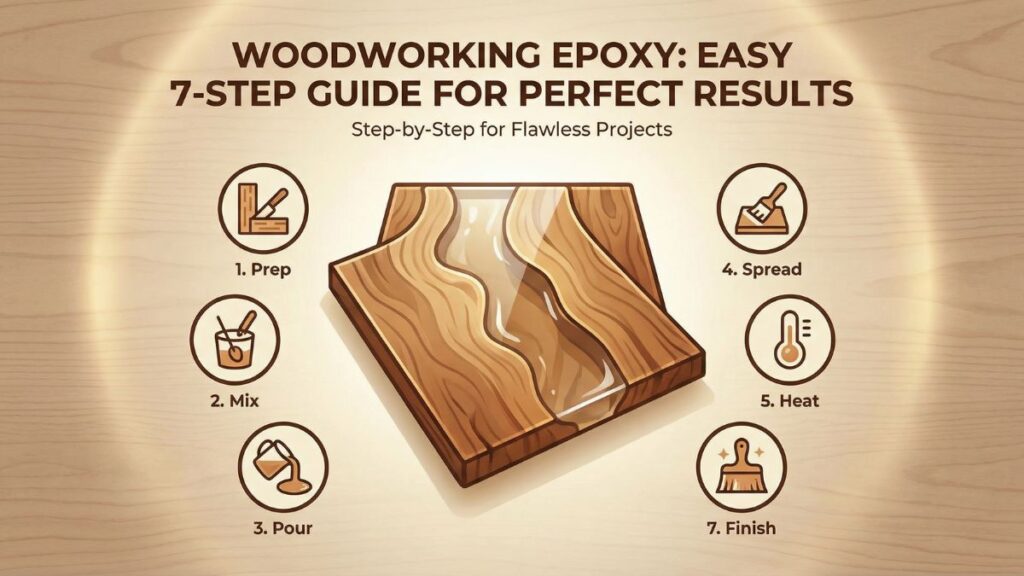
Step 1 — Clean the surface first
Sand the area where you want to apply the resin. Remove all dust, old wax, and dirt. The mix needs a clean and dry surface to stick properly. Wipe with a dry cloth after sanding.
Step 2 — Tape around the area
Use painters tape on the edges around the crack or area. This stops the liquid from spreading where you dont want it. Very important step. Most beginners skip this and regret it later.
Step 3 — Mix the epoxy
Take equal amounts of resin and hardener and pour them into your cup. Stir slowly and properly for about 3 to 4 minutes. Dont rush this step. If you dont mix it fully and properly, the woodworking epoxy wont harden correctly and it will stay rubbery and sticky forever. I made this exact mistake on my second project. Not fun.
Step 4 — Apply the resin
For a crack, slowly pour the mixed resin directly into the gap. Let it flow in naturally on its own. For a surface coat, pour on top and spread using an old credit card or plastic spreader.
Step 5 — Remove air bubbles
Sometimes small air bubbles come up to the surface. You can quickly pass a lighter or heat gun over the surface and the bubbles will pop. Dont hold it too long, just a quick pass is enough.
Step 6 — Let it cure fully
Leave it completely alone. Most woodworking epoxy takes around 24 hours to fully harden. Some fast-set versions take 12 hours. Keep it at room temperature. Not too cold, not too hot.
Step 7 — Sand and finish
After curing, sand starting with 120 grit and finishing with 220 grit. For a very glossy look go up to 400 grit. Your surface will look smooth and beautiful.
Best Budget Options for Beginners in the USA
Since we are talking budget-friendly approach here, let me tell you what I actually recommend from my own experience.
You really dont need to spend a lot of money when you are just learning. Expensive doesnt always mean better, especially for practice projects.
For crack filling, a basic two-part kit from any local hardware store works perfectly fine. Brands in the 10 to 15 dollar range from Home Depot or Walmart are totally enough for home use.
For tabletop coating, look for a self-leveling tabletop woodworking epoxy resin. A quart kit usually costs around 20 to 35 dollars and gives a very nice clear glossy finish.
For outdoor or water-exposed projects, something labeled marine grade epoxy for wood or exterior formula is what you want. It costs a little more maybe 25 to 45 dollars but it lasts way longer outside compared to normal indoor types.
One important tip from my personal experience. Always buy small amount first and test on scrap wood. Dont buy a big gallon kit for your very first project. You will waste money and get very frustrated. Been there, done that.
Also if you are just starting your whole wood journey and need easy project ideas to build first, I have shared some really simple ones here: Easy DIY Wood Projects to Make Money. Great place to start before jumping into epoxy work.
Common Mistakes Beginners Make With Epoxy Resin
Oh man this section is from real personal experience only. Not tips I read somewhere.
Wrong mixing ratio
This is the biggest mistake. If you mix unequal amounts of the resin and hardener, the woodworking epoxy will not set properly. Or it sets all sticky and rubbery like chewing gum. Always follow the ratio on the bottle. Usually 1:1 or 2:1.
Pouring too thick in one go
If you have a very deep crack or gap, dont pour the resin all at once. Do it in layers. Each layer should be around half inch maximum. Very thick pours create a lot of heat and the whole thing can crack or warp on you.
Working in a cold space
This resin material needs warmth to cure properly. If your garage is too cold in winter it may not harden well at all. Try to work at around 70 to 75 degrees Fahrenheit for best results. Temperature really really matters here.
Not wearing gloves
The liquid resin can irritate your skin. Some people actually develop an allergy from repeated contact. Gloves cost almost nothing. Dont skip them ever.
Skipping the seal coat step
On porous wood like pine, always put a very thin first coat of the mix and let it soak and dry first. This is called a seal coat. It stops air bubbles from coming up and ruining your main pour later on. This one tip alone can save your whole project.
For a more detailed look at how mixing ratios and temperatures affect your results, West System’s beginner guide explains the science behind it in a very straightforward and easy way.
Using Epoxy Resin for a Wood Table Project
One of the most popular things people use this material for is tables. And honestly I understand why completely. A river table or even just a simple clear-coated board looks stunning.
Good news is you dont need a fancy slab of expensive wood to make something nice. Even a simple pine board from your local store can look absolutely amazing with a clear resin coat on top.
You can also mix in some blue or black color pigment into your casting resin and create that cool river effect between two pieces of wood. It really does not need any professional skill. Just patience and time.
If you want to first build a simple dining table before adding the epoxy finish on top, check out our step by step guide here: Woodworking Dining Table Budget Beginner Guide. A solid base project before you start experimenting with the resin finish.
Is It Safe for Beginners?
Short answer yes, as long as you follow some simple safety rules.
Always wear gloves. Work in a room with open windows or good ventilation. Dont breathe in the fumes directly. Look for low VOC woodworking epoxy resin options when buying as they are safer for indoor use.
After you are done, wash hands properly with soap and water. Dont reuse your mixing cup for food or drinks obviously.
Keep all liquid resin away from small children completely. Before it cures it is not safe for kids to touch at all.
Once the material has fully hardened, it is completely safe, stable, and non-toxic. So your finished wood project is totally fine to use every day.
Best Epoxy Resin for Wood Cracks Specifically
If your main goal is to fix cracks, you want something thin enough to actually flow down into the crack and fill it deeply.
Thick paste types wont go into narrow cracks at all. For small thin cracks, look for a low viscosity woodworking epoxy resin that flows almost like water on its own.
For bigger gaps or large knot holes, a thicker filler type or epoxy putty works better because you can push it in and mold it with your fingers.
Always sand the crack area first, remove loose wood fibers, clean out all the dust. Then apply the resin. Let it overflow a tiny bit over the edges and sand it perfectly flat after it cures. Clean result every single time.
For outdoor cracks with moisture damage, marine grade epoxy for wood is your best choice. It seals the crack and also protects the wood from future water damage at the same time.
Quick Tips Summary Before You Start
Let me give you all my best tips in one fast list before the FAQs.
Always mix slowly and completely without rushing. Use gloves every single time without exception. Work at room temperature always. Do a seal coat first on soft porous wood. Pour in thin layers for very deep fills. Sand properly after curing for smooth results. Start with a small cheap kit before buying big. Always test on scrap wood first before your real project.
These small things make a huge difference, trust me.
4 FAQs About Woodworking Epoxy
Q1. What is woodworking epoxy used for?
Woodworking epoxy is mainly used to fill wood cracks, bond joints, stabilize soft or rotten wood, and coat surfaces for a glossy waterproof finish.
Q2. How long does woodworking epoxy take to dry?
Most woodworking epoxy takes around 24 hours to fully cure, though some fast-set types harden in 5 to 30 minutes depending on the formula you use.
Q3. Is woodworking epoxy waterproof?
Yes, woodworking epoxy resin is waterproof once fully cured, making it a great option for tables, outdoor pieces, and waterproof epoxy resin for wood projects in wet-prone areas.
Q4. Can beginners use woodworking epoxy without experience?
Absolutely yes. A basic woodworking epoxy kit comes with instructions and is very easy to use for simple projects like filling cracks or coating small boards at home.
Conclusion
Okay so that’s basically everything I know about woodworking epoxy from my personal experience. I started with a cracked table and a cheap 12 dollar kit, and now I use woodworking epoxy on almost every project I do.
The thing is, woodworking epoxy is not scary at all. Its actually one of the most forgiving materials you can work with. Even if you make a small mistake, you can sand it down and redo it. No big deal.
If you are a complete beginner in the USA looking to start with simple wood projects, woodworking epoxy is a skill that will take your builds from looking “okay” to looking genuinely impressive. And the best part, it doesn’t have to cost a lot.
Start small. Use a budget woodworking epoxy kit. Practice on scrap. Then slowly move to bigger projects.
You got this. And if you have any questions or want to share your first woodworking epoxy experience, drop it in the comments below. I would love to hear from you!
For more beginner DIY project ideas, tools guides, and tips visit easydiywood.com and explore everything we have waiting for you.
Happy building!


Pingback: Boxelder Woodworking: The Cheap Wood Beginners Love
Pingback: Best Woodworking Epoxy Resin Guide for Beginners