
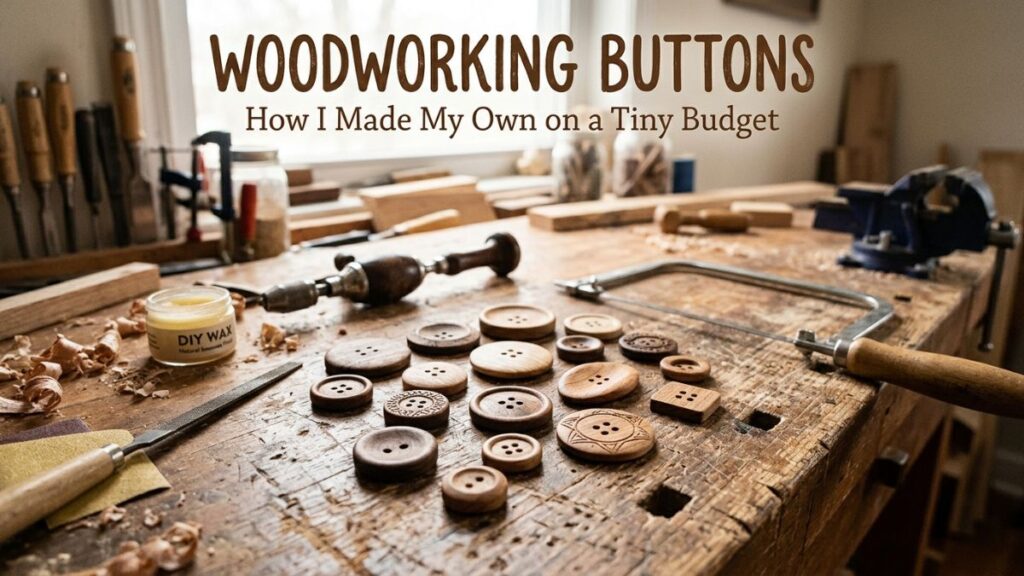

I still remember the first time I tried making woodworking buttons in my small balcony workshop here in India. I had almost no money to spend and only two basic tools lying around, but somehow those wooden buttons turned out looking better than the ones I saw in the local market. That day I understood woodworking buttons are not some fancy skill that only professional carpenters can do. Any complete beginner, even with a very tight pocket, can make them at home.
In this post I am sharing exactly how I make my woodworking buttons, which tools I actually use, what wood works best, and all the small mistakes I made so that you don’t have to repeat them. This is not some perfectly polished tutorial written by an expert with a big workshop. I am just a hobbyist who loves working with wood and wanted to share what I learned the hard way, mistakes and all.
What Are Woodworking Buttons Anyway
Simply put, woodworking buttons are small round or square pieces of wood with holes drilled through them, used just like normal buttons on clothes, bags, or even small craft projects. People have been carving wood buttons from tree branches for years, and that method works fine too, but as someone who works mostly with dowels and scrap wood, I prefer a slightly more controlled method that gives more consistent results every time.
The good part about this project, and honestly one reason I love it, is that you don’t need any fancy machines. A hand drill, a bit of sandpaper, and some patience is really all you need to get started with your own diy wood buttons.
Why I Started Making My Own Woodworking Buttons
Honestly it started because I had leftover wood scraps from another beginner woodworking project and I did not want to waste them. Store bought wooden buttons here cost quite a lot for what they actually are, so I thought, why not just try making some myself.
My first batch was pretty ugly if I am being honest. Some buttons cracked while drilling, some holes came out crooked, one even snapped in half while I was sanding it. But I learned more in that one afternoon than I expected. Making woodworking buttons slowly became a small weekend hobby of mine, something I now do almost every month when I have leftover scraps.
Tools You Really Need For Woodworking Buttons
This is the budget friendly part, which I know most complete beginners care about the most, since nobody wants to spend a fortune on a tiny craft project.
- A hand drill or a cheap cordless drill
- A fine drill bit, somewhere around 1.5mm to 2mm works for most button sizes
- A coping saw, or even a regular hacksaw if that’s what you have
- Sandpaper in two or three grits, going from coarse to fine
- A scrap piece of hardwood, or a plain wooden dowel from the hardware shop
- A small clamp or vice, though honestly a heavy book on top works fine in a pinch
- Safety glasses, since wood chips do fly around while cutting
I already had most of these tools lying around from other budget woodworking projects, so I spent almost nothing extra on this one. If you are starting completely from zero and want a proper breakdown on getting into this hobby without draining your wallet, I already wrote a detailed guide on how to start woodworking with a low budget which covers all of this in a lot more depth.
One more tool I genuinely recommend, especially once you want cleaner and rounder buttons, is a plug cutter. It sounds exactly like what it does, a small tool that cuts round wood plugs out of a flat board. Wood buttons and wood plugs are honestly cousins of each other in terms of technique. I wrote a full separate post on woodworking plugs if you want to understand this tool properly before spending money on one.
Best Wood For Woodworking Buttons
Not every type of wood works well for woodworking buttons, and this is something I learned the hard way. Soft woods like pine tend to snap easily once you drill thin holes through them, so I generally avoid using pine for this particular project.
I personally prefer maple, oak, walnut, or cherry scraps whenever I happen to have some lying around. These hardwoods hold up much better under the drill and take a nicer polish once you get to the sanding stage. If you are ever confused about which wood species suits your project or climate, I usually check the details on The Wood Database before buying anything new, since it has honest, detailed information on hardness and grain for almost every wood type out there.
Dowels from your local hardware shop also work really well, and honestly they are the easiest starting point for a beginner since they already come perfectly round, saving you a whole shaping step.
Types Of Woodworking Buttons You Can Try
Once you get comfortable with the basic round shape, there are actually a few fun variations worth trying.
Round buttons are the simplest and the ones I made first. Square or rectangular buttons look nice on rustic style clothing and bags. Toggle style buttons, which are longer and thinner, work great for jackets and coats. I have even tried heart and leaf shaped buttons for gifting purposes, though those need a coping saw and a little extra patience with the curves.
Step By Step, How I Make My Woodworking Buttons
Okay, here is my actual process, not some generic copy paste method you find everywhere online.
First I pick a dowel or a straight piece of scrap hardwood, roughly the same width I want my final button to be. Then I mark my cutting lines using a pencil, spacing them about the thickness I want, usually somewhere between 3mm and 6mm depending on the project.
Next I cut the slices using my coping saw. This part genuinely needs patience, going slow gives you much cleaner cuts compared to rushing through it, and rushed cuts is exactly how I cracked my first few buttons.
Once I have my rough button blanks ready, I clamp each one down carefully and drill the holes. I usually go with two holes, though four holes also look nice depending on the final project. I always mark my hole positions with a pencil first so both holes end up lining up evenly, otherwise the button looks crooked once thread goes through it.
After drilling, I round off the sharp edges slightly with sandpaper, then sand each button starting from a rougher grit and slowly moving to a finer one. This step is honestly where the real magic happens, a rough ugly little blank slowly turns into something smooth and genuinely presentable.
Finishing Your Woodworking Buttons The Right Way
This part people often skip, but finishing genuinely matters for woodworking buttons, especially if they are going on clothes that get washed regularly.
I usually rub in a little natural oil, either linseed oil or sometimes plain coconut oil since that’s easily available at home. It brings out the natural wood grain nicely and adds a thin layer of protection against moisture.
One honest warning though, if your woodworking buttons are going onto something that gets machine washed often, please test one single button first before committing to a whole batch. Some finishes simply do not survive repeated washing cycles well, and nobody wants a favorite shirt ruined just because a button finish reacted badly in the wash.
Mistakes I Made With Woodworking Buttons
I am not going to pretend I got everything right on my first try, because I definitely did not.
My very first buttons cracked because I used wood that was still slightly wet. Always let your wood dry out properly before cutting, even a couple of extra days of drying makes a noticeable difference.
I also drilled holes too close to the edge a few times, and the button simply broke apart in my hand. Leave a decent margin around your holes, more than you think you need.
And honestly, please wear a dust mask while sanding. I did not bother in the beginning, and breathing in fine wood dust over a long period is genuinely not good for your lungs. NIOSH has actually published research confirming how harmful long term wood dust exposure can be, so this is not something to casually ignore, even for a small hobby project like this one.
How Much Does This Cost
If you already own basic tools like I did, making woodworking buttons costs almost nothing at all. A single scrap piece of hardwood or one dowel can honestly give you enough buttons for several small projects.
Even starting completely from zero, a hand drill, some sandpaper, and a cheap saw together should not cost you much, definitely far less than repeatedly buying store bought wooden buttons every time you need a fresh batch.
Where I Use My Woodworking Buttons
I personally use mine on simple things like DIY coasters, small wooden gift boxes, handmade pouches, and yes, regular clothing repairs too. Once you start making your own woodworking buttons, you will genuinely notice how many small projects around the house can actually use them.
They also make surprisingly thoughtful little gifts. A small jar full of handmade wood buttons, tied with a ribbon, has become one of my go to gifting ideas for friends who sew or knit.
FAQs
Can you actually make buttons from wood at home? Yes, with just a saw, a drill, and some sandpaper, you can make simple wood buttons at home without needing any special machine.
What is the best wood for making wood buttons? Hardwoods like oak, maple, walnut, or cherry work best since they are stronger and take a nicer finish compared to soft woods like pine.
Do wooden buttons survive machine washing? It really depends on the finish used. Always test one button first before sewing a full batch onto something you plan to wash often.
Do I need a lathe to make wood buttons? No, a lathe is not necessary at all. Simple hand tools like a coping saw and a hand drill work perfectly fine for basic wood buttons.
Final Thoughts
Making woodworking buttons turned out to be one of those small projects that taught me a lot more about patience than I expected, and also about working smartly with leftover scrap wood. It does not need an expensive workshop, just a few basic tools and a genuine willingness to make mistakes along the way.
If you end up trying to make your own woodworking buttons, I would honestly love to know how your first batch turns out. Mistakes are just part of the process, mine definitely were, and yours will be too, and that’s perfectly okay.