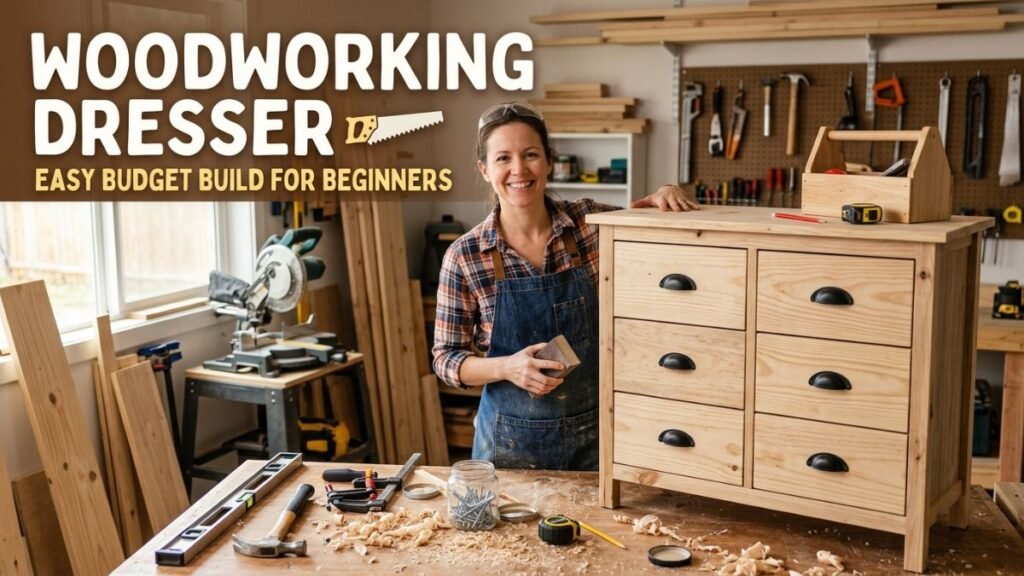

Okay so let me tell you something real quick. When I first decided to do a woodworking dresser project at home, I was super scared. Like actually scared. I thought only proffesional carpenters can do this kind of thing. I am Udit Das, I run easydiywood.com and I am from India, living my hobby of making wooden stuff at home. And I promise you, if a person like me with basic english and basic tools can make a woodworking dresser, you can also do it. 100%.
This post is not about showing off. It is me telling you the whole truth, the messy parts, the confusion, and all the tips I wish someone told me before I started my first woodworking dresser build. So if you are a complete beginner in the USA trying to save some money and build something with your hands, stay with me.
Why I Even Started This Woodworking Dresser Project
So basically what happened is I went to a furniture store near my area and I saw dressers going for like 200 to 350 dollars. Some were made of cheap particleboard and felt like they would break if you put too many clothes inside. I was really not happy about that.
Then one day I was watching YouTube and I saw someone building a dresser at home with plywood and pine boards. My mind was just… wow. Wait, can I do this? I thought about it for maybe two weeks. Then I just went to Home Depot and bought some wood and thats how my woodworking dresser journey started.
I spent around 90 to 120 dollars total on wood and hardware. The dresser I built is solid, looks really nice and it is still standing strong in my bedroom. So yeah, the woodworking dresser idea was 100% worth it for me.
What Tools Do You Actually Need for a Beginner Woodworking Dresser
This is where most blogs I read are making mistake. They list like 15 tools and beginners feel like they need a whole workshop. Not true at all.
Here are the tools I used for my woodworking dresser build and you probably already have some of them at home already.
A circular saw or even a basic hand saw will work fine for cutting the boards. A power drill is a must, you will be using this thing a lot. Pocket hole jig, this one is very helpful for joining wood pieces without it looking ugly. Wood glue, seriously don’t skip this one. A tape measure and a pencil obviously. Sandpaper, I used 80 grit and 120 grit. That is pretty much all you need.
If you dont have a pocket hole jig yet, I really suggest you get one. It makes joining wood so much easier and your woodworking dresser will look way cleaner. You can get a basic Kreg jig for around 25 to 35 dollars.
Also if you want to learn more about woodworking tools that fit your budget, check out my guide on budget woodworkers bench vise for beginners it will help you understand which tools are worth buying first.
What Wood Should You Use for Your Woodworking Dresser (Budget Pick)
Okay so here is the honest answer. For a beginner woodworking dresser build in USA on a budget, go with pine boards and birch plywood. Pine is easy to cut, easy to sand, and it is really cheap at any hardware store like Home Depot or Lowes. Birch plywood is a little bit more expensive than basic plywood but it looks so much better when you paint or stain it.
For the body or carcass of the dresser I used 3/4 inch birch plywood. For the drawer boxes inside I used 1/2 inch plywood. And for the face trim around the front I used 1×2 and 1×4 pine boards.
One thing nobody really told me before I started, the actual size of lumber is not what it says on the label. A 2×4 is not actually 2 inches by 4 inches in real life. It is smaller. I learned this the hard way when my measurements were off and I had to recut some pieces. So always measure the actual wood before you plan your woodworking dresser dimensions. This little tip can save you a lot of headache trust me.
Simple Woodworking Dresser Plan for Beginners (Step by Step)
I am going to walk you through how I built my woodworking dresser. This is a simple 4 drawer design, nothing fancy, just clean and useful.
Step 1 — Measure and Plan First
Before you touch any wood or tool, decide the size of your woodworking dresser. I made mine around 36 inches tall, 48 inches wide and 18 inches deep. This size is good for a bedroom without taking too much floor space.
Draw a rough sketch on paper. Doesn’t have to be perfect. Just write down the measurements of each part like the two side panels, the top piece, the bottom piece, and the back panel. This sketch saved me from so many mistakes.
Step 2 — Cut All Your Wood Pieces
Now cut all pieces according to your measurements. I suggest you cut everything first before assembling anything. This way you can check all pieces fit together before you start putting glue or screws.
The two side panels, top panel, bottom panel, and the horizontal shelf pieces in the middle are the main parts of the body. For my woodworking dresser I had 3 horizontal pieces dividing the space for 4 drawers.
Step 3 — Build the Body Frame
Start by joining the side panels with the top and bottom pieces using pocket holes and wood glue. Clamp it while the glue dries, or if you dont have clamps use heavy books or anything heavy. I actually used some bricks I had in my garage haha.
Add the horizontal dividers next. These are the pieces that will separate each drawer opening. Make sure everything is level or your drawers wont slide properly later. This is super important for your woodworking dresser to look good.
Step 4 — Attach the Back Panel
Cut a thin plywood piece for the back and nail or staple it on. The back panel is what keeps your woodworking dresser straight and not wobbly. Don’t skip this step even if you think the body already feels solid, the back panel makes a huge difference in strength.
Step 5 — Build the Drawer Boxes
This is the part most beginners are scared of but honestly its not that bad. Each drawer box is just four pieces of wood joined in a rectangle with a flat bottom piece.
For my woodworking dresser drawers I used 1/2 inch plywood for the sides of the drawer box and 1/4 inch plywood for the bottom. Join the four sides using pocket holes and glue. Then slide the bottom piece into a small groove or just nail it from underneath.
Make the drawer box about 1 inch smaller than the opening on each side so it has room to move in and out easily.
Step 6 — Install Drawer Slides
Okay so this part took me the longest time to figure out honestly. I used basic ball bearing drawer slides from Amazon, they were like 3 to 4 dollars per pair. For a woodworking dresser with 4 drawers thats around 12 to 16 dollars total for all slides.
The trick is to mount both sides of the slide at exactly the same height. Use a small piece of scrap wood as a spacer so both sides are level. If one side is even slightly higher than the other, the drawer will tilt and stick. Ugh this happened to me on the first drawer and I had to remove it and redo the whole thing.
Step 7 — Make the Drawer Fronts
The drawer fronts are the pieces you actually see on the outside of your woodworking dresser. Cut them from 3/4 inch plywood or a nice pine board. Make them slightly bigger than the opening so they overlap the edges a little bit and cover any small gaps.
Attach them to the drawer boxes using screws from inside. Then add knobs or handles of your choice. I went with simple round wooden knobs which I also made myself in another project.
Step 8 — Sand and Finish
Sand everything starting with 80 grit and then go over it again with 120 grit. This is honestly the most satisfying part of the whole woodworking dresser build. You start feeling like wow this actually looks like a real piece of furniture.
For finish I used a white chalk paint because I wanted a clean modern look for my bedroom. But you can also use wood stain if you want to show the natural wood grain. Two coats of paint is usually enough. Let each coat dry fully before adding the next one.
Common Mistakes I Made and You Should Avoid
I want to be real about this because most blog posts skip this part completely and I feel like this is where the actual value is.
The biggest mistake I made during my woodworking dresser build was not dry fitting everything before applying glue. Dry fitting means you put all the pieces together without any glue first, just to check everything fits. I skipped this step and ended up with a crooked corner that was already glued. It was really frustrating.
Another mistake was measuring the drawer opening but forgetting to measure the inside depth of the woodworking dresser. So my first drawer box was too long and it would not go in all the way. I had to cut it down again after it was already assembled. Not fun.
Also please dont rush the sanding step. I did that once and the paint looked bumpy and weird on my woodworking dresser. Taking extra 30 minutes to sand properly makes a really big difference in the final look.
How Much Does a DIY Woodworking Dresser Cost?
This is the real question right. Let me give you my honest budget breakdown for my woodworking dresser project.
Birch plywood, two 4×8 sheets, around 55 to 70 dollars depending on your local store. Pine boards for trim, around 15 to 20 dollars. Drawer slides 4 pairs, around 12 to 16 dollars. Pocket hole screws and wood glue, around 10 dollars. Sandpaper and paint, around 15 to 20 dollars.
Total comes to roughly 107 to 136 dollars. Compare that to a 250 or 300 dollar store bought dresser made of particleboard and you can see why so many people are getting into woodworking dresser DIY projects right now.
And honestly the woodworking dresser you build yourself is going to last way longer than anything from a big box furniture store.
Want to Try More Wood Projects After This?
Once you finish your first woodworking dresser, trust me you will be addicted to making wood stuff at home. I remember the feeling when I finished mine, I just stood there for like 5 minutes staring at it. Felt like the most proud moment of my DIY life honestly.
If you want to try another fun beginner project after this, check out my post on woodworking nightstand beginner guide because a matching nightstand pairs perfectly with your new dresser and it is an even simpler build.
For those of you in USA who want to go deeper into woodworking, a great resource I have personally used and recommend is the Ana White free plans website which has free woodworking dresser plans with clear measurements for beginners. Another good one is Kreg Tool project plans which has free DIY dresser plans you can download and follow step by step.
Final Thoughts on Building a Woodworking Dresser
So yeah thats my full story and guide for making a woodworking dresser at home on a budget. It is not a perfect process. You will make some mistakes, maybe a few cuts will be slightly off, maybe one drawer will stick a little bit at first. But thats okay.
A woodworking dresser you built yourself with your own hands is worth so much more than anything you can buy. Every time I open my dresser drawers I feel genuinely proud. And you will too.
Start simple, go slow, dont skip the dry fitting step, and please do sand properly before painting. If you follow all the steps I shared here your first woodworking dresser will come out really good.
If you have any questions just drop them in the comments below. I read every single one and try to reply. Happy building friends!
FAQs About Woodworking Dresser
Q1. Is it hard to build a woodworking dresser as a beginner? Not really! If you follow a simple plan and take it one step at a time, even a complete beginner can build a woodworking dresser over one weekend with basic tools.
Q2. What is the cheapest wood to use for a DIY woodworking dresser? Pine boards and birch plywood are the most budget-friendly options for a woodworking dresser build and both are easily available at Home Depot or Lowes in USA.
Q3. How long does it take to build a woodworking dresser from scratch? For a beginner it usually takes one full weekend, around 8 to 12 hours total including cutting, assembling, sanding and painting the woodworking dresser.
Q4. Do I need expensive tools to start a woodworking dresser project? No, a circular saw, power drill, pocket hole jig, wood glue and sandpaper is enough to get your first woodworking dresser done without spending much on tools.