Okay so let me be honest with you. when I first tryed rocking horse woodworking I was super scared. Like seriously, I thought you need some big workshop, fancy tools, tons of money… but that was not true at all. I am Udit Das, I run easydiywood.com and I build wooden stuff at home in my free time. And this project, this rocking horse woodworking thing, it was one of the most fun I ever done in my wood hobby life.
So if you are a complete beginner and you want to build something your kid or grandkid will love forever, just keep reading. I promise to keep it simple.
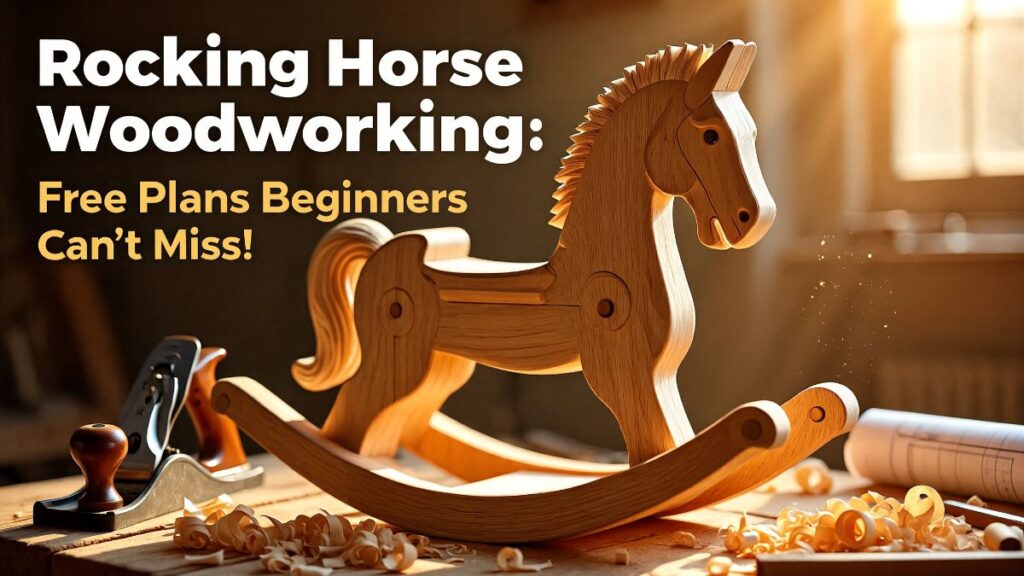
What is Rocking Horse Woodworking and Why Should You Even Try It?
Okay so rocking horse woodworking is basically when you cut wood pieces, shape them like a horse body, add curved rockers at the bottom, and make a toy that kids can sit and ride on.
Sounds hard? It’s not. Really.
Most people think rocking horse woodworking is for professional woodworkers only. But that is totally wrong thinking. I have seen many first time builders finish a beautiful rocking horse in just one weekend, sometime two. No joke.
The best part is you dont need a huge budget. A basic rocking horse woodworking project can be done in under 40 to 50 dollars if you plan well. I will explain the cost part later in this article.
Why I Decided to Build One (My Real Story)
My niece, she was turning 2 years old and I wanted to gift her something special. I went online to check rocking horse prices and oh my god they were so expensive. Like 80 dollars, 100 dollars, some even 200 dollars for a wooden rocking horse.
I said to myself no way I am paying that much when I have a jigsaw and some pine boards in my garage.
So I searched for rocking horse woodworking plans free, found a basic design, printed it, and just started cutting. Did I make mistakes? Oh yes many. The first rocker I cut was not matching properly so the horse was shaking sideways a little. Had to recut it. But it was fine in the end and my niece still rides it today.
That feeling you know, when a child sits on something you made with your own hands, that is something else.
What Kind of Wood is Best for Rocking Horse Woodworking
This is a question I get alot. People are confused about wood type and that is totally okay.
For beginners, I always say go with pine or poplar. These are soft woods, easy to cut, easy to sand, and very budget friendly. You can get a 1×12 pine board at Home Depot or any hardware store for around 8 to 12 dollars. That is all you need mostly.
If you want something more strong and long lasting, you can use hardwood like oak. But for your first rocking horse woodworking project, please just use pine. It is easier to work with and if you mess up a cut, it is not such a big loss money wise.
Also, avoid MDF for the main body. MDF is okay for practice but it is heavy and not strong enough for a toy that kids actually sit and rock on.
One more thing, I actually wrote a full guide on douglas fir woodworking which is another great wood choice if you want something slightly stronger than pine but still beginner friendly. Do check that out.
Where to Find Rocking Horse Woodworking Plans Free (Without Spending Money)
This is the thing most other blogs dont explain properly. They either sell you plans or link to paid stuff without telling you where the free ones are.
Here are the honest options I have used myself:
Now coming to the most asked thing. Where do you actually get rocking horse woodworking plans free without paying anyone? So I will tell you two places I personally use and trust. First one is wooden-toy-plans.com where you can grab a complete rocking horse woodworking free PDF with drawings, photos, full material list and construction notes all in one download. I used this one for my niece’s horse and it had everything a beginner needs.
Second one is woodworkersworkshop.com which has a big collection of free rocking horse woodworking plan links at one place. Some are simple rocking horse plans, some are full size rocking horse plans PDF, some are even 3D SketchUp drawings. So you have plenty of choices depending on what style you want to build. Both sites are free to use and no signup is needed most of the time. Just go, pick a plan which looks simple, download it and start.
Option 3: YouTube Build Videos with Plans in Description Many woodworking channels put their rocking horse woodworking plans pdf free in the video description. Check the comments too sometimes people share links there.
Option 4: Community Forums Woodworking forums are goldmine. People share free plans, photos, tips, and they are very helpful if you ask nicely.
So yes, rocking horse plans PDF free is very much possible to find without paying anything. You just have to look in right places.
Rocking Horse Woodworking Plans: What a Good Plan Should Include
Whether you use rocking horse woodworking plans free or paid ones, make sure the plan has these things.
A good rocking horse woodworking plan should have a full list of parts with measurements. Like the head size, body size, leg size, seat width, and most importantly the rocker dimensions. The rocker is the curved piece at the bottom that makes the horse actually rock.
It should also have a material list. So you know exactly how many boards to buy, what thickness, and what size.
Exploded view is very helpful too. This is a diagram that shows all the parts separated so you can see how everything goes together before you start cutting.
Step by step instructions written in simple english is a big plus. Full size rocking horse plans PDF is even better because you dont have to scale anything, you just trace and cut.
If you find rocking horse woodworking plans that have photos of each step, those are the best ones for beginners. Keep those.
Rocking Horse Woodworking: Tools You Need (Budget Friendly List)
Okay this is where people panic. They think you need 500 dollar tools. You dont. Here is the honest list.
Must Have Tools: A jigsaw. This is the most important. It cuts curved shapes which is what most of rocking horse woodworking is about. A basic jigsaw costs around 35 to 50 dollars.
A drill. You already probably have one at home. You need it to make holes and screw parts together.
Sandpaper. Buy 80 grit and 120 grit both. You will do alot of sanding on a rocking horse.
Wood glue and clamps. Wood glue is cheap. Clamps you can buy 2 or 4, not need to buy ten.
Nice to Have But Not Compulsory: A bandsaw gives cleaner curves. A scroll saw is great for detailed head shapes. A router helps with smooth edges.
But seriously for your first rocking horse woodworking project? Jigsaw, drill, sandpaper. That is it. Rest you can manage.
Simple Rocking Horse Plans Step by Step (My Beginner Method)
Alright lets talk about the actual building process. I am going to explain how I do it so you can follow along easily.
Step 1: Choose Your Plan Find a good rocking horse woodworking plan. I prefer simple rocking horse plans that have only 7 to 9 pieces. Less pieces means less cutting and less chance of making mistakes.
Step 2: Get Your Materials For a small rocking horse (good for toddlers age 1 to 4) you need about two to three 1×12 pine boards, each around 6 feet long. Cost is around 25 to 35 dollars total at any lumber store.
Step 3: Print and Trace the Templates If you have rocking horse plans pdf free downloaded, print them out. Tape the pages together if needed to make full size patterns. Then trace these shapes onto your wood with a pencil.
Step 4: Cut the Pieces Use your jigsaw to cut along the lines. Go slow specially on the curves. Rushing this step is where most beginners mess up. I messed up here on my first try too, no shame.
The main pieces you are cutting are the horse body (head and body together usually), two legs on each side, the seat board, the two rocker pieces, and some small support strips.
Step 5: Sand Everything Sand each piece before you assemble. This is so much easier than trying to sand after it is all put together. Start with 80 grit then finish with 120 grit. Make edges smooth specially because kids will touch every part.
Step 6: Assemble the Base First Connect the rockers to the leg pieces first. This is the base. Make sure both rockers are exactly same shape and exactly same length. If they are not matching your horse will rock to one side. This is a very common beginner problem in rocking horse woodworking so please measure twice before cutting.
Step 7: Attach the Body Place the horse body onto the base. Use wood glue and screws both for strong connection. Predrill the holes so the wood dont split.
Step 8: Add the Seat and Handle Screw the seat board in place. Add a small wooden dowel as a handle bar. Smooth everything again.
Step 9: Finish and Paint Sand one final time. Apply a child safe paint or non toxic wood stain. Let it dry fully before letting any child touch it.
And thats it! Your rocking horse woodworking project is done.
How Much Does Rocking Horse Woodworking Actually Cost
This is the question I wish someone had answered for me when I was starting.
Realistic budget breakdown for a beginner making their first rocking horse woodworking project:
Pine boards: 25 to 35 dollars Wood glue and sandpaper: 8 to 10 dollars Screws and dowels: 4 to 6 dollars Paint or stain (child safe): 8 to 12 dollars Rocking horse plans (if buying paid ones): 0 to 20 dollars
Total: roughly 45 to 80 dollars maximum.
Compare that to buying a store made one for 100 to 200 dollars and you save a good amount of money plus you get the joy of making it yourself.
If you already have tools at home, even the jigsaw, your cost goes down further. This is why rocking horse woodworking is such a great budget friendly project.
Rocking Horse Plans and Kits vs Making from Scratch
Okay so some people prefer rocking horse plans and kits where the pieces are already cut for you. You just sand and assemble and paint.
These kits usually cost around 40 to 70 dollars and are perfect if you dont have cutting tools or you feel nervous about cutting curves. I think for total beginners kits are a valid option.
But if you have a jigsaw and some confidence, making from scratch using rocking horse woodworking plans free is more rewarding and definitely saves money.
I always say try from scratch. Even if it is not perfect first time, you learn so much more.
Safety Tips for Rocking Horse Woodworking (Very Important)
When building rocking horse woodworking project for kids, safety is number one priority.
Always round off every edge and corner. Sharp edges on a children’s toy is dangerous. Use sandpaper or a round over router bit to smooth all edges nicely.
Use non toxic paint or stain only. Kids put their mouths on everything. Please check the label says child safe or non toxic.
Make the base wide enough. If the rocker base is too narrow the horse can tip over sideways. A good rule is the rocker base width should be at least 8 to 9 inches.
Tighten all screws fully. Check all joints are solid before letting a child use it. Wood glue plus screws together is always stronger than just one or the other.
Also check the weight limit of your design. Most simple rocking horse woodworking plans support kids up to around 50 pounds which covers toddlers nicely.
Common Mistakes Beginners Make in Rocking Horse Woodworking
I have made these mistakes so hopefully you wont have to.
Mistake one is cutting both rockers at the same time but not keeping them together while cutting. If you cut them separately you might end up with slightly different shapes. Always stack them, tape them together and cut both at once so they are identical.
Mistake two is not drilling pilot holes before screwing. Pine can split if you just push a screw in directly. Drill small hole first, then put screw. Saves you from cracking the wood.
Mistake three is rushing the sanding. I know sanding is boring. But a rough surface on a kids toy is not okay. Take your time here.
Mistake four is painting before the wood is fully dry and sanded smooth. The paint shows every scratch and rough spot. Prep the wood properly first.
Where Rocking Horse Woodworking Fits for Your Next Projects
After finishing your rocking horse woodworking project you will feel so confident to try more things. Trust me. I felt the same way.
If you enjoyed working with wood, maybe next you can try building a woodworking dollhouse for kids. It uses many same skills like cutting shapes, sanding, assembling, and finishing. Great next step project.
Also if you want to understand basic woodworking joints before your next project, I have a post on butt joint woodworking which is the most simple joint used in beginner projects. Very useful to know.
My Honest Opinion About Rocking Horse Woodworking for Beginners
Honestly I think rocking horse woodworking is one of the most beginner friendly projects that also has very high emotional value. You are not just making a box or a shelf. You are making a toy that a child will play on, maybe for years.
And the best part is rocking horse woodworking does not need expensive tools, does not need expensive wood, does not need you to be a professional. All it needs is some patience, a few basic tools, and a simple plan.
Whether you download rocking horse woodworking plans free or buy a rocking horse woodworking pdf, or even use simple rocking horse plans from a forum, the process is same and the result is beautiful.
I have gotten so many messages from people on my blog who tried rocking horse woodworking after reading my content and every single one said it was easier than they expected. That makes me very happy.
Conclusion: Start Your Rocking Horse Woodworking Journey Today
So now you know everything you need to start your rocking horse woodworking project. From finding rocking horse woodworking plans free, to what wood to buy, to step by step building process, to budget, to safety tips.
Rocking horse woodworking is not hard. It is not expensive. It is not only for experts. It is for everyone including you.
Pick any simple rocking horse plans, grab your jigsaw, get some pine boards, and just start. Even if your first one is not perfect it will still be amazing because you made it.
And when that little child sits on it for the first time and starts rocking, you will feel something money cannot buy.
Go build your rocking horse woodworking project today. You totally can do this.
FAQs About Rocking Horse Woodworking
Q1. Is rocking horse woodworking difficult for a complete beginner?
Not at all. With simple rocking horse plans and basic tools like a jigsaw and drill, most beginners can finish their first rocking horse woodworking project in one to two weekends.
Q2. Where can I find rocking horse woodworking plans PDF free?
Many websites and woodworking forums offer rocking horse woodworking free PDF downloads. You can also find full size rocking horse plans PDF on toy making websites that offer free resources for beginners.
Q3. What is the cheapest wood to use for rocking horse woodworking?
Pine is the most budget friendly option for rocking horse woodworking. It is easy to cut, sand and finish and works perfectly well for a toddler toy.
Q4. How long does a rocking horse woodworking project take to finish?
For a beginner following simple rocking horse plans, it usually takes one full weekend or about 8 to 12 hours of work including cutting, assembly and painting time.