
My hands were shaking the first time I laid my daughter in the crib I’d built her. Not from fear—from pride. And maybe a little exhaustion from the 47 hours I’d logged in my garage over three weekends. Building a woodworking crib is one of the most rewarding projects you’ll ever tackle. It’s also one where you absolutely cannot cut corners.
Look, I’ve been building furniture for over two decades. I’ve made plenty of pieces where “close enough” worked just fine. A crib isn’t one of them.
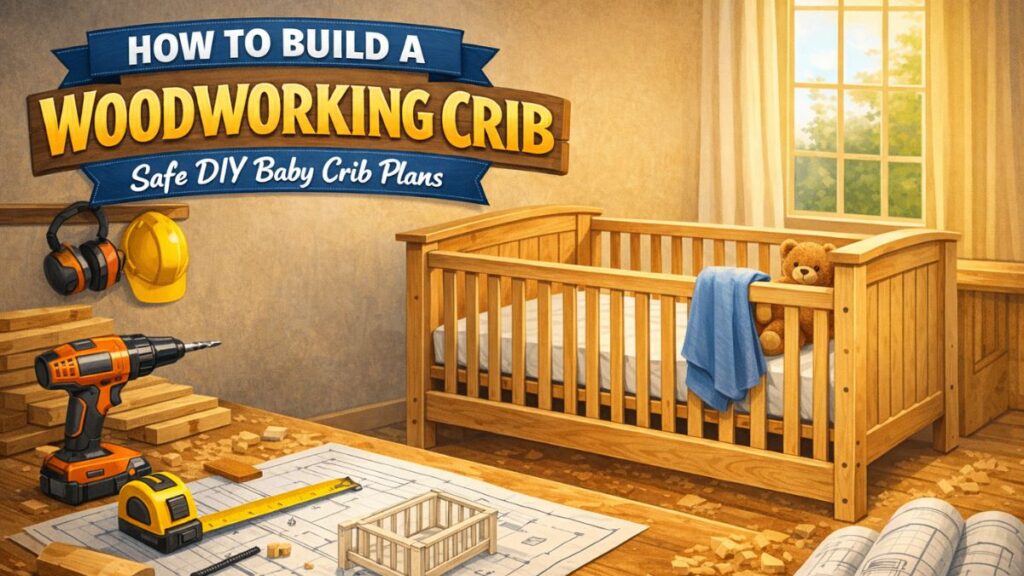
Quick Answer: Building a DIY baby crib requires approximately 24-30 board feet of hardwood lumber, strict adherence to CPSC safety standards (slat spacing no more than 2⅜ inches, rail height minimum 26 inches above mattress), and costs between $200-$500 depending on wood choice. Plan for 30-50 hours of shop time for a first-time crib builder.
Why Build Your Own Woodworking Crib?
I get it—you can buy a decent crib at Target for $250. So why spend 40+ hours in your shop?
Here’s why I’ve built three cribs now (two for my kids, one for my brother’s family): There’s something different about a handmade crib. 5The wood for a DIY crib should cost you around $150-200, and when you factor in hardware and finish, you’re looking at roughly what a mid-range store-bought crib costs. But you’re getting solid hardwood instead of particle board. You’re getting heirloom quality.
My first crib is now a toddler bed in my daughter’s room. In a few years, it’ll convert to a full headboard. That’s three pieces of furniture for one build. Try getting that from IKEA.
Plus—and I know this sounds corny—there’s something about knowing every joint, every sanded edge, every coat of finish. 1One crib project took “all of 7 months to build, including the time it took to create the plan, and running out of wood 3 times.” That’s not me (I’m more of a weekend warrior), but it shows the range. Some folks take their time.
The flip side? 5You need to be confident in your woodworking abilities to build a crib. If you don’t feel confident, it might be best to purchase a crib. Honest truth. This isn’t a “learn as you go” project.
Understanding CPSC Crib Safety Standards (Non-Negotiable)
Here’s where I get serious. 3There are strict governmental guidelines regarding the construction and design of cribs. These aren’t suggestions—they’re federal law.23 All cribs in use in the United States are now required to be compliant with Standards 16 CFR 1219 and 16 CFR 1220. These regulations came out of tragic incidents involving drop-side cribs and poor construction.
The critical measurements you must follow:
- 17 **Slat Spacing:** No more than 2⅜ inches (about the width of a soda can) between crib slats so a baby’s body cannot fit through the slats.
- 6 **Rail Height:** Drop sides raised, are at least 26 inches above mattress support.
- 18 **Corner Posts:** No corner posts. Clothing can attach to these posts and injure or strangle a child.
- 6 **Mattress Fit:** No more than 2 finger widths between crib side and mattress (suffocation hazard).
- 23 **No Drop Sides:** No drop side rail cribs are permissible.
- 10 **No Cutouts:** There should be no cutouts in the headboard or footboard to prevent a baby’s head from getting trapped.
I keep a soda can in my shop specifically for checking slat spacing. Sounds ridiculous, but it’s the perfect gauge. If the can fits through, your slats are too far apart. Period.21 Full-size cribs have interior dimensions of 28 ± ⅝ inches (71 ± 1.6 centimeters) in width x 52⅜ ± ⅝ inches (133 ± 1.6 centimeters) in length. These dimensions exist so standard crib mattresses fit snugly.
My rule: 6Buy your mattress before you start so you have exact measurements to go with. I learned this the hard way on my first build. Mattress sizes have slight variations between brands.
Choosing the Right Wood for a Baby Crib
5 It is best to use a hardwood for a crib to ensure that it is stable and will last. Hardwoods are stronger and will be better for the weight of a child as they grow.
But not all hardwoods are created equal. Here’s what I recommend based on actually building with these species:
Top Picks:
| Wood Species | Hardness (Janka) | Workability | Cost (per bf) | My Take |
|---|---|---|---|---|
| Hard Maple | 1,450 | Good | $6-9 | My go-to. Tight grain, paints beautifully, incredibly strong |
| Cherry | 950 | Excellent | $8-12 | Gorgeous natural finish, ages beautifully, mid-range hardness |
| Poplar | 540 | Excellent | $3-5 | Budget-friendly, takes paint well, softer (will show dents) |
| White Oak | 1,360 | Moderate | $7-10 | Extremely durable, beautiful grain, harder to work |
| Walnut | 1,010 | Excellent | $10-15 | Stunning dark color, naturally baby-safe finish |
5 Some builders use poplar for their cribs. It’s a solid budget choice if you’re painting. 1 Cherry is popular for natural-finish cribs—the way it darkens over the years is something special. 4 One builder used a combination of rough Hard Maple and Walnut, starting with the spindles since they’re one of the most time-consuming parts of the build because there are so many of them—54 in total.
Woods to AVOID:
- Pine — Too soft, splinters easily, not suitable for slats
- Red Oak — Open grain can trap moisture and bacteria
- Cedar/Redwood — Natural oils can be irritating to babies
- Any treated lumber — Chemicals are a no-go near infants
Tools and Materials You’ll Need
Must-Have Tools
You don’t need a $50,000 shop, but this isn’t a “hammer and handsaw” project either.
| Tool | Why You Need It | Budget Option |
|---|---|---|
| Table Saw | Ripping slats to consistent width | DeWalt DWE7485 (~$400) |
| Miter Saw | Crosscuts, consistent lengths | Ryobi 10″ (~$150) |
| Drill/Driver | Pilot holes, assembly | Any 18V cordless works |
| Router | Edge profiles, roundovers | Bosch 1617EVS (~$220) |
| Pocket Hole Jig | Hidden joinery | Kreg K4 (~$100) |
| Clamps | You need at least 8-10 | Mix of 24″ and 36″ bar clamps |
| Random Orbit Sander | Smoothing everything | DeWalt DWE6423 (~$70) |
5 For a traditional crib, you’ll need a table saw, miter saw, pocket hole jig, sander, drill and clamps.
I’d add a router to that list. Running a 1/8″ roundover on every edge isn’t optional—babies will find any sharp corner.
Materials List
2 Materials needed to build a crib (excluding tools) include: Roughly 24 board-feet of solid lumber, 22 feet of ¼” diameter dowel, ~10 square feet of ¾” plywood, hex head connector bolts, drill tap, and various drill bits.
Here’s my expanded list:
Lumber:
- 24-30 board feet of hardwood (4/4 thickness for most pieces)
- 8/4 stock for legs if doing turned or thick legs
- ¾” plywood for mattress platform (use Baltic birch, not construction-grade)
Hardware:
- Bed rail brackets (Rockler’s crib hardware kit runs about $50-80)
- 1¼” and 2″ pocket screws (stainless or coated)
- Wood glue (Titebond III is waterproof and non-toxic when cured)
- ¼” dowels for slats (or turn square slats)
Finish:
- Baby-safe finish (more on this below)
- 120, 180, and 220-grit sandpaper
Step-by-Step: Building the Crib Frame
I’m going to walk you through my approach. Fair warning: this is an intermediate-to-advanced project.
Step 1: Mill Your Lumber
4 Rip your boards at the table saw to rough size, then let them rest for a few days to allow any movement to occur, and plane them down to their final size at the planer.
Don’t skip the resting period. I once jumped straight to final milling and watched my slats bow overnight. Frustrating doesn’t begin to cover it.
Step 2: Build the End Panels (Headboard and Footboard)
Your end panels are the visual centerpiece. I prefer frame-and-panel construction—it’s stable and allows the center panel to expand and contract with humidity.
Cut your stiles (vertical pieces) to 36″ long. Rails (horizontal pieces) should be cut to create an interior width that matches your mattress plus ¼” clearance. A crib design with two mattress heights using frame-and-panel construction for three sides, with bars on the front, requires no complex joinery, nor specialty hardware.
Step 3: Create the Long Rails
The front and back rails span the length of the crib and house your slats. 2The crib outer dimensions should be approximately 54⅛” long, 30½” deep, and 36″ tall, designed to fit a standard crib mattress (52″ long x 28″ wide x 5.5″ thick).
I drill my slat holes using a drill press with a fence. Consistency matters more than speed here.
Step 4: Assemble the Frame
It is essential to lock all the components together tightly, so drill pocket holes and insert the appropriate galvanized screws. Add waterproof glue to the joints and make sure the corners are square after fitting each component.
Use bed bolt hardware for connecting the end panels to the rails. This lets you disassemble the crib for moving or converting later.
Slat Installation and Spacing
This is where most DIY cribs fail safety inspection.10 Baby cribs must meet certain construction rules: Slats should be no more than 2⅜ inches between slats to prevent a baby’s body from passing through.
My slat spacing jig:
I made a simple spacer block from scrap hardwood—exactly 2¼” wide. This gives me consistent spacing while staying well under the 2⅜” maximum. Don’t work right at the limit. Give yourself margin.4 The final spindle size is ¾” by ¾”. This is a common dimension that provides good strength while maintaining proper spacing. 4 Sand everything up to 180 grit to prep for finish and make sure any rough edges are sanded smooth—the last thing you want is your kid getting a splinter from your crib.
Mattress Support System
4 The mattress supports are really simple. The mattress support rails are made up of two pieces of hardwood, which you cut to rough size at the table saw and mill down to final size on the jointer and planer. The two support rail pieces are glued together to form a little ledge for the mattress slats to sit in, and this keeps the slats from moving around or falling off.
Adjustable Heights:4 Mark exactly where the holes will go on the sides of the crib for the mattress support height, then drill and tap the holes. You can add hole locations for two mattress heights, but can go back and add more later if needed.
I do three height settings: newborn (highest), sitting up (middle), and standing (lowest). The lowest position should keep the top rail at least 26″ above the mattress surface.
Baby-Safe Finishes and Stains
Here’s the thing—6most all of the modern wood finishes are non-toxic once cured. But “once cured” is the key phrase.4 Rubio Monocoat is a 0% VOC finish and is food safe after 7 days of cure time. The two-part version with the 2C accelerator speeds the cure time.
My Recommended Baby-Safe Finishes:
| Finish | VOC Level | Cure Time | Durability | Price |
|---|---|---|---|---|
| Rubio Monocoat | 0% VOC | 7 days | Excellent | $60/liter |
| OSMO Polyx-Oil | Low VOC | 14 days | Excellent | $55/liter |
| Pure Tung Oil | Zero VOC | 30 days | Good | $35/quart |
| Milk Paint + Wax | Zero VOC | 3-7 days | Moderate | $25/quart |
10 The crib should be painted with lead-free paint to prevent lead poisoning if a baby chews on the crib rails.
I use Rubio Monocoat on anything for my kids. Yes, it’s pricey. Worth every penny for peace of mind.6 Teething covers for the side rails are nice—one builder’s granddaughter decided to try her new teeth on the end caps instead. Babies will chew wherever they can reach. Budget for silicone rail guards regardless of finish.
Converting to a 3-in-1 Crib Design
A lot of folks search for 3-in-1 baby crib plans because they want longevity. Smart thinking.
The basic conversion path:
- Crib (0-2 years)
- Toddler Bed (2-4 years) — Remove one long rail, add toddler rail or leave open
- Full/Twin Headboard (4+ years) — Use end panels as headboard and footboard
1 Some cribs convert to a full size bed with the right planning.
The key to convertible design is using bed bolt hardware from the start. This lets you separate the components without damage.
Pro Tips from My Workshop
1. Build a full-scale mock-up first. I use cheap 2x4s and plywood to mock up the basic shape before cutting expensive hardwood. Catches mistakes early.
2. Number your slats. They all look identical until you need to match grain orientation. Ask me how I know.
3. The soda can test.17 A standard soda can is about the width of a soda can—2⅜ inches. Keep one in your shop for checking slat spacing as you go.
4. Dry-fit everything before glue-up. Twice. I’m serious.
5. Router all edges. Run a 1/8″ roundover bit on every edge your child might touch. Then sand to 220 grit.
6. Glue squeeze-out in corners. Clean it immediately with a damp rag. Dried glue won’t take finish evenly.
7. Let the finish cure fully.8 Any finish will be safe once it is dry/cured. Don’t rush this. Three weeks of cure time minimum before baby uses it.
Common Mistakes to Avoid
Mistake #1: Slats too far apart
Consequence: Fails safety standards. Baby can get trapped. Fix: Use a consistent spacer jig. Check with soda can.
Mistake #2: Using soft wood for slats
Consequence: Slats can crack under stress or from teething. Fix: 15Choose hardwoods like oak, maple, or birch.
Mistake #3: Not buying mattress first
Consequence: Mattress doesn’t fit snugly, creating suffocation hazard. Fix: 6Buy your mattress before you start so you have exact measurements to go with.
Mistake #4: Decorative corner posts
Consequence: 10Corner posts should be no more than 1/16th inch high to prevent clothing from getting caught. Fix: Keep all posts flush with the top rail.
Mistake #5: Rushing the finish
Consequence: Off-gassing near baby’s face. Fix: Allow 2-4 weeks cure time depending on finish type.
Mistake #6: Forgetting about weight
I tested my first crib with a 50-pound sandbag bouncing on the mattress platform. Over-engineer the mattress support system. Babies become toddlers who jump.
Cost Breakdown
Here’s what a DIY woodworking crib actually costs in 2025-2026:
| Item | Budget Option | Premium Option |
|---|---|---|
| Hardwood Lumber (24-30 bf) | Poplar: $90-120 | Walnut: $300-400 |
| Plywood (mattress platform) | $25 | $45 (Baltic birch) |
| Hardware (bed bolts, screws) | $40 | $80 (Rockler kit) |
| Finish | $25 (tung oil) | $65 (Rubio Monocoat) |
| Sandpaper, glue, misc | $25 | $40 |
| Crib Mattress | $80 | $200 |
| TOTAL | $285-330 | $730-830 |
The wood for a crib should cost you around $150-200 if you’re using mid-range hardwood like cherry or maple.
Compare that to a Pottery Barn crib at $999 (and that’s particle board with veneer).
Is it safe to build your own baby crib?
It is definitely safe to build your own crib. If you are using clear plans (either of your own design or from someone else) and can follow them properly, they will be safe. You also need to be confident in your woodworking abilities to build a crib.The key is following CPSC standards exactly—not approximately.
What are the dimensions of a standard baby crib?
Full-size cribs have interior dimensions of 28 ± ⅝ inches in width x 52⅜ ± ⅝ inches in length.The inner dimensions should be the size of the crib mattress so that there are no gaps. In this case, that size is 28″x52″.
What tools do I need to build a crib?
Depending on the design, you will need various tools. For a traditional crib, you’ll need a table saw, miter saw, pocket hole jig, sander, drill and clamps. I’d add a router for edge treatment.
How far apart should crib slats be?
No more than 2⅜ inches (about the width of a soda can) between crib slats. I recommend spacing at 2¼” to give yourself safety margin.
Can I use pine wood for a baby crib?
I don’t recommend it. Pine is too soft—slats can crack, and it splinters easily. 5It is best to use a hardwood for a crib to ensure that it is stable and will last. Hardwoods are stronger and will be better for the weight of a child as they grow.
Are DIY cribs legal?
Yes, for personal use. Anyone who builds something is defined as a “manufacturer.” The regulations apply to things you make for your own family. You must still meet federal safety standards.
How long does it take to build a crib?
Plan for 30-50 hours of shop time for a first-time build. Some projects take months when you factor in planning and material sourcing. My second crib took about 35 hours spread over four weekends.
Final Thoughts from the Workbench
Building a crib for your child is one of those projects that stays with you. Twenty years from now, you’ll still remember the smell of that first coat of finish drying, the moment you set the mattress in place, the nervous excitement of lowering your baby into something you built with your own hands.
Is it the easiest woodworking project? Not even close. Is it worth it? Without question.5 If you are using clear plans and can follow them properly, a DIY crib will be safe. The safety standards exist for good reason— 18 the crib is the one place where babies and young children are regularly left unsupervised, so it’s important to be aware of the common crib hazards.
Take your time. Measure twice (okay, three times for this project). Test your spacing obsessively. And when you’re done, take a picture of that empty crib before it’s ever used. You’ll want to remember that moment.
Now get out to your shop. You’ve got sawdust to make.
you may also like to read our blog : Norwegian Woodworking: Stunning Guide That Changed My Life

Pingback: Amazing Woodworking Dollhouse Guide for Complete Beginners