

Last year I was making a small wall shelf for my room, and the corners kept opening up after just one week. I was so annoyed, honestly. Then a freind told me about the domino woodworking joint, and I thought it is only for big shops with costly machines.
Today I will explain the domino woodworking joint in very simple words. I will also show you how a complete beginner can get the same kind of result without spending too much money.
What Is a Domino Woodworking Joint?
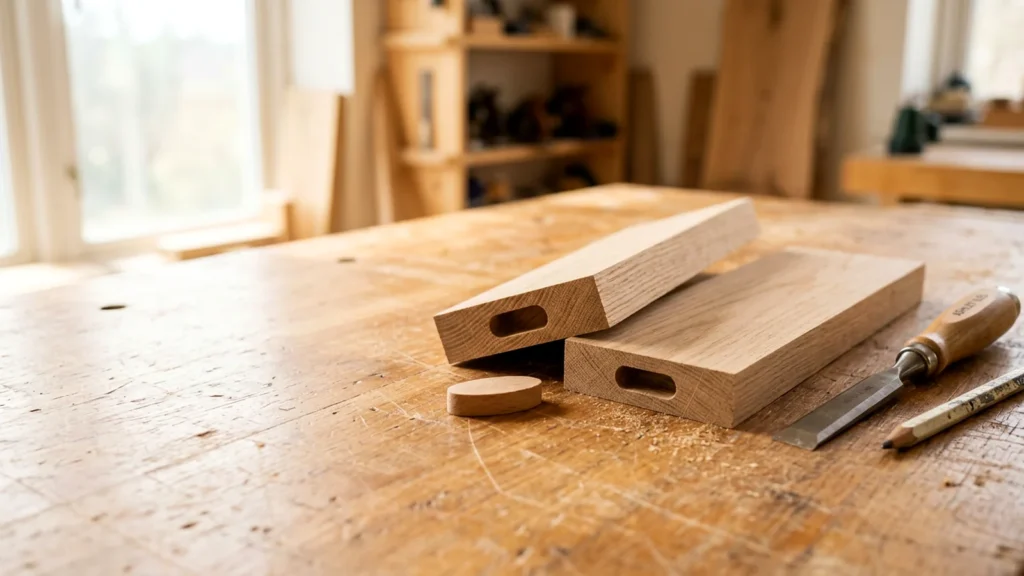
A domino woodworking joint is a loose tenon joint. Simple meaning, you cut one slot in each board, then you put a small flat wooden piece inside both slots with glue.
That small piece is the domino. It looks like the game piece, with round ends. Some people also call it a floating tenon, because it is not fixed to any one board.
The name became famous from the Festool Domino joiner. It is a hand tool that cuts these slots in few seconds. The DF 500 and DF 700 are the two models most people talk about.
So when somebody says domino woodworking joint, they may mean the tool or the joint. In this post I am talking mostly about the joint, because you can make it without the tool also.
Why I Like a Domino Woodworking Joint as a Beginner
First reason is alignment. When you glue two boards, they slide around and you get small steps on the top surface. Very irritating. The loose tenon sits inside the slots and keeps both boards in the same place.
Second reason is strength. A plain butt joint is just glue on the end grain, and it is weak. I explained this in my post on butt joint woodworking. A domino woodworking joint gives much more glue area, so it holds better.
Third, the grain of the tenon runs in the right direction. Because of this, the domino woodworking joint feels very near to a real mortise and tenon, but without long hours of chisel work.
I feel this joint is nice for frames, table legs, shelves and cabinet boxes. Small things like a bedside table also. Every time I use a domino woodworking joint, the corners come out neat and square.
How Strong Is a Domino Woodworking Joint, Really?
Short answer, strong enough for home furniture. In a test shown by the maker, a glued joint was still holding at around 145 kg. That is heavy.
I also read a forum post where somebody broke three types of joints. The biscuit gave up at 545 pounds, the domino at 597 pounds, and a plain round dowel at 759 pounds. Funny, right? The dowel won that day.
But dont take one test as final truth. Wood type, glue, size and how you clamp, all of this change the result. Still, a domino woodworking joint is already more than what a normal shelf needs.
If you like reading the background, the Domino joiner page on Wikipedia explains how the tool came and where it sits near the biscuit joiner.
Domino Woodworking Joint vs Biscuit Joint vs Dowel Joint
I was very confused between these three in the starting. So here is how I understand them now.
- Biscuit: a flat oval piece. Good for lining up boards, but it is thin so little weaker.
- Dowel: a round wooden pin. You need two for one joint, otherwise the boards can twist.
- Domino: thicker and flat sided, so it fights twisting very well.
A biscuit joiner is much cheaper than the domino machine, and it does not make a domino woodworking joint, but it is a good starting point. I wrote about it in my guide on woodworking biscuits, so check that if you are thinking to buy one.
Honestly, if you make only few projects in a year, then a domino woodworking joint cut by an expensive machine is not a must. A cheaper way can give similar result.
The Cost Problem Nobody Tell You
The Festool tool was already near 700 dollars when it launched, and it is still not a small amount for a beginner. The wooden dominos are also sold separate.
One forum member said even his starter set of dominos cost more than 100 pounds. I was shocked reading that.
So for a budget person like me, a domino woodworking joint feels like a luxury. But the idea behind it is not luxury at all. The idea is just a slot and a loose tenon. And that can be done cheap.
Budget Friendly Ways to Make a Domino Woodworking Joint
Here are the ways I tried or I am planning to try, from cheapest to little costly.
Hand tools. This is the cheapest way. Mark the slot, drill few holes with a drill bit, then clean the sides with a chisel. It is slow, but a domino woodworking joint made like this is still strong.
Router with a simple guide. If you already own a router, put a straight bit, clamp a guide on the board, and cut the slot. Round the tenon edges with sandpaper after. Many hobbyists make their domino woodworking joint at home like this.
Biscuit joiner. It is not a real domino, but for panels and alignment it works nice. Used ones are found cheap.
Dowel jig. A small jig does not cost much. Always use two dowels in every joint, never one.
Borrow the tool. Ask in your local woodworking group, somebody may allow you to use their joiner for one weekend. Then you can cut every domino woodworking joint your project needs in one go.
For the tenons, you can cut strips from oak or maple and round the edges yourself. It saves money against buying the full box.
Step by Step Method for a Domino Woodworking Joint
This is how I make a domino woodworking joint now. Not perfect, but it works for me and for my small projects.
- Put both boards together and draw one straight line across the joint. This is your centre mark.
- Cut a slot in the first board, then in the second one. Make each slot around half the length of the tenon.
- Do a dry fit without glue. Dont skip this step, trust me.
- Put glue inside the slots and on the tenon, not too much.
- Join the boards, clamp them, and wipe extra glue with a damp cloth.
- Leave it overnight. Be patient.
If you want to see the maker’s own settings for angled joints, Festool USA has a free guide on miter joints with the domino. It is useful even if you use a different tool.
Which Wood and Glue Work Best for a Domino Woodworking Joint?
Many beginners ask me this, and I also asked the same question in my starting days. For a budget project, pine and poplar are easy to find and easy to cut. But they are soft, so be gentle while cutting the slot.
Oak, maple and beech are harder. A domino woodworking joint in these woods feels very solid, but the cost is little more. I use hardwood only for the tenon, and normal wood for the board. This way the budget stays safe.
For glue, plain yellow wood glue is enough for most indoor work. If the piece will stay outside, then buy a waterproof one. Dont use fast drying glue on your first try, because you need some time to fit everything.
Also keep the tenon dry. Damp wood swells inside the slot and the domino woodworking joint becomes tight too early. I learned this on a rainy day, and it was not fun.
Small Tips From My Workshop
These are small things, but they save big headache. I wish somebody told me before.
Always cut the slot a little longer than the tenon. This gives you some space to move the board by a small amount, which is very helpful when the glue is wet. A domino woodworking joint with zero play is very hard to fix.
Mark every board with a pencil, like A1 and A2, so you dont mix the pieces. It sounds silly, but I mixed them once and cried a little.
Use scrap wood for practice, always. A few extra minutes on scrap will make your real domino woodworking joint much cleaner.
And last, take your time. Woodworking is not a race, is it?
Mistakes I Made With My First Domino Woodworking Joint
My first domino woodworking joint was a disaster. I cut the slot too wide, and the tenon was rattling inside like a coin in a box. I felt so stupid that day.
Then I skipped the dry fit, and one board came out little bit crooked. Glue was already drying, so no way to fix it.
Another mistake was using very thin wood. The slot was almost touching the surface and it cracked. So keep enough wood around the slot, at least double the thickness of the tenon.
And too much glue, yes. It comes out everywhere and makes the stain look patchy later. Learn from my mistakes, please, so your next domino woodworking joint comes out better than my first one.
Best Projects to Try First
Dont start with a big dining table, I did that mistake in my mind only, thank god. Start small.
A picture frame is a good first project because a domino woodworking joint at the corners keeps them tight. After that, try a simple bookshelf or a side table.
Once you are comfortable, a bench or a nightstand will feel easy. I think the domino woodworking joint is one of the best joints to learn early, because it teaches you slow and careful work. Every domino woodworking joint you make will give you more confidence.
Frequently Asked Questions
Is a domino woodworking joint strong enough for furniture? Yes, it is. For tables, shelves and cabinets, a domino woodworking joint gives plenty of strength when you use good glue.
Is a domino woodworking joint better than a biscuit joint? Mostly yes, because the tenon is thicker and resists twisting more. But a biscuit joiner costs less, so it is fine for simple panel work.
Do I need a Festool Domino to make a domino woodworking joint? No, you dont. A router with a guide or even a chisel can cut the slots, and you can make the tenons yourself.
Can a beginner make a domino woodworking joint with hand tools? Yes, but go slow. Practice on scrap wood first and your domino woodworking joint will fit much better.
Conclusion
So that is my honest take on the domino woodworking joint. It is not magic, it is just a slot, a loose tenon and some glue, but it gives strong and neat joints.
You dont need a 700 dollar tool to start. A hand chisel, a router or a borrowed joiner can make a good domino woodworking joint, and you can upgrade later when your hobby grows.
Try one on a scrap piece this weekend. If you get stuck, tell me in the comments, I will try to help. Happy woodworking freinds.