Hey freinds, I am Udit Das from easydiywood.com and today I wanna talk about something that totally changed my whole woodworking game. Yep, we are talking about router table woodworking plans. When I first got into wood projects at home, I was using my router by hand only. And honestly? It was scary. The router was jumping everywhere, my cuts were not clean, and I was wasting so much good wood. Then one day I saw someone on YouTube building there own router table from basic router table woodworking plans and I thought, wait a minute, I can also do this thing.
So I did. And trust me, if I can build one, you definately can also do it. No joke.
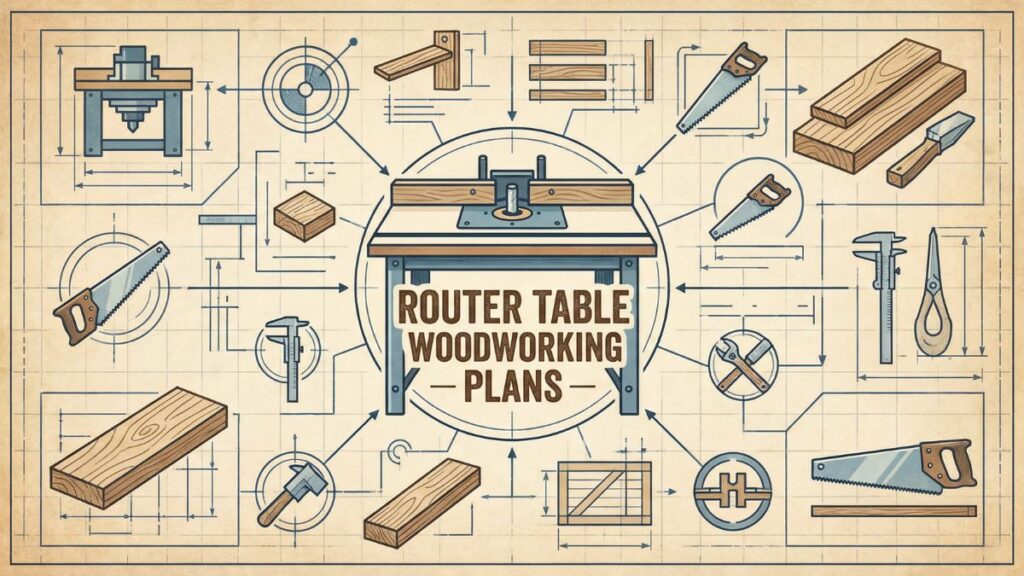
Why You Even Need Router Table Woodworking Plans in the First Place
Ok so before we go into the actual router table woodworking plans and all the details, let me tell you why having a router table is actually super important. See when you hold the router in your hand and try to make edge profiles or grooves, its very hard to keep it steady. Your hand shakes, the wood moves, and the cut comes out all wobbly and ugly.
But when you flip that same router upside down and mount it under a table using proper router table woodworking plans, everything changes completely. Now the router stays still and you move the wood. Much more control yaar. Much cleaner cuts. And honestly, much more safer too for a beginer.
I was so confused in the begining about whether I should buy a ready made router table or follow some simple router table woodworking plans and build my own. The ready made ones in USA can cost you anywhere from 200 to even 1000 dollars. For a beginner who is just learning, that is way too much money to spend.
That is exactly why I went with the DIY route using free router table woodworking plans. And I am going to share evrything I learned with you today.
My First Experience Building a Simple DIY Router Table
So let me tell you about my first build using router table woodworking plans I found online. It was not pretty at all. I used some leftover plywood pieces from another project, a cheap router I got on sale, and some screws from the hardware store. The total cost? Around 40 to 50 dollars only. Can you belive that?
I basically took a flat piece of 3/4 inch plywood, cut a hole in the middle, and mounted my router from underneath. Then I made a basic fence from another piece of plywood and clamped it down with C clamps. Thats it. That was my first simple DIY router table.
Was it perfect? Absolutely not. But did it work? Oh yes it did. And that feeling when you make your first clean edge profile on a piece of wood using your homemade router table, I cant even explain that feeling to you freinds.
The point I am making is, you dont need fancy or expensive router table woodworking plans to get started. You just need to start somewhere with whatever you got.
What Materials You Need for Budget Router Table Woodworking Plans
Alright so lets talk about what you actually need to follow these router table woodworking plans and build your own table. I am keeping this list very basic becoz I know many of you are complete beginners and dont want to spend lots of money on this.
Here is what I used for my router table woodworking plans build:
One sheet of 3/4 inch plywood. You can get a half sheet if you want to save even more money. This is gonna be your table top and also your fence material.
A wood router. Any basic palm router or plunge router works fine. I started with a very cheap one and it did the job perfectly for beginner level stuff.
Wood screws, around 20 to 30 pieces of different sizes for assembly.
Wood glue. Always keep wood glue handy freinds, it makes joints so much more stronger.
A drill machine with basic drill bits for making holes.
A jigsaw or circular saw to cut the plywood pieces.
Some sandpaper for smoothing out the rough edges.
Optional but helpfull: T track and feather boards for extra safety while routing.
The total cost of all this material for your router table woodworking plans project? Depending on what you already have at home, it can be anywhere from 30 to 80 dollars. Thats it. Compare that to buying a 500 dollar router table from the store. Makes sense right?
If you want to learn more about what basic machines and tools you need for woodworking, I wrote a detailed guide about woodwork machines for beginners that might help you out alot.
Simple Router Table Woodworking Plans Step by Step Guide
Ok now we are getting to the good part. Let me walk you thru my router table woodworking plans step by step. These are simple router table woodworking plans that literally anyone can follow. I promise you that.
Step 1: Cut your table top piece
Take your 3/4 inch plywood and cut it to around 24 inches by 32 inches. This size gives you enuff workspace for most routing jobs. You can make it smaller if you have less space in your garage or workshop, no problem at all. Just make sure its flat. A warped table top will give you terrible results and your router table woodworking plans will be ruined.
Step 2: Mark and cut the router opening carefully
Flip the plywood over to the bottom side. Place your router base plate in the center, or slightly towards the front where you will do most of your work. Trace around the base plate with a pencil. Now using a jigsaw, carefully cut out that circle shape. Take your time here freinds. If you rush this part, the hole might come out uneven and your router wont sit properly in there.
Step 3: Make a mounting plate for the router
This is optional but I really recomend it in my router table woodworking plans. Get a piece of clear acrylic or even a thin plywood piece, and mount your router to it. Then this plate drops into the hole you just cut in step 2. Why do this? Because its way easier to take the router in and out when you need to change bits. Trust me on this one, it saves so much time.
Step 4: Build the legs or base structure
Now you got few options here in these router table woodworking plans. If you want a benchtop router table, you dont even need legs at all. Just clamp the whole thing to your workbench and you are good to go. This is what I did for my first build and it worked great.
But if you want a standing router table, you can build a simple frame from 2×4 lumber. Cut four legs at about 34 inches tall. Add some cross pieces for support and stability. Screw evrything together with wood screws and glue for strength.
Some people also like to build a full cabinet underneath with drawers and storage for router bits and accessories. Thats nice but not necesary for beginners at all. Keep it simple first.
Step 5: Build the fence for your router table
The fence is super important in any router table woodworking plans guys. Without a good straight fence, your router table is basically useless for accurate cuts. Take another piece of plywood, about 4 inches tall and as wide as your table top. Cut a small notch in the middle area for the router bit to poke through.
Clamp this fence to your table top. You can use C clamps in the begining. Later you can upgrade to proper T track clamps if you want. I used C clamps for almost 6 months before I upgraded and they worked just fine for all my projects.
Step 6: Add a dust collection port to your setup
This one I learned the hard way freinds. Routing creates SO MUCH dust. Like you wont believe how much sawdust comes out when you start routing. So attaching a small vacuum hose to the back of your fence is really really helpfull. Just cut a hole in the fence back side and connect your shop vacuum with a hose adapter.
Step 7: Test everything on scrap wood first
Before you start routing actual project pieces on your new table, do some test cuts on scrap wood. Make sure the table is stable, the fence is straight and square, and the router bit is at the right hight. Adjust things as needed until you feel confident.
And thats it. You just built your own router table using simple router table woodworking plans. Congrats yaar! Welcome to the club.
Free Router Table Plans PDF Where to Find Good Ones
I know many of you are looking for router table woodworking plans pdf that you can download and print out at home. Good news is there are several places online where you can find free router table plans PDF.
Popular Woodworking has some really nice free plans with detailed drawings and material lists that you can download as PDF. They actually offer three different router table woodworking plans in one free download which is pretty amazing for beginners.
Now I am gonna be honest with you about something. Many of the free router table plans PDF for beginners out there are actually quite advanced in reality. They assume you already know joinery techniques, you have a table saw, and you have past experience with power tools. That can be super frustrating for a complete beginner who is just starting.
Thats why I tried to make my router table woodworking plans guide above as simple as possible. The router table woodworking plans I shared are something that even a first timer can follow without getting confused. No complicated joints, no expensive hardware needed, just basic cuts and screws.
If you are looking for ultimate router table plans PDF with more features like drawers, built in dust collection systems, and fancy adjustable fences, those are available too on sites like Woodsmith Plans. But my suggestion is to start with the basic version first. Get comfortable with your router. Learn how it behaves. Then upgrade later when you feel ready.
Budget Breakdown for Your Router Table Woodworking Plans
Let me break down the cost for you because I think this is where my router table woodworking plans really shine compared to buying a store bought one.
Plywood half sheet: around 15 to 25 dollars depending on where you buy it. Some Home Depot or Lowes stores have sales pretty often so keep watching.
Wood screws and glue: maybe 8 to 10 dollars if you dont already have them lying around.
Sandpaper: 3 to 5 dollars for a multi grit pack.
Mounting plate acrylic piece: about 10 to 15 dollars. Or you can skip this and mount the router directly to save money.
If you already own a router, thats it freinds. Your total is under 60 dollars for a fully working router table built from these router table woodworking plans. Even if you need to buy a basic router fresh, you can find decent palm routers for 50 to 70 dollars on sale at Amazon or Home Depot.
So the grand total with everything bought new is around 100 to 130 dollars. Compare that with commercial router tables that start at 200 and go up to 1000 plus dollars. The savings is huge specially when you are on a tight budget like me.
Common Mistakes Beginners Make with Router Table Woodworking Plans
Ok so let me tell you some mistakes I made while following router table woodworking plans so you dont have to repeat them. Learn from my errors yaar.
First mistake was not making the table top flat enough. I used a piece of plywood that was slightly bent and warped, and all my cuts were coming out uneven. Always check if your plywood is flat before starting your router table woodworking plans project. Put it on a flat surface and see if it rocks side to side.
Second mistake was making the router hole too big. I got excited with the jigsaw and cut a hole that was way bigger than what was needed. The router was moving around in there loosely. Not good at all. Measure twice and cut once, they say this for a reason.
Third mistake was not having proper dust collection setup. I was routing without any vacuum connected and my whole garage was covered in fine sawdust. It was in my hair, my clothes, literally everywhere. My wife was not not happy about that at all. So please, add a dust port to your fence from day one itself.
Fourth mistake was using the wrong router bit speed for the material. Different bits need different speeds to work safely. If you run a large diameter bit too fast, it can be really dangerous. The WoodWorkers Guild of America has some great safety tips about this that every beginner should read.
And fifth mistake, I was pushing the wood too fast through the router bit. You need to take it slow and steady. Let the bit do the cutting work. If you push too hard, the wood can kick back towards you and that is seriously dangerous stuff.
Router Table Woodworking Plans: Benchtop vs Full Size Which One to Build
This is a question I get asked a lot by readers. Should you follow benchtop router table woodworking plans or full size standing ones? Honestly, it depends on your situation and workspace.
If you have a small workshop or you work in your garage like me, benchtop router table woodworking plans are perfect to start with. You can clamp the table to any surface, use it when needed, and store it away when done. Its lightweight and doesnt take up permanent space. For most begginers, this is honestly the best option to go with.
But if you have a dedicated workshop room and you plan to do a lot of routing work regularly, full size router table woodworking plans with a cabinet underneath are worth the extra effort. You get storage for your bits, a stable heavy base that doesnt vibrate much, and everything is at a comfortable working hight for standing.
My advice from personal experience? Start with simple benchtop router table woodworking plans. Use the table for a few months. Then when you know what features you really need and what is missing, build a bigger one. This way you dont waste money and time building something you dont actually need or use.
If you are looking for more beginner woodworking project ideas to try, check out my post about free woodworking projects for beginners where I share lots of easy plans and ideas.
Safety Tips You Must Know Before Using Your Router Table Woodworking Plans Build
Look, I know safety tips sound boring but please please read this section carefully. Routers are very powerful tools and they can hurt you badly if you are not carefull while using them.
Always wear safety glasses when routing on your table. Wood chips fly everywhere at high speed and they can damage your eyes in a second. This is non negotiable for me.
Wear ear protection also. Routers are loud. Like really really loud. Long time exposure to that kind of noise can damage your hearing permanantly over time.
Never ever reach near the router bit while its still spinning. Always turn off the router and wait for it to completely stop spinning before making any adjustments or changes. I know it sounds obvious but you would be suprised how many people forget this simple thing in the moment.
Use push sticks and feather boards whenever possible on your router table. These accessories keep your fingers away from the spinning bit while still giving you good control over the wood piece you are routing. This is something every good router table woodworking plans guide should mention.
Always unplug your router completely before changing bits. Even if the power switch is off, unplug it from the wall. Accidents happen when we get lazy about safety precautions.
And finally, never ever route small pieces freehand on the router table. If the piece is too small to safely hold with your hands, use a jig or a clamp setup to secure it properly. Small pieces can get grabbed by the spinning bit and thrown at you with serious force.
Upgrading Your Router Table Woodworking Plans Over Time
One thing I absolutely love about building your own router table from router table woodworking plans is that you can keep upgrading it over time at your own pace. When I first built mine, it was just a flat board with a hole and a basic plywood fence. Super basic and nothing fancy.
But over the months, I kept adding small improvements to it. First I added a proper T track to the fence for feather boards. Then I built a small drawer underneath for storing my most used router bits so they are always close by. Then I added caster wheels to the legs so I could move the whole thing around my garage easily when needed.
Now my router table has a pretty decent dust collection setup, a nice adjustable fence with T tracks, and even a power switch mounted on the outside so I can turn the router on and off without bending down underneath. It took me almost a year to get it to this point, but thats the beauty of following DIY router table woodworking plans.
You dont need to build the ultimate router table in one weekend. Start with basic router table woodworking plans free version and keep making it better as you learn what you actually need for your projects. That is the real beauty of woodworking isnt it?
What Router Bits to Start With for Your Router Table
I want to touch on this quickly because when I started I bought like 15 different router bits thinking I need them all and only used 3 of them regularly. Total waste of money that was.
For a beginner using router table woodworking plans for the first time, you really only need these three bits to get going:
A straight bit for making grooves and dadoes in wood. Get a 1/4 inch one to start with, its very versatile.
A roundover bit for making smooth rounded edges on your projects. A 1/4 inch roundover bit is super useful for almost everything.
A flush trim bit for cleaning up edges and working with templates on your router table.
Thats it freinds. Just three bits. You can add more later as your skills and confidence grow. Dont fall into the trap of buying a 50 piece router bit set from Amazon on day one. Most of those bits you will never even touch, trust me I know from experience.
Router Table Woodworking Plans: My Final Thoughts and Tips
So if you have read this far, first of all thank you so much yaar. I really appriciate you spending time here. Let me give you my final thoughts on router table woodworking plans.
If you are a complete beginner with limited budget, build a simple benchtop router table first using the router table woodworking plans I shared above. Use plywood, keep the design super basic, and focus on making a flat top surface and a straight fence. Thats genuinely all you need to start making beautiful wood projects at home.
Dont get overwhelmed by those fancy router table builds you see on YouTube with LED lights and automatic dust collection systems and all that cool stuff. Those are great for sure, but they are absolutely not necesary when you are just starting out on your woodworking journey.
Your first router table woodworking plans should be simple, cheap, and most importantly functional. Once you get comfortable and confident, you can always build a better one from more advanced router table woodworking plans. I have built three router tables so far in my life and each one was better than the last one. Thats how learning works na?
And remember this one thing, the best router table is the one you actually build and use. Not the one you keep planning in your head forever without taking action. So go grab some plywood, take out that router from the box, and start building your router table today using these router table woodworking plans. You will thank yourself later for it, I promise.
Happy building freinds. See you in the next post!
FAQ
Can I build a router table with just plywood?
Yes absolutely. Plywood is one of the best materials for a DIY router table. Use 3/4 inch thick plywood for the top and fence, its flat, strong, and cheap.
How much does it cost to build your own router table?
If you already own a router, you can build a basic table for around 30 to 60 dollars using plywood and screws. Even with a new budget router included, total cost stays under 130 dollars.
Do I need a router lift for my DIY router table?
No, beginners dont need a router lift at all. You can simply mount the router directly to the table top or to a mounting plate. A lift is a nice upgrade for later but not necesary to start.
What size should a homemade router table be?
A good size for beginners is around 24 inches deep and 32 inches wide. This gives enuff workspace for most projects without taking up too much room in your shop or garage.