Okay so this is going to sound wierd but hear me out. Last year around october I was sitting in my balcony and the power went out. My wife brought this ugly plastic emergency light and I just sat there thinking… why dont I just make my own lamp from wood? Thats how my whole lamp woodworking journey started. From a power cut. Funny right?
Hi I am Udit Das, I make simple wood things at home and I write about them on easydiywood.com. I am no carpenter or anything close to that. I am just a regular guy from India who picked up woodworking as a hobby because I was getting bored of watching Netflix every weekend. And making wooden lamps turned out to be the thing that got me really really hooked into this whole DIY world.
Let me tell you one thing before we go ahead. I messed up my first lamp so bad that my 6 year old daughter said “papa this looks like a broken robot” haha. But you know what, that broken robot lamp is still working and its sitting right next to my bed. So yeah, even if you mess up your first try its totally okay.
What Even is Lamp Woodworking and Why Should You Care
So lamp woodworking is basically making lamps using wood as the main body or base. Simple as that. You take a piece of wood, shape it however you want, drill some holes for the wire, attach a bulb socket on top and boom you got yourself a wooden lamp.
Now why should you care about this? Let me give you 3 reasons from my own life.
Number one. A basic wooden lamp from HomeGoods or Target costs anywhere from 40 to 90 dollars. I made my first one for 14 dollars total. Fourteen dollars. Let that sink in.
Number two. Nobody and I mean NOBODY in your freind circle will have a lamp like yours. Because you made it yourself. Its one of a kind. My neighbour saw my driftwood lamp and literally asked me to make one for him too. I charged him 35 dollars for it hehe.
Number three. Its actually relaxing. Like I am not even exaggerating. After a stressfull day at work, going to my small corner in the garage and sanding a piece of wood while listening to old hindi songs… theres nothing better than that honestly.
The Tools Situation (Dont Worry Its Not Expensive)
This is the part where most beginers get scared and close the tab. Please dont do that. The tools you need for lamp woodworking are so basic that you probably have half of them already at home.
Here is what I used for my first ever wooden lamp.
A regular handsaw that was already in my toolbox from like 5 years ago. A drill machine which every Indian household has because we all need to drill holes in walls for temples and photo frames right haha. Sandpaper I bought a pack of mixed grits for 3 dollars. Wood glue, had it already. And the most important thing, a lamp wiring kit with socket, switch and cord. Got it from Rockler online for about 10 dollars.
Thats it. No fancy table saw. No router. No lathe machine. Nothing expensive. If you already do some basic woodworking at home and have tools for that, you can check my woodworking fastener guide where I talk about useful hardware stuff for beginners.
My First Table Lamp Woodworking Project (The Ugly One)
Okay so I want to be fully honest here because I think thats more helpful than showing you only the pretty stuff. My first table lamp woodworking attempt was… not great looking.
I took a square piece of pine from the hardware store. It was roughly 4 inches by 4 inches and about 8 inches tall. Cost me maybe 3 dollars or something. I marked the center on top and drilled a hole going down with a long bit. The idea was simple, wire goes through this hole from bottom to top where the socket sits.
But what happened was I drilled slightly crooked. The hole came out at a angle. So when I tried to push the wire through it kept getting stuck at one point. I had to wiggle and push and pull for like 20 minutes. My palms were red from the wire.
Then I sanded the outside and applied some walnut stain. The staining part actually turned out nice I wont lie. If you want to know how staining works properly you should read my staining guide for beginners because I made lots of staining mistakes too before figuring it out.
The final lamp looked a bit crooked, the socket wasnt perfectly centered and the cord was visible from one side. But when I put in a warm LED bulb and turned it on in the evening? It looked magical in the dim room. My wife actually said it looks nice with the lights off haha. I think that was a compliment but I am not sure.
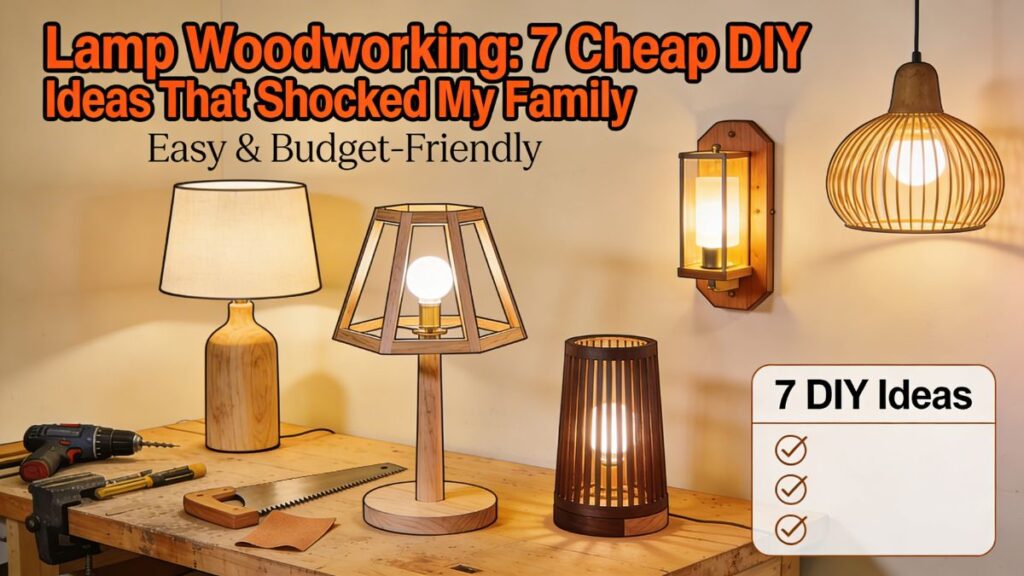
7 Wood Lamp Design Ideas That Wont Break Your Wallet
After that first project I got a bit obsessed with making more lamps. Over the past year I think I made like 12 or 13 wooden lamps. Some for my house, some as gifts, and few I sold to freinds. Here are the designs that worked best for beginners and cost almost nothing.
The Chunky Block Lamp
This is what I described above. Just a solid wood block with a hole drilled through it. Use pine or poplar because they are cheap and soft enough to work with hand tools. Total cost around 13 to 15 dollars with the lamp kit.
Stacked Pieces Table Lamp
Cut 5 or 6 square pieces of wood, each one slightly differant in size. Stack them biggest to smallest with the wire running through a center hole in each piece. Glue them together. This gives a really cool pyramid kind of look. I used scrap wood for this so it cost me only the lamp kit price.
The Branch Lamp (My Wifes Favourite)
Find a nice thick branch from your yard or a park. Let it dry out completely for at least a week. Dont skip the drying part I learned this the hard way when my branch cracked after three days sitting near the window. Attach a socket to the top and run the wire along the outside secured with small staples. Put a fabric shade on it and trust me it looks like those expensive rustic lamps from Pottery Barn.
Plywood Box With Cutouts
Take thin plywood maybe 1/4 inch thick. Cut four sides and make a box shape. Before assembling, drill or cut out patterns on the sides. Stars, circles, waves, whatever you like. When the bulb goes inside the light pours through those cutouts and makes beautful patterns on your walls at night. My daughter loves the one I made with moon and star cutouts for her room.
Floor Lamp Woodworking with Dowels
Okay so floor lamp woodworking sounds intimidating but its actually quite simple. Buy three 5 foot wooden dowels. They cost like 2 dollars each. Tie them together near the top in a tripod arrangement. Hang the socket from the meeting point. Thats literally it. A floor lamp that looks modern and minimal and costs under 20 dollars. I put one in my living room corner and guests always notice it first.
Driftwood Table Lamp
If you live near a beach this is free material. Pick up an intersting piece of driftwood, clean it real good with brush and water, let it dry in the sun for few days. Then mount it on a flat wood base and attach the lamp hardware. Every single driftwood lamp looks unique because no two pieces of driftwood are same. Its like natures artwork.
The Log Slice Lamp
Get a thick log slice maybe 3 to 4 inches thick and 8 to 10 inches in diameter. Drill a hole in the center for the lamp pipe. Sand the top and bottom flat. Add some clear coat to show off the rings and bark edges. This makes wooden lamps handmade that look like they belong in a cabin or lodge. People go crazy over this design on Instagram.
How I Wire the Lamp (The Scary Part That Isnt Actually Scary)
I know I know. Electricity plus wood sounds dangerous. And when I started lamp woodworking this was the part that made me most nervous. Like what if I wire it wrong and my house catches fire or something.
But honestly once you do it one time you realize its not rocket science at all.
A standard lamp kit comes with everything already. The socket, a cord with plug, and usually a switch built into the cord. All you really do is connect two wires to two screws on the socket. One wire to the gold screw one wire to the silver screw. Tighten them. Done.
But please please please do these things for safety. Always use LED bulbs because they produce very less heat compared to old bulbs. Old incandescent bulbs get so hot they can actually burn wood over time. Make sure wire connections are tight and covered with electrical tape. And never work on wiring while its plugged in. I know this sounds obvious but you would be suprised how many people forget this basic thing.
If electrical stuff really scares you, ask someone who knows about it to help. My father in law helped me with my first two lamps and after watching him do it I was able to do the rest on my own. No shame in asking for help na?
Quick Clarification About Wood Lamp Dermatology
This one is funny actually. When I first searched “wood lamp” on Google to find ideas, half the results were about dermatology and skin stuff. I was so confused for a minute.
So here is the deal. Wood lamp dermatology is a completly different thing. Its a UV light tool that skin doctors use to check skin problems. Its named after some physicist named Robert Wood. Has absolutely nothing to do with our woodworking lamps haha.
I am mentioning this because if you are new and searching online for lamp ideas you might see these medical results and think you are on the wrong page. Nope you are fine. Just add “DIY” or “woodworking” to your search and you will get what you need.
Where to Get Wooden Lamp Plans Free
Not everyone wants to design from scratch and thats perfectly fine yaar. When I was starting out I used free plans from the internet for my first couple of projects.
Websites like FreeWoodworkingPlan.com have a whole section just for lamp and lighting projects. You can find everthing from simple table lamp woodworking plans to more complex floor lamp designs there.
YouTube is another goldmine. I would literally watch a video, pause it, go do that step in my garage, come back, watch the next step. Took me 3 hours to finish a 15 minute tutorial video haha. But it worked and I learned a lot.
And then there are lamp woodworking kit options too. These kits come with pre cut wood pieces and all the hardware included. They cost between 25 to 45 dollars depending on the design. A bit pricey compared to buying raw wood yourself but if you are nervous about cutting and measuring on your own, kits are a solid starting point. Nothing wrong with using training wheels before you ride the bicycle right?
Mistakes I Made So You Can Laugh At Me (And Learn)
Let me share some of my greatest hits in the mistakes department. Because I genuinely believe you learn more from other peoples failures than from their successes.
One time I chose a piece of wood that had a hidden crack inside. Everything looked fine from outside but when I drilled the center hole the whole block split in half. I just stood there staring at two pieces of wood in my hands. My wife walked in and said “so we are making two lamps now?” Very funny.
Another time I was too impatient to let the stain dry fully. I put the lamp together and the stain transferred onto my white bedsheet. My wife did not find that funny at all. So always wait at least 24 hours for finish to dry. I am not saying this for fun I am saying this to save your marriage haha.
Oh and one more. I once used a bulb that was way too bright for a small bedside lamp. Like 100 watt equivalent. It lit up the whole room like a stadium. My daughter said her eyes were hurting. So match your bulb brightness to the lamp size. For a small table lamp 40 watt equivalent LED is more than enough.
The Actual Cost Breakdown (Because I Know You Want Numbers)
People ask me this all the time. Udit how much does it really cost to make a wooden lamp? So here you go.
The cheapest lamp I ever made cost me 11 dollars. It was the stacked pieces one using scrap wood I already had. I only needed to buy the lamp kit.
The most expensive one was the floor lamp woodworking project with the tripod design. That cost me about 22 dollars because I bought nice birch dowels and a slightly fancier socket with dimmer switch.
On average most of my table lamp woodworking projects fall in the 14 to 18 dollar range. Compare that to buying similar looking wooden lamps handmade from Etsy where sellers charge 60, 80, sometimes over 100 dollars.
The sandpaper, stain and glue are recurring costs but one purchase lasts for many many projects. So after your first lamp each additional lamp gets cheaper actually.
Some Final Thoughts From Me
Look I am gonna be real with you. Lamp woodworking is not going to be perfect from day one. Your first lamp will probably look a bit wonky. The drill hole might not be straight. The finish might have some drips. And thats completely completely fine.
What matters is that you started. You took a piece of wood and turned it into something that lights up your room every evening. Thats pretty amazing if you think about it.
I have made over a dozen lamps now and I still mess things up sometimes. But every lamp is a little better than the previous one. Thats the whole point of lamp woodworking or any woodworking really. You keep getting better slowly slowly.
So grab a piece of wood this weekend. Get a cheap lamp kit online. And just start. Dont overthink which wood to buy or what design to make. Just start with a simple block and see what happens. I promise you will enjoy it more than you expect.
And if your lamp comes out looking like a broken robot like my first one did, send me a picture. I will proudly put it up on easydiywood.com because thats what real DIY looks like.
Happy making freinds!
People Also Ask
What type of wood is best for making a lamp?
Pine and poplar are great for beginers because they are cheap, soft and easy to cut. For a fancier look, walnut or oak works really nice but costs more.
Is it safe to make a lamp out of wood?
Yes totally safe if you use LED bulbs and wire everything properly. LED bulbs dont heat up much so wood stays fine. Just make sure connections are tight and insulated.
How much does a DIY wooden lamp cost to make?
A basic one costs between 11 to 20 dollars depending on wood and lamp kit. Way cheaper than store bought wooden lamps which can go over 80 dollars easily.
What is a wood lamp in dermatology?
Wood lamp dermatology is a UV light tool used by skin doctors to check skin problems. Its completly different from woodworking lamps, just shares a similar name.