
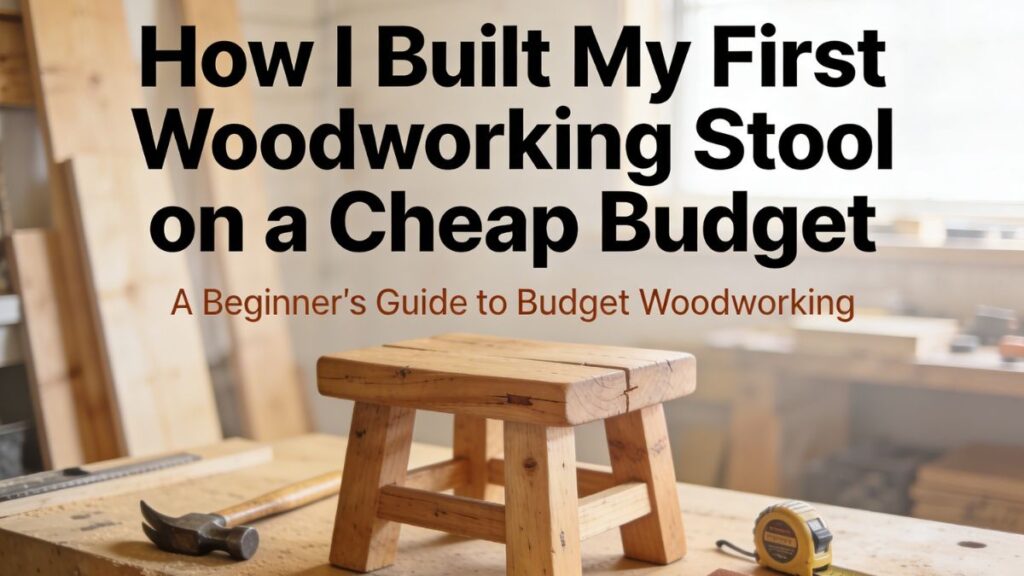
So ok wait let me start from the beginning. I was standing in my garage one evening, my back was killing me, and I had nowhere to sit. Like nothing. Not even a bucket. And I thought why am I not making a woodworking stool when I literally have wood laying around here. Sounds dumb right? But thats how this whole thing started.
Hey I am Udit Das, I write on easydiywood.com about beginner wood projects. Today I am gonna tell you how I built my first stool for like $15 or maybe less. I dont remember the exact amount honestly but it was somewhere around there. And you know what the best part is? You dont need to be good at this stuff. I wasnt. I am still learning if I am being real with you.
If you never touched a saw before, if you think woodworking is only for those YouTube guys with big shops and costly tools, nah man. Sit down and read this. Well actually you might not have a stool to sit on yet haha. Thats why you are here na?
Why I Think a Woodworking Stool is the Best First Project
Ok so people always ask me Udit what should I build first. And I used to give different answers every time. Sometimes I said try a box, sometimes a small shelf. But now? I always say build a stool first. Always.
And I will tell you why.
See when I built my first one, I learned so many things without even trying to learn. Like how to measure and cut straight. How legs need to be same same length otherwise everything goes wrong. How glue and screws work together to make things strong. All these things I picked up just from one small stool.
Also and this is the thing nobody tells you. A shop stool is something you will USE every single day. Its not like a photo frame that hangs on wall and you forget about it. Every time I go to my garage, I sit on that stool. Every time. Its been two years plus now.
And look if you learn stool making properly, you can move on to bigger stuff later. Like I went from stools to trying a woodworking chess board and even some furniture things. It all started from that one wobbly ugly stool haha.
The Wood and Stuff I Bought (Keep It Cheap Yaar)
Alright so lets talk about what you need to buy. And please dont go buying fancy wood ok. I made that mistake once. Went to the store and asked for oak. The guy told me the price and I almost fell down. No no no. We are keeping this cheap.
Just get pine 2×4 boards. Thats it. Pine is soft so its easy to cut even if your saw is not that sharp. And its like $3 to $5 per board. Thats nothing.
Here is my shopping list that I actually bought:
Three pine 2×4 boards, 8 feet long each
One box of 2.5 inch wood screws
Wood glue, small bottle is enough
Sandpaper in 120 and 220 grit
My bill came to around $12 to $15. I think it was $13 something but I lost the receipt so I am not 100 percent sure. But somewhere in that range only.
Oh and one more thing. This is important so listen. When you pick boards at the store, LOOK at them carefully. Pick up the board and look from one end to the other like you are looking through a pipe. If its straight, good take it home. If its bending or twisting even a little bit, put it back. I brought home twisted boards once and trust me the headache is not worth it. You cant make straight cuts on bent wood. Simple as that.
What Tools I Used (Not Many I Promise)
So every time I see woodworking stool plans pdf online, they list like 15 tools minimum. And I always think who has all that stuff? Not me thats for sure. Atleast not when I was starting out.
When I made my first workshop stool, this is all I had:
A circular saw that I borrowed from my freind actually
A drill, the basic one with a charger
Measuring tape
Pencil
Speed square, you know that triangle metal thing
Two clamps
Thats literally everything. No miter saw, no table saw, no pocket hole jig, no router, nothing nothing. And my stool still came out fine. Not perfect ya but it holds my weight and I am not a small guy if you know what I mean haha.
If you want to know about screws and which ones to use for what, I wrote about it in my fastener guide for beginners post. That might help you pick the right screws.
But main point is this. Dont think you need expensive tools to start. You really dont. I have seen people make beautiful stools with just a handsaw and some nails. So whatever you got at home, just start with that.
How I Actually Built My Woodworking Stool (The Real Steps)
Ok here comes the actual making part. I am going to explain exactly what I did. No need to go looking for wooden stool plans PDF free download or anything. Just follow what I say.
First thing, cutting all the pieces
So from the three boards I cut these:
Four legs, each 17 inches long. I know 17 sounds weird but this height works really good for a shop stool where you are sitting at a work bench. If you want taller, make it 20 or 22 inches. Your choice.
Four rails, each 12 inches long. These are the pieces that connect legs to each other and make the frame strong.
Five seat slats, each 14 inches long. These go on top and become the part you sit on.
Cutting was scary for me the first time I wont lie. The saw was loud, wood was shaking, I was sweating. But after the first two cuts I got used to it. You will too. Just go slow and let the saw do its thing.
Second thing, making the side frames
So here is what I did and I might not explain this perfectly but try to follow ok. Take two legs and put them standing up. Now take one rail and screw it at the top, connecting both legs. The top of the rail should be matching with the top of the legs. Like same same level.
Then take another rail and screw it near the bottom, like 4 inches up from the ground. This bottom rail stops the legs from moving apart.
Put two screws at each joint. And PLEASE put glue before the screws. I cannot say this enough. The glue makes it so strong you wont believe. Without glue its ok but with glue its like solid rock.
Now do this same thing again with the other two legs. So now you have two frames that look like the letter H sort of.
Third thing, joining both frames
Take the two H frames and stand them up. Now connect them with rails on the front side and back side. Same way, two screws and glue at every joint.
Once you do this, step back and look at it. You should see something that looks like a small table without a top. Give it a good shake with your hands. Does it feel tight? Good. Is it wobbling? Then something is not cut straight and you need to check.
Last thing, putting the seat on top
This part is easy and honestly its the most fun. Lay your five slats across the top of the frame. Leave a small gap between each one, like quarter inch maybe. The gap looks good and also lets dust fall through if you using it as a workshop stool.
Two screws on each end of every slat. Plus glue of course. And boom thats it. You just built a woodworking stool with your own hands. How does that feel? Pretty amazing right? I remember I just sat there on it for like 10 minutes after finishing, just smiling. My wife thought I was going crazy haha.
The Dumb Mistakes I Made (Learn from My Pain)
Oh man where do I even start. My first stool was a mess. I mean it worked, it held my weight, but it had so many problems.
Mistake number one. I cut one leg half inch shorter than the rest. HALF INCH. And I didnt even notice until I put it on the floor and it started dancing like those wobbly restaurant tables. Why? Because I measured only once. The old saying measure twice cut once exists for a reason yaar. I learned that the hard way.
Mistake number two. I used drywall screws because they were cheaper. Bad bad bad idea. Drywall screws are thin and weak. One snapped right inside the wood while I was driving it in. I couldnt get it out, couldnt put another screw next to it. Had to cut a whole new piece. Just spend the extra dollar and buy proper wood screws. Please.
Mistake number three. I skipped sanding because I was too excited. Sat on the stool next day in shorts. Got a tiny wood piece stuck in the back of my leg. Very painful and very avoidable. Now I sand everything like my life depends on it haha. First with 120 grit to remove rough stuff, then 220 grit to make it baby smooth.
You know what though? All these goofups teached me things that no YouTube video ever could. So if you mess up your first try, dont feel bad. Its part of the learning.
Making Your Stool Look Nice (The Finishing Part)
This is the part most simple wooden stool designs guides online totally skip. They show you how to build it and then bye bye good luck. But what about making it LOOK nice? Nobody talks about that.
After your stool is built, sand the whole thing one more time. Every corner, every edge, every flat part. Run your hand on it. If your skin catches on something, sand more.
Then you have a few ways to go:
Leave it bare. Just put a coat of clear coat on it and done. Pine has a nice light colour on its own. The clear coat keeps water and dirt from messing it up.
Stain it darker. I tried dark walnut stain on my second stool and OH MY GOD it looked so good. Like it looked like a $50 store stool. My neighbour came over and asked where I bought it. When I said I made it, his face was priceless.
Paint it whatever colour you want. My wife asked for a white stool for near the kitchen counter. I used chalk paint, two coats, and it came out beautiful. She put a small plant on it. Now she tells everyone I made that. Feels good man.
One thing though and I am speaking from real life here. Let the finish dry FULLY before using. I sat on mine before the clear coat dried once. My shorts stuck to it a little and left marks on the seat. I had to sand it and do the whole coat again. The Family Handyman says wait 24 to 48 hours and honestly just do that. Be patient for once in your life. I know its hard but do it.
Other Simple Wooden Stool Designs Worth Trying
Once you make one stool you will want to make five more. I am telling you its like eating chips, you cant stop at one haha. Here are some other types I have played around with:
Round seat stool Instead of slats on top you use one solid round piece. You can cut it with a jigsaw or ask the store guy to cut a circle for you. Looks very clean and modern kind of.
Folding workshop stool This one is a bit more tricky but still ok for beginners I think. You add a folding thing in middle so the stool goes flat when not in use. Great if your garage or work space is small. Mine is tiny so I need every inch of space.
Tall stool for kitchen counter Same idea same design just make the legs longer, like 28 to 30 inches. And add one rail about 12 inches from floor as a foot rest. Your feet need somewhere to go when you sit up high na?
Leftover wood stool This is my favourite and I will tell you why. You take whatever random wood pieces you have laying around from old projects and just build with that. Every stool looks completely different. Each one is one of a kind. And cost? Basically free.
Popular Woodworking says using leftover wood is great for beginners to practice without the worry of wasting good wood. I agree hundred percent. Some of my best looking stools came from scraps that I was about to throw away.
Lets Talk Money (The Real Cost)
Ok so I know money matters, specially when you are just starting and you dont know if this hobby is for you. Why spend $100 on something you might not enjoy right?
So here is what it really costs to build one stool:
Pine boards: $9 to $15
Screws and glue: $5 to $8 but this will last you like 5 or 6 projects easily
Sandpaper: $3 to $5
Stain or paint if you want: $8 to $12
Total for first stool is maybe $15 to $20 if you starting from zero. After that second stool third stool all cheaper because you already have the screws glue sandpaper all that.
Now go look at wooden stools at any furniture store. $30 minimum for a bad one. $60 to $80 for a decent one. And most of those are made of pressed wood that falls apart in one year. Your handmade stool? Real pine wood, real screws, real glue. It will last so long.
Like I said my first stool is still going strong after two years of daily use. Not one loose screw, not one wobble. That makes me proud every time I think about it.
Wait Can You Actually Sell These?
Ha so this is a fun topic. My freind asked me one day Udit why dont you sell stools. And I was like who will buy my stools man. But then I put three on Facebook Marketplace just for fun.
All three sold in one week. ONE WEEK. My neighbour bought them for his outdoor area, $35 each. The store sells same looking ones for $60 something. So he saved money and I made profit. Win win.
People on Etsy sell handmade stools all day long. That rough handmade look? People love it. They pay good money for it. So ya if you want to make some side cash from this hobby, woodworking stools are honestly a great thing to start selling. Low cost to make, not hard to build, and people always need somewhere to sit.
Please Read the Safety Part Dont Skip
I know I know. Safety is boring. But listen to me for two minutes.
I got a cut on my finger on my second build. Small cut, not deep, but there was blood and I got scared. And it happened because I was being lazy and not paying attention. So please:
Wear safety glasses every time you cut. Wood chips go everywhere and your eyes are not replaceable.
Put on ear covers when using power tools. That circular saw is louder than you think.
Clamp your wood down before cutting. Both hands on the saw. Not one hand holding wood and one on saw. Thats how bad things happen.
Keep fingers far from the blade. I know this sounds like common sense but trust me when you are focused on the cut line you forget where your fingers are.
If little kids are around lock your tools away. My son once grabbed my drill when I wasnt looking. My heart stopped for a second. Nothing happened but after that I bought a lock for my tool box.
To Wrap It All Up
So ya thats my whole story of building a woodworking stool from nothing. $15, few basic tools, couple hours of work and one very sore back the next morning haha. But that little stool changed everything for me. It gave me the feeling that hey I can actually MAKE things. Real things. Things people can use.
If you are sitting there reading this and thinking should I try it or not, let me tell you just go for it. Get the wood this weekend. Dont plan too much dont overthink it. Your first woodworking stool will probably not be perfect and thats completely fine. Mine wasnt. Mine was ugly and wobbly and I loved every bit of it.
This hobby changed my life and I am not even joking. What started as me needing a place to sit in my garage turned into this whole blog and all these projects and meeting so many cool people.
For more beginner stuff and easy project ideas keep checking easydiywood.com. I put up new things every week and I try to keep everything simple and budget freindly because thats what we are all about here.
Now go build something. And when you do, send me a picture ya? I want to see your first stool.
Take care and happy building!
FAQs About Building a Woodworking Stool
What wood should I use for my first stool?
Pine 2x4s from any hardware store. Its soft, easy to work with, and costs only $3 to $5 per board. Best choice for beginners.
How tall should a workshop stool be?
For working at a bench, 17 to 24 inches is good. For kitchen counter height, go with around 24 to 28 inches.
Can I make a stool without a miter saw?
Ya totally. A circular saw works fine for straight cuts. Even a handsaw will do the job if you go slow and steady.
How much will my first DIY stool cost?
Around $12 to $20 if you are buying everything new. After your first build it gets cheaper because you have leftover screws and glue.
Where can I find woodworking stool plans PDF for free?
Lots of websites give them for free but honestly for a basic stool you dont need plans. Just follow a simple step by step guide like this one.
My stool is wobbling what do I do?
Check if all four legs are exactly the same length. If one is longer sand it down. Also make sure you used glue at every joint for extra hold.
What finish works best on a wooden stool?
For indoor use try a clear coat or wood stain. For outdoor stools use a weather safe wood protector so rain and sun dont damage it.

Pingback: Woodworking Staining Made Simple: My Honest Budget Guide
Pingback: Brackets Woodworking Guide for Beginners That Actually Works
Pingback: Flush Meaning Woodwork: Simple Guide For Beginners
Pingback: Poplar Woodworking: Honest Budget Guide for Beginners 2026