Hey freinds, its me Udit from easydiywood.com and today I wanna talk about something which I made last month and honestly I am still so happy about it. A woodworking drying rack. Yep, sounds simple right? But trust me, when I first started thinking about making one, I had no idea where to begin. I searched everywhere, watched like 20 videos, got confused, and then finally just picked up some wood and started doing it myself. And you know what, it turned out pretty good actually.
So if you are a complete beginner like I was and you want to make your own woodworking drying rack without spending too much money, you are in the right place my freind. I am going to share everthing I learned, all the mistakes I made, and how you can avoid them.
Lets get into it yeah?
Why I Even Decided to Build a Woodworking Drying Rack
Ok so heres the thing. I used to have this cheap plastic drying rack from the store. You know the type right? The one that wobbles everytime you put a wet towel on it and then one day it just collapses on you. That happened to me twice. TWICE. And I was done with it.
I started looking at wooden clothes drying rack options on Amazon and IKEA. The wooden clothes drying rack IKEA had some decent looking options but honestly the price was not fitting in my budget. And the quality wasnt that great for what they charging.
Thats when I thought wait, I do woodworking as a hobby anyway. Why am I even buying this? I should just build one myself. And thats how this whole journey started.
What Makes Wood Better Than Metal or Plastic Racks
Before I tell you how to build, let me share why I think a woodworking drying rack is way better than those metal or plastic ones you see everywhere.
First thing, wood is stronger. Like really strong. A good pine or cedar frame can hold way more weight than those thin metal rods which bend after few months.
Second thing, wood looks beautiful in your home. It gives that warm natural feeling which plastic just cant give you. My wife actually said this is the nicest thing in our laundry room now. Can you believe that?
Third thing and this one is important for me, wood is eco freindly. We all know plastic is bad for enviroment. When your wooden drying rack eventually gets old after many many years, it goes back to nature. No harm done.
And fourth thing, you can customise it however you want. Want it bigger? Make it bigger. Want it foldable? You can do that too. With store bought racks you are stuck with whatever size they give you.
Types of Woodworking Drying Rack You Can Build
Now this is something most blogs dont tell you properly. There are actually different types of woodworking drying rack designs and each one is good for different situations. Let me explain.
Standing Foldable Type
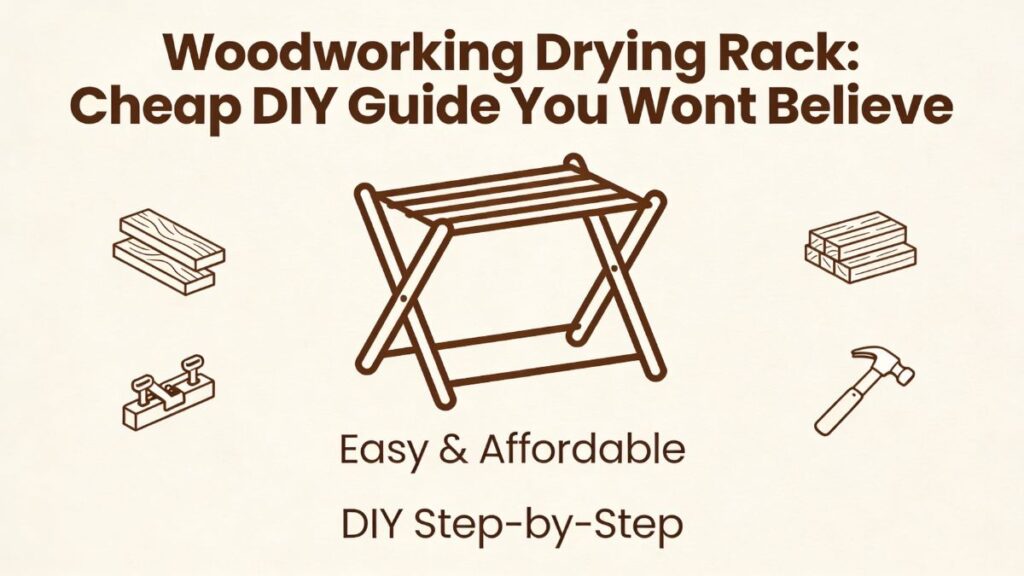
This is the most common one. You know, the one that opens up like a tent shape with two frames connected at the top with hinges. A wood clothes drying rack foldable design is perfect if you dont have wall space or if you want to move it around. You can fold it flat and store behind a door when not using.
I made this type first because it seemed the easiest. And it really is.
Wall Mounted Type
A wood clothes drying rack wall mounted design saves so much floor space. Basically you mount a wooden frame on the wall and it folds down when you need to use it. When not using, it sits flat against wall like a picture frame almost.
This is great for small laundry rooms or apartments. If you live in a small space, I would highly recommend this type of woodworking drying rack.
Old Fashioned Hanging Style
An old fashioned wooden clothes drying rack that hangs from the ceiling using pulleys. This is actually a very traditional British design and it works amazingly well. You lower it down, put your clothes, and pull it back up near the ceiling where the warm air naturally dries everything faster.
I havent made this one yet but its on my list for sure. Looks so cool in the kitchen too for drying herbs and stuff.
Simple Dowel Standing Rack
This is the simplest woodworking drying rack you can make. Just two vertical boards with holes drilled in them and dowel rods going across. Thats it. Takes maybe 2 hours to build and costs almost nothing. Perfect first project for any beginner.
Tools You Need (Dont Worry Its Not Much)
Ok so heres the tool list and I promise you dont need anything fancy. When I started woodworking, I was scared that I need expensive tools but no. For a basic woodworking drying rack you need these things only.
A hand saw or if you have a circular saw thats even better. A drill with some basic drill bits. A measuring tape obviously. A pencil for marking. Some sandpaper, maybe 120 grit and 220 grit. A speed square if you have one. And some clamps, even 2 or 3 small ones will work.
Thats literally it. If you want to learn more about basic woodworking tools, I wrote a detailed guide on woodwork machines for beginners which you should definately check out.
No table saw needed. No fancy jig needed. Just basic stuff that most people already have at home or can borrow from a freind or neighbour.
What Wood Should You Use for Your Woodworking Drying Rack
This is a question I get asked so much. And honestly the answer is simpler than you think.
For a budget woodworking drying rack, pine is the best choice. Its cheap, easy to cut, easy to sand, and available at every hardware store. You can get pine boards for very less money and they work perfectly fine for a drying rack.
If you want something slightly better, go for cedar. Cedar is naturally resistant to moisture which is really good because your rack will have wet clothes on it. Cedar also smells amazing, like really nice. But it costs a bit more than pine.
Now some people ask about oak or maple. Look, those are great woods but for a beginner project like a woodworking drying rack, they are too expensive and hard to work with. Save those for later projects when you have more experience.
For the dowel rods where clothes actually hang, I would suggest using hardwood dowels. They are smoother and stronger. You can get these from any hardware store very easily. Half inch or three quarter inch dowels work perfectly.
My Budget Breakdown: How Much I Spent
Alright so lets talk money because thats what everyone wants to know right? How much does a woodworking drying rack actually cost to build?
Here is what I spent on my foldable standing rack:
Pine 1×2 boards, 3 pieces of 8 foot length, cost me around 9 dollars total. Then I bought 10 hardwood dowel rods of half inch diameter and 30 inches long, that was about 12 dollars. Three small hinges cost 4 dollars. Some wood glue was 5 dollars but I already had it. Sandpaper I already had. Total came to about 25 to 30 dollars.
Compare that to buying a decent wooden drying rack from a store which costs anywhere from 60 to 250 dollars. The best woodworking drying rack you can make yourself costs fraction of that price. And it will be stronger and look better too because you made it with your own hands.
If you want woodworking drying rack plans for free, honestly you dont really need fancy blueprints for this. The design is so simple. But I will explain the steps below so clearly that you wont need any plans at all.
Step by Step: Building a Foldable Woodworking Drying Rack
Ok here we go. This is the actual building part and I will try to explain it as simply as possible. Remember I am talking to complete beginners here so no complicated stuff.
Step 1: Cut Your Wood Pieces
Take your three 8 foot pine 1×2 boards. Cut two of them exactly in half. That gives you four pieces of 48 inches each. These will be the four legs of your woodworking drying rack.
From the third board cut two pieces of 30 inches. These are the top pieces that connect each frame.
Then cut your dowel rods. You need 10 dowels at 30 inches long. If they come longer just cut them down.
Step 2: Cut the Angle on the Legs
On the bottom of each leg, mark a 15 degree angle and cut it. This angle helps the rack stand stable on the floor without wobbling. Use a speed square to mark the angle. If you dont have a speed square, dont worry too much about it. Even a small angle cut by eye will work ok.
Step 3: Drill Holes for the Dowels
Now take two legs and clamp them together side by side. This way both pieces get holes in the exact same spots which is very important.
Mark five evenly spaced points along the length of the legs. Starting from about 2 and half inches from the top, then every 8 inches down. These are where your dowel holes go.
Drill holes using a drill bit that matches your dowel size. Go halfway through the wood, not all the way. Put tape on your drill bit to mark the depth so you dont go too deep. This is a little trick I learned.
Do the same thing for the other pair of legs.
Step 4: Put the Dowels In
Put some wood glue into each hole. Then push your 30 inch dowels into the holes on one leg. Line up the other leg and push it onto the other ends of the dowels. Now you have one frame of your woodworking drying rack ready.
Wipe off any extra glue that squeezes out. Do the same for the second frame.
Step 5: Add the Top Pieces
Take your 30 inch top pieces and attach one to the top of each frame using screws or nails. Just two screws on each side is enough. Make sure everything is straight.
Step 6: Connect With Hinges
Now lay both frames next to each other with the top pieces touching. Place three small hinges along the seam where the two top pieces meet. Screw them in. Now your woodworking drying rack should open and close like a book.
Step 7: Add a Stopper
This is something many people forget and I forgot it too on my first try. You need something to stop the rack from opening too wide and falling flat.
Drill a small hole through each pair of legs about halfway down. Thread a piece of strong string or cord through the holes and tie it. This string limits how far the legs can spread apart. I keep mine at about 30 inches apart at the bottom.
Step 8: Sand Everything Smooth
This is really important especially for a woodworking drying rack. You are going to put wet clothes on this thing so you dont want any rough spots or splinters catching on your nice shirts.
Sand everything with 120 grit first to smooth out rough spots. Then go over with 220 grit for a nice smooth finish. Pay special attention to the dowel rods where clothes will actually sit.
If you wanna learn more about finishing your projects nicely, check out my staining guide for beginners. It covers everything you need to know about making wood look beautiful.
Step 9: Apply a Finish (Optional but Recommended)
Since your woodworking drying rack will be exposed to moisture from wet clothes, I would say apply a simple clear sealant. Nothing fancy, just a basic polyurethane or even beeswax finish works fine. Let it dry completely before using the rack.
Dont use dark stains or colored paints unless you are sure they wont transfer onto wet clothes. Thats a mistake I almost made. Imagine putting your white shirt on a freshly stained rack. Disaster right?
Woodworking Drying Rack for Your Workshop Too
Hey wait, I wanna mention something else also. A woodworking drying rack isnt only for clothes. If you do woodworking projects then you know the struggle of finding space to dry your freshly painted or finished pieces. A shop woodworking drying rack is super useful for this.
You can make a bigger version with wider spacing between the dowels for drying cabinet doors, shelves, or any flat piece you just finished. Some people even use metal conduit pipes instead of wooden dowels for the workshop version because they are stronger and smoother.
I actually plan to build a workshop version of my woodworking drying rack next month. I will update this post when its done so maybe bookmark this page yeah?
Wall Mounted Woodworking Drying Rack: Quick Overview
If you are interested in the wall mounted type of woodworking drying rack, the basic idea is similar but with some differences.
You build a frame with dowels inside it, same as the foldable version. But instead of legs, you attach the frame to a backboard using hinges. The backboard gets screwed into the wall and the frame folds down when you need it.
You need to make sure you screw into wall studs for strength because wet clothes are heavy. Use a stud finder if you have one. If not, knock on the wall and listen for the solid sound versus hollow sound.
A wall mounted woodworking drying rack is honestly my favourite type because it takes zero floor space. When folded up it looks like a simple wooden panel on the wall. Very clean, very neat.
According to the Family Handyman website, wall mounted racks are one of the most popular space saving solutions for small laundry rooms. And I totally agree with that.
Common Mistakes Beginners Make
Let me share some mistakes I made so you dont repeat them. Learn from my stupidity yeah?
First mistake, I didnt clamp my leg pieces together when drilling holes. Result? The holes on left leg didnt line up with holes on right leg. My dowels were going in crooked. Had to redo it. Always clamp and drill together.
Second mistake, I didnt sand the dowels properly. Thought they were smooth enough from the store. They were not. My wifes favorite top got a small snag on it. She was NOT happy. Sand everything, even if it looks smooth already.
Third mistake, I used thin dowels at first. Quarter inch ones. They were too thin and started bending when I put heavy wet jeans on them. Switch to half inch minimum. Three quarter inch is even better if your woodworking drying rack is going to hold heavy items.
Fourth mistake, not sealing the wood. After few weeks of use, I noticed some water marks on the dowels. A simple coat of sealant would have prevented that completely.
Woodworking Drying Rack vs Store Bought: Honest Comparison
Look, I am not going to say DIY is always better for everyone. Some people dont have time to build things and thats totally fine. A woodworking drying rack for sale at stores can be a good option if you need something right away.
But heres the honest truth. Most cheap store bought drying racks under 50 dollars are garbage. They break within months. The wooden clothes drying rack IKEA models look nice but they are often made from compressed wood, not solid wood. Big difference in durability.
If you do buy one, the best woodworking drying rack options from stores are usually the Amish made ones. They use solid hardwood and traditional joinery techniques. But those cost 150 to 300 dollars or more.
Or you can build your own woodworking drying rack for under 30 dollars and get something stronger, bigger, and custom sized for your space. The Wood Magazine website has some great resources for woodworking inspiration too if you want to explore more designs.
The choice is yours but for me personally, building my own woodworking drying rack was one of the most satisfying little projects I have ever done.
Tips to Make Your Woodworking Drying Rack Last Longer
Here are some quick tips from my experience that will help your woodworking drying rack survive for many years.
Dont leave it outside in rain. Even cedar will eventually rot if constantly exposed to weather. If you use it outdoors, bring it inside after or keep under a covered area.
Tighten the hinge screws every few months. Wood shrinks and expands with weather changes so screws can get loose over time. Just take a screwdriver and check them.
If you see any rough spots developing on the dowels, give them a quick sand. Takes 2 minutes and prevents clothes from getting damaged.
Apply a fresh coat of sealant once a year. Just one coat, takes 15 minutes. Your woodworking drying rack will look brand new again.
And most importantly, dont overload it. I know its tempting to put all your washing on there at once but wet clothes are heavy. Spread the load evenly across all the dowels.
My Final Thoughts on Building a Woodworking Drying Rack
So yeah, thats basically everthing I know about making a woodworking drying rack at home. I truly believe this is one of the best beginner projects anyone can start with. Its useful, its cheap, its satisfying to make, and you will use it almost every day.
When I finished my first woodworking drying rack and put it in the laundry room, my wife actually smiled and said it looks proffesional. Coming from her, thats a big deal trust me. That feeling of creating something useful with your own hands, nothing can beat that feeling.
If you are a complete beginner, dont overthink it. Just go to the hardware store, grab some pine boards and dowels, and start building. Your first woodworking drying rack might not be perfect and thats absolutely ok. Mine wasnt perfect either. But it works great and I am proud of it.
What about you? Have you tried building a woodworking drying rack before? Or is this going to be your first project? Let me know in the comments, I read every single one.
Happy building freinds!
FAQ
What is the best wood for a woodworking drying rack?
Pine and cedar are the best choices for beginners because they are cheap, easy to work with, and available at any hardware store near you.
How much does it cost to build a woodworking drying rack at home?
You can build a good quality woodworking drying rack for about 25 to 35 dollars using pine boards and hardwood dowels from any local store.
Can I make a woodworking drying rack without power tools?
Yes absolutely, you only need a hand saw, a drill, sandpaper and some basic supplies. No power tools are required for this simple project.
How long does a homemade woodworking drying rack last?
If you seal the wood properly and maintain it once a year, your woodworking drying rack can easily last 10 to 15 years or even more with good care.