Ok so let me tell you something. When I first started doing woodworking in my small garage, my tools were literally just sitting on the floor. Like everywhere. I was tripping over stuff, loosing screws, and honestly it was a mess. Then one day I discoverd woodworking carts and oh man, it changed everything for me. If you are a complete beginner like I was, this guide is going to help you a lot. Trust me on this one.
My name is Udit Das and I run easydiywood.com where I share simple wood projects for people who are just starting out. Today I want to talk about how you can build your own woodworking carts without spending too much money. Because I know how it feels when you have a small budget and big dreams for your workshop yeah.
Why You Even Need Woodworking Carts in Your Shop
So here is the thing. Many beginers think they dont need a cart. I thought the same. But let me ask you something. Have you ever tried moving a heavy table saw from one corner to another? Its not fun at all. Your back hurts, you scratch the floor, and sometimes you just give up and leave it there.
Woodworking carts solve this problem so nicely. You put your tool on a cart with wheels and boom, you can move it anywhere you want. When you done working, just roll it back to the corner. Simple as that.
And its not just about moving tools around. A good shop cart gives you extra storage underneath. You can keep your blades, screws, clamps and all that stuff right there where you need them. No more walking back and forth to find things.
Types of Woodworking Carts You Can Build
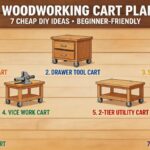
Ok so before you go and start cutting wood, let me tell you about different types of woodworking carts that exist. Because depending on what you need, you should pick the right one.
General Shop Cart
This is like your basic everyday cart. Its got a flat top, some shelves below, and wheels at the bottom. You can use it for assembly work, putting your tools on it, or even as a extra work surface. Most free shop cart plans you find online are for this type only.
Table Saw Cart DIY
This one is specially made to hold your table saw. The height matters a lot here because you want the saw deck to be at comfortable level for cutting. When I made my first rolling table saw cart, I actually messed up the height and had to redo it. So measure your saw first ok.
A table saw cart DIY project is probably one of the most usefull things you can build for your workshop. Because table saws are heavy and you definetly dont want to lift them every time.
Router Table Cart
Router table cart plans are great if you want to combine your router with a mobile station. Some people even make a combo where the table saw and router share the same cart. That saves a lot of space specially if you have a tiny garage like me.
Panel Lifting Cart
Now this is something not many beginers know about. A panel lifting cart helps you move big sheets of plywood around your shop. If you ever tried to carry a full 4×8 sheet of plywood alone, you know how awkward and heavy it is. This cart type makes that job so much easier.
Lumber Storage Cart
This one is for keeping your wood organised. You know how scrap wood just keeps piling up? A lumber cart with dividers keeps everything neat and you can actually find what you need when you need it.
My First Woodworking Cart Build Story
Let me share my own experience because I think it will help you understand better. So about two years back, I was watching videos on youtube about workshop setup and I saw these beautiful woodworking carts that people had built. They looked so proffesional and clean.
But the problem was, most of those carts cost like 200 or 300 dollars in materials alone. And I was like, no way I am spending that much on a cart when I still need to buy actual tools right.
So what I did was, I went to the hardware store and bought one sheet of half inch plywood. Just one sheet. And some caster wheels from online that were pretty cheap. I think I spent around 40 to 50 dollars total on everything.
I didnt even have proper woodworking carts plans at that time. I just drew some rough measurements on a piece of paper and started cutting. Was it perfect? Absolutely not. The shelves were slightly uneven, one wheel was making a squeaky noise, and the whole thing looked kind of ugly honestly.
But you know what? It worked. And thats all that matters when you are starting out. That ugly little cart held my drill, my sander, and a bunch of screws and it rolled around my garage perfectly fine. I still have it actually.
Free Shop Cart Plans and Where to Find Them
Now if you dont want to do what I did and just wing it, there are plenty of free shop cart plans available. Let me tell you about few options.
Ana White has some really nice beginner freindly plans for rolling wood carts. Her plans come with shopping lists and cut lists which makes everything super easy. Woodsmith Plans also has some great options for carts and stands if you want something more detailed.
For free table saw cart plans, you can find tons of options on woodworking blogs and forums. The important thing is to check the dimensions match your specific saw model. Dont assume all table saws are same size because they are not.
When looking at woodworking carts plans, always check these things:
Does it have a material list? How much will the materials cost? What tools do you need to build it? Is it actually beginner level or they just say its beginner level?
Because I have seen some plans that say easy beginner project and then they ask you to make dovetail joints and stuff. Thats not beginner ok thats intermediate at least.
Budget Friendly Materials for Your Woodworking Carts
Alright so lets talk money because thats what matters most for us beginers right. Here is a rough breakdown of what you need and what it might cost.
Plywood is your best freind when building woodworking carts. One sheet of three quarter inch plywood costs around 30 to 50 dollars depending on where you live in USA. Half inch plywood is even cheaper.
For the frame, you can use 2×4 lumber which is super affordable. A pack of basic caster wheels will run you about 15 to 25 dollars for four pieces. Get the locking type because you dont want your cart rolling away while you are using the table saw on it. That would be dangereous.
Screws and wood glue maybe another 10 to 15 dollars. So total, you are looking at roughly 60 to 90 dollars for a really solid woodworking cart. Compare that to buying a ready made one which can cost 200 dollars or more. See the difference?
If you want to save even more money, use scrap wood that you already have. I have built woodworking carts from leftover pieces of previous projects and it works just fine. Its not going to win any beauty contest but it gets the job done.
How to Build a Simple Rolling Table Saw Cart
Ok let me walk you through how I build my rolling table saw cart because this is probably the most popular cart that beginers want. I will keep it simple dont worry.
Step 1: Measure Your Table Saw
First thing first, measure the base of your table saw. Write down the length, width, and the height of the deck. This deck height is important because if you plan to use another cart as outfeed table, both surfaces need to be at same height. Otherwise your wood will get stuck and thats annoying.
Step 2: Cut the Base Frame
Using 2×4 lumber, cut pieces to make a rectangular frame that is slightly bigger than your saw base. Maybe 3 to 4 inches extra on each side. This gives you some breathing room and also space for accessories.
Step 3: Add Plywood Top and Shelves
Cut a piece of plywood for the top. Then add one or two shelves below for storage. You can use pocket hole screws or just regular wood screws for this. If you are new to pocket holes, check out our guide on woodwork machines for beginners which covers basic tools you need.
Step 4: Attach the Wheels
Flip the whole thing upside down and screw on four caster wheels. Make sure to use heavy duty ones that can handle the weight of your saw. I would recomend at least 3 inch wheels, but 4 or 5 inch ones are even better because they roll smoother on rough garage floors.
Step 5: Place Your Saw and Test
Put your table saw on top and roll it around. Check if its stable and doesnt wobble too much. If it does, you might need to add some bracing or tighten the screws.
And thats basically it. Your table saw cart DIY project is done. See it wasnt that hard was it?
Rockler Panel Cart vs DIY Options
So you might have heard about the Rockler Panel Cart. Its a pretty popular product among woodworkers for moving big sheets of plywood and panels around. Its well made and does the job nicely.
But here is the thing. It costs a decent amount of money. And if you are on a tight budget like most beginers, spending that much on just a panel cart might not make sense.
What I would suggest is, if you handle big sheets of plywood regularly, then yes a panel lifting cart is worth it. You can either buy the Rockler one or build your own version. There are DIY designs out there that use simple materials and work almost as good.
But if you only occasionally deal with big panels, just ask a freind to help you carry them. Save that money for other tools or materials instead. Thats what I do most of the time honestly.
Common Mistakes Beginners Make with Woodworking Carts
Let me share some mistakes I have made and seen others make so you can avoid them.
Making it too heavy. I once built a cart from solid hardwood and thick MDF. It was so heavy that even with wheels it was hard to push around. Stick with plywood and 2x4s, they are light and strong enough.
Wrong wheel size. Small wheels look cute but they get stuck on everything. Every little piece of sawdust or extension cord on the floor becomes a obstacle. Go with bigger wheels trust me.
Not adding locks on wheels. This is a safety issue ok. If your cart can roll freely while you are using the table saw or router, thats a accident waiting to happen. Always get locking casters.
Forgetting about height. Especially for table saw carts and router table cart plans, the height needs to be right. Too tall and your arms will hurt, too short and your back will hurt. Standard working height is around 34 to 36 inches including the wheels.
No storage underneath. If you are building a cart anyway, why not add some shelves or drawers? Even a simple open shelf can hold so much stuff. Dont waste that space.
How to Make Woodworking Carts More Useful
Here are some tips I have picked up over the years that make your woodworking carts even better.
Add a power strip to the side of your cart. This way you only need one extension cord going to the wall and all your tools on the cart can plug into the strip. No more tangled cords everywhere.
Put some pegboard on one side for hanging small tools. Wrenches, screwdrivers, push sticks, whatever you use often. Having them right there saves so much time.
If you are making a general purpose cart, make the top flat and smooth. Sand it nice and maybe put a coat of polyurethane on it. This way you can use it as a glue up surface or assembly table too. One cart doing many jobs is the best kind of cart.
For more ideas on organizing your workspace, you might want to read about brackets for woodworking which can help you add extra storage to your carts and walls.
Combo Carts: Table Saw and Router Together
Ok this is something I am really excited about because I recently built a combo cart that holds both my table saw and router table. And honestly it is the the best thing I have done for my small workshop.
The idea is simple. One side of the cart holds the table saw and the other side has a router mounted from below with a flat top surface acting as the router table. Some designs even share the same fence between both tools which is pretty smart.
Router table cart plans for combo setups are a bit more advanced but still doable for beginers if you follow the steps carefully. The key thing is making sure both surfaces are perfectly flat and at the same height. Use a long level to check this.
This kind of combo cart is perfect for small garages because instead of having two separate stations, you have everything in one compact unit. And since its on wheels, you can roll it outside when the weather is nice and work in the fresh air. I do that all the time during spring and fall.
You can check out sites like Family Handyman for more inspiration on workshop organization and cart building ideas.
What Size Caster Wheels Should You Use
People ask me this question a lot so let me cover it quickly. For most woodworking carts, 3 inch to 5 inch caster wheels work great. Here is a simple guide.
For light duty carts like a scrap wood organiser or small tool cart, 3 inch wheels are fine. For medium duty like a general shop cart, go with 4 inch. For heavy stuff like a table saw cart or a cart carrying multiple tools, use 5 inch wheels.
Always check the weight rating on the casters. Add up the weight of the cart itself plus everything you plan to put on it, then make sure the total rating of all four wheels is more than that. I usually get wheels rated for at least double what I need, just to be safe.
And please get locking ones. I cannot stress this enough. The few extra dollars for locking casters is totally worth it for safety.
Final Thoughts on Building Your Own Woodworking Carts
Look I am going to be real with you. Your first woodworking cart is probably not going to look like those fancy ones you see on Instagram or Pinterest. Mine certainly didnt. But thats completely fine.
The whole point of woodworking carts is to make your work easier and keep your shop organised. As long as it rolls, holds your stuff, and doesnt fall apart, its a good cart. You can always build a nicer one later when your skills improve.
Start with one simple cart. Maybe a rolling table saw cart or a basic shop cart. Use cheap materials, follow free shop cart plans, and dont overthink it. The best cart is the one you actually build and use, not the one you keep planning in your head forever.
Woodworking carts have genuinely made my workshop experience so much better. I can find my tools quickly, move heavy machines without hurting my back, and my garage actually looks decent now. Well, most of the time at least haha.
So go ahead, grab some plywood and screws, and build your first woodworking cart this weekend. You will thank yourself later. And if you have any questions, just drop a comment below. I am always happy to help fellow beginers.
Happy building freinds!
FAQ
What is the best wood for building woodworking carts?
Plywood is the best and most affordable option for building woodworking carts. Three quarter inch plywood gives good strength without being too heavy or expensive.
How much does it cost to build a DIY shop cart?
You can build a simple shop cart for around 50 to 90 dollars using plywood, 2×4 lumber, caster wheels and screws.
What size caster wheels should I use for a table saw cart?
For a table saw cart use 4 to 5 inch heavy duty locking caster wheels so the cart stays stable during cutting.
Can I build a combo table saw and router table cart?
Yes you can build a combo cart that holds both your table saw and router table in one unit, which saves a lot of space in small workshops.
Where can I find free woodworking cart plans?
You can find free woodworking cart plans on sites like Ana White, Woodsmith Plans, and various woodworking blogs and forums online.
Is a Rockler Panel Cart worth buying for beginners?
The Rockler Panel Cart is good quality but expensive for beginners. If you handle large plywood sheets often it might be worth it, otherwise build a simple DIY version.