Okay so honestly when I first tried making woodworking bookends I thought it was gonna be super complicated. Like I looked at a few videos and I was thinking “bhai this looks hard.” But then I just tried it one sunday and guess what, it was one of the most easiest things I ever made in my garage. Seriously no joke.
If you are a beginner and you want to make your very first woodworking bookends without spending too much money, you are at the right place. I am Udit Das, I run easydiywood.com and I do DIY wood stuff mostly from scraps and cheap lumber. So let me show you everything from start to finish, and I promise its not scary at all.
What Are Woodworking Bookends and Why Should You Even Make Them
A bookend is basically a small wooden piece that goes on both sides of your books on a shelf so the books dont fall down like dominoes. Simple right?
Now you can buy bookends from Amazon or Walmart but honestly why spend 20 to 30 dollars when you can make wooden bookends DIY style for literally under 5 dollars or sometimes almost free if you have scrap wood at home.
Also when you make it yourself, it feels so good. I am not kidding, my wife was actually impressed when I showed her the first pair I made. She said “you made this??” and I said yes with a very proud face lol.
And the main thing is, this project takes maybe 1 to 2 hours max. Even if you have never touched a saw in your life, you can do this.
Things You Need Before Starting (Budget Friendly Approach)
Okay so before we get into the actual woodworking bookends making process, lets talk about what you actually need.
For tools you just need a saw (even a simple hand saw works fine, no need for any fancy power tools at all), a drill or screwdriver, some sandpaper, and wood glue or screws. Thats it basically.
For wood, I always suggest pine boards. Pine is cheap, easy to cut, and available at Home Depot or Lowes everywhere across USA. A small 1×4 or 1×6 pine board that is like 2 feet long costs maybe 2 to 4 dollars. Super budget friendly for everyone. You also want to know that, as one helpful resource explains, pine is a softwood that is “readily available and affordable, making it a popular choice for beginners” and its “easy to work with” nature makes it great for first-timers. You can read more about choosing the right wood over at ManMadeDIY’s beginner wood guide if you want to go deeper into that topic.
You will also need felt pads for the bottom of the bookends so they dont scratch your shelf surface. These are available in packs of 50 for like 2 dollars. Very important step that most people just skip and then wonder why the bookend is sliding all around.
If you dont have any wood at home yet, you can also try woodworking bookends kits which come with pre-cut pieces and basic instructions. These kits are good for absolute beginners who are a little scared of cutting wood themselves. They are available online and in some craft stores too.
But honestly, buying a small board and cutting it yourself is way more satisfying and even cheaper most of the time. I always prefer to do it that way.
The Simple L Shape Design (Most Beginner Friendly)
Now here is the thing. Most easy woodworking bookends are made in an L shape. Why? Because its the most stable shape for holding books and its the simplest to make.
You basically need two pieces of wood for each bookend. One piece is the vertical part (the part books lean against) and one piece is the horizontal base (the part that sits flat on shelf). These two pieces are joined together at a 90 degree angle, making that L shape.
For sizes, I usually cut: Vertical piece at around 5 to 6 inches tall Base piece at around 4 to 5 inches long
But you can adjust depending on how tall your books are. For heavy books or thick textbooks, I recommend making the vertical piece a little taller, maybe 7 inches, so the books dont tip over the top.
Actually this is something most other guides dont tell you. DIY bookends for heavy books need a wider and heavier base. I made mine with a thicker piece of wood for the base, around 1.5 inch thick, and it holds even my heavy engineering books no problem.
If you want to learn more about how wood joints work before you start this project, go check out this guide on butt joint woodworking which explains the basic joint you will be using here in a very simple way.
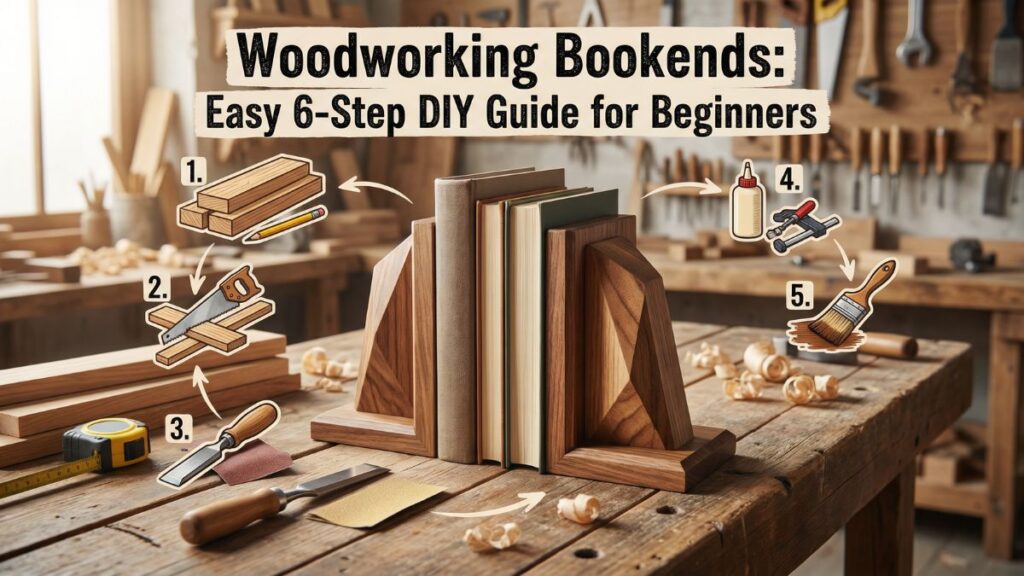
Step By Step How to Make Easy Woodworking Bookends
Alright lets get into the actual making part. This is where the fun starts.
Step 1: Measure and mark your wood
Take your pine board and use a pencil to mark where you will cut. Remember you need four pieces total, two for each bookend. Mark carefully before cutting, measure twice cut once, you know the old saying.
Step 2: Cut your wood pieces
Use your hand saw or miter saw to cut along your pencil lines. If you are scared of cutting, take it slow. Slow cuts are safer and actually cleaner for beginners. Dont rush this part.
Step 3: Sand the edges
After cutting, your edges will be a little rough. Take some 80 grit sandpaper first to smooth it out and then use 120 or 150 grit for a nicer finish. This step makes a huge diffrence in how the final product looks.
Step 4: Join the two pieces
Now you need to attach the vertical piece to the base at 90 degrees. You can do this with wood glue plus screws, or just screws. I like to use both for extra strength especially if making DIY bookends for heavy books.
Apply wood glue first, press the pieces together, then drill a pilot hole and put in 1 or 2 screws from the bottom. Let the glue dry fully before using it.
Step 5: Add felt pads on the bottom
This is the step most beginners forget. Stick some felt pads on the bottom of the base piece. This stops the bookend from sliding and also protects your shelf from scratches. Very very important step.
Step 6: Finish it
You can stain it, paint it, or just leave the natural wood look. I personally love natural pine with a light coat of clear varnish. It looks clean and simple and honestly very beautiful.
And thats it! Your first pair of easy DIY bookends is ready. Wasnt that simple?
Cool Woodworking Bookends Ideas to Make It More Special
Okay so the basic L shape is great but if you want to make something more creative, here are some easy woodworking bookends ideas that even beginners can try.
Animal shapes: Cut a simple animal shape from thin plywood and glue it to the front of your L shaped bookend. Bunny, cat, dog, anything you like. Kids love these type of wooden bookends DIY styles.
Initials or letters: Cut out the first letter of your name from wood and glue it on. Makes a very nice personalised gift idea.
Mountain shape: This one is my personal favorite. Cut a simple triangle from wood to look like a mountain peak and attach it on top of the vertical piece. Looks really classy on a bookshelf.
Simple geometric patterns: If you are into woodworking bookends patterns, try cutting small geometric shapes and arranging them on the front face of the bookend. Even just drilling a few decorative holes looks good.
For more project ideas for complete beginners like these, I also suggest checking out easy DIY wood projects to make money if you want to use your new skills to actually earn something on the side.
What About Cardboard First?
Oh wait, I almost forgot to mention this. If you are totally new and super nervous about cutting wood, here is a little trick I use.
Before cutting real wood, I sometimes make a rough version with DIY bookends cardboard first. Just use thick cardboard, cut it in the same L shape, and tape it together. This helps you see if the size looks right before you waste any wood.
It is especially helpful when trying new woodworking bookends patterns or shapes. Just use cardboard as a test run. Many experienced woodworkers do this actually. Its called making a “mock-up” or template.
Common Mistakes Beginners Make With Woodworking Bookends
I made all these mistakes so you dont have to.
First mistake is not sanding before painting. The paint or stain will look bumpy and bad if you skip sanding. Always sand first.
Second mistake is using wood that is too thin for heavy books. If you want DIY bookends for heavy books, use at least 3/4 inch thick wood. Thinner wood can crack or bend under weight.
Third mistake is skipping the felt pads. I know I already said this but seriously, dont skip it. The bookend will slide away from your books and not work properly.
Fourth mistake is making the base too short. A longer base means better stability. I usually make the base at least as long as the height of the vertical piece.
Fifth mistake, and this is a funny one, is not making both bookends exactly the same size. One bookend ended up smaller than the other in my very first try and it looked quite odd on the shelf. Measure both pieces together, not separately.
Should You Buy a Woodworking Bookends Kit Instead?
So some people ask me, should I just buy a woodworking bookends kit instead of making from scratch?
Honestly it depends. If you have zero tools and zero wood at home, a kit might be easier to start with. These kits usually come with pre-cut wood pieces, sandpaper, and basic instructions. You just assemble and finish.
But the cost is usually higher than just buying a small board. And the satisfaction of cutting your own wood is something a kit cannot give you.
My honest suggestion: start with a kit for your very first time if you are totally scared, and then after that try making from scratch. You will never go back to kits after that, trust me.
Also, if you enjoy making woodworking bookends and want to expand your projects, you might want to check out this beginners guide on woodworking for beginners free guide which has lot of helpful resources all in one place.
What Wood Is Best for Budget Woodworking Bookends in USA
Since I am writing this for folks in USA, lets talk about what wood to buy.
Pine is the most budget friendly and most available wood for easy woodworking bookends. You can get it at Home Depot, Lowes, or any local lumber yard. It is soft, cuts easily, and takes stain and paint very nicely.
Poplar is another good option. Slightly harder than pine but still affordable and very smooth after sanding. Looks really good with a natural stain.
Avoid hardwoods like oak or walnut for your very first bookend project. They are harder to cut and more expensive. Save those for when you have a little more experience.
Also, check if your store has a “clearance lumber” or “damaged wood” section. I have found perfect pieces there for almost nothing. Even small mistakes on a board dont matter much when you are cutting small pieces for woodworking bookends.
For finishing, a basic can of Minwax wood stain is great. Golden Oak or Early American colors look beautiful on pine. And then a coat of clear polyurethane sealer on top to protect it.
How to Make Woodworking Bookends Look Expensive (Without Spending Much)
Okay this is a litle secret section. Many people think handmade wood things look “cheap.” But with the right finishing, your wooden bookends DIY project can look like it came from a fancy home decor store.
Sand the wood really smooth. I mean really smooth, like 150 grit then 220 grit. The smoother the wood, the better the stain looks.
Use a pre-stain wood conditioner before staining pine. This helps the stain go on more evenly without blotchy patches. This one tip alone makes a huge difference in how professional the final bookend looks.
If you want a metallic look, spray paint in gold or bronze. Two thin coats work better than one thick coat. Let each coat dry properly before adding the next one.
And honestly, just confidence matters too. When you put the bookend on the shelf with pride, people will think you bought it somewhere nice.
Conclusion: Just Start Making Your Woodworking Bookends Today
So there you have it. Everything you need to know about woodworking bookends as a total beginner on a budget. I know sometimes all this information feels like a lot but once you actually start cutting that first piece of wood, everything becomes much more clearer.
The great thing about woodworking bookends is that they are small, quick, cheap, and super useful. You can make them as a gift, for your own shelf, for your kids room, or even to sell at a craft fair. The possibilities are honestly endless.
I started with the most basic easy woodworking bookends and now I make them in different shapes and styles for fun. If I can do it, so can you.
So please go try it this weekend okay? Buy a small pine board, watch your cuts, sand it smooth, and make your very first wooden bookends DIY project. You will feel so proud when its done.
And if you make one, please come back and tell me in the comments how it went. I love hearing from readers.
Happy building from Udit at easydiywood.com!
FAQs About Woodworking Bookends
Q1: Can I make woodworking bookends without any power tools?
Yes absolutely! A simple hand saw and a screwdriver is more than enough. Most easy DIY bookends just need straight cuts and basic assembly.
Q2: What is the best wood for DIY bookends for heavy books?
Pine that is at least 3/4 inch thick works well for most books. For very heavy textbooks, use a thicker base piece around 1 to 1.5 inch thick for better support.
Q3: How do I stop my wooden bookends from sliding on the shelf?
Stick self-adhesive felt pads on the bottom of the bookend base. This simple fix stops sliding and also protects your shelf surface from scratches.
Q4: Are woodworking bookends kits good for total beginners?
Yes they are a nice starting point if you have no tools or wood at home. But making from scratch with a cheap pine board is more rewarding and usually even less expensive.