Ok so let me tell you something. When I first heard about shadow box woodworking, I had no idea what peoples were talking about. Like seriously, a box that makes shadows? What does that even mean ya? But then I saw one hanging on my freind’s wall and it had all these old photos and medals inside it behind a glass front. And I was like wow, thats actually beautful. Thats the moment I decided I want to make one myself.
So hey, I am Udit and I run this little blog easydiywood.com where I share simple wood projects for peoples who are just starting out. And today I am going to walk you through shadow box woodworking in the most simple and cheap way possible. No fancy tools, no big budget, just basic stuff you can find at home or at your local hardware store.
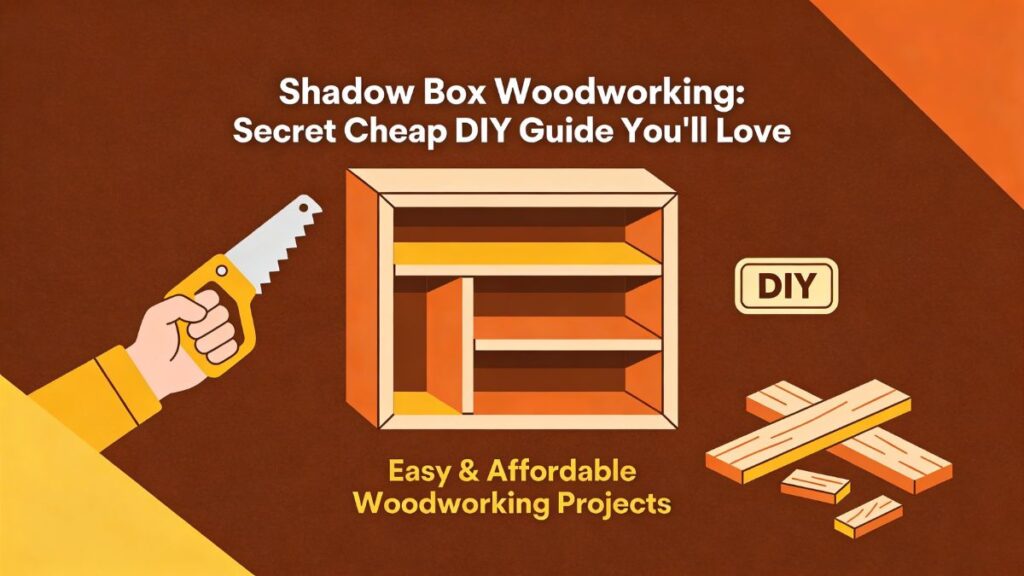
What Even is a Shadow Box Anyway?
Ok so before we go into the making part, let me explain what this thing actually is. A shadow box is basically a deep picture frame, right? But instead of putting just one photo inside, you put objects inside it. Like medals, old keys, baby shoes, dried flowers, ticket stubs, all those things that mean something to you. The box has depth so those items can sit inside nicely and it usually has a glass or acrylic front to keep dust away.
Think of it like a tiny display cabinet you hang on your wall. Thats it. Nothing complicated at all.
Shadow box woodworking is one of the most satisfying projects for beginners because the result looks very proffesional even if your cuts are not perfect. Trust me on this one, I messed up my first shadow box pretty bad and it still looked decent on the wall haha.
Why I Think Shadow Box Woodworking is Perfect for Beginners
Let me be honest with you. When I started woodworking, I was scared of making big furniture pieces. A table? Too big. A bookshelf? Too many cuts. But a shadow box? Its small, its manageable, and if you mess up, you dont waste much wood or money.
Shadow box woodworking is like a training project. You learn measuring, cutting, glueing, sanding and finishing all in one small project. And the best part? You get something usefull at the end. Not just a practice peice that goes in the trash, but something you can actually hang on your wall or give as a gift.
I remember making my first one for my mom’s birthday. I put her old temple photos and some dried flowers from our garden inside it. She almost cried when she saw it. That feeling, you cant buy that from any shop na?
If you are someone who is looking for beginner wood projects, shadow box woodworking should be on your list for sure.
Tools You Actually Need for Shadow Box Woodworking
Now here is where most websites confuse beginners. They list table saws, dado blades, biscuit joiners and all sorts of expensive things. And you sit there thinking, I dont have any of this stuff.
So let me tell you what you realy need. The basic basic stuff.
A hand saw or a miter box with a back saw. You can get one for around 10 to 15 dollars. If you already have a miter saw, even better but its not compulsary at all.
A measuring tape. Obviously.
Sandpaper. Get 150 grit and 220 grit. Both together cost like 3 to 4 dollars.
Wood glue. Any brand works. Titebond is good but even the cheap ones from dollar store do fine for this size project.
Some small nails or brad nails. Or if you have a nail gun thats great too.
A piece of acrylic sheet or plexiglass. Way cheaper and safer than real glass. You can get a small sheet from Walmart or Dollar Tree even.
And a clamp. Even a rubber band works if your box is small enough honestly.
Thats it. Thats all you need for shadow box woodworking. No table saw required. I know it sounds too simple but I promise you it works.
Picking the Right Wood Without Spending Too Much
Ok so this is the part where peoples overspend. They go to the wood shop and buy walnut or cherry wood and end up spending 30 to 40 dollars just on lumber for one small box. Dont do that please.
For shadow box woodworking on a budget, pine wood is your best freind. Seriously. Pine is cheap, easy to cut, easy to sand, and it takes stain very nicely. A 1×3 or 1×4 pine board from Home Depot costs somewhere around 3 to 6 dollars depending on length. Thats enough wood to make one or even two shadow boxes.
Another option is to use pallet wood or scrap wood if you have some lying around. Old picture frames work amazingly well too. I once made a shadow box from an old drawer that was broken. Just took the sides, cut them down, and boom, free shadow box.
If you want a slightly nicer look, poplar is also a good option. Its smooth, paints well, and not too expensive either. You can check my guide on poplar woodworking if you want to know more about that wood type.
Shadow Box Woodworking Plans: Do You Really Need One?
Honestly? For a basic shadow box, you dont really need a fancy plan. But having a rough sketch helps you avoid mistakes. I always draw a quick diagram on a paper before starting. Just the size I want, the depth I need, and where the grooves will go.
Now if you search for shadow box woodworking plans pdf or shadow box plans PDF online, you will find some good ones. Some websites offer shadow box woodworking plans free and those are great for reference. But dont feel like you must follow them exactly. Every shadow box is different because it depends on what you want to put inside.
For my projects, I usually make 8×10 inch or 11×14 inch sizes. Those are common photo frame sizes so finding acrylic sheets in those dimensions is super easy and cheap.
If you want shadow box woodworking patterns free, check some woodworking forums and YouTube channels. Lots of kind peoples share their shadow box woodworking plans for free. Just search shadow box plans PDF free download and you will find plenty of options to get started.
But here is my honest opinion. Dont overcomplicate it. A shadow box is basically four sides, a back, and a front cover. Thats literally it. The magic is in how you finish it and what you put inside.
My Step by Step Process for Building a Cheap Shadow Box
Alright so here is how I actually do it. This is my real process, not some textbook method.
Step 1: Decide Your Size
First thing, figure out what you want to display. Is it a small medal? Use a 5×7 box. Is it a folded flag or jersey? You will need something bigger like 16×20. For most general shadow box woodworking projects, 8×10 works perfectly.
Step 2: Cut Your Wood
Take your 1×3 or 1×4 pine board and cut four peices. Two for the top and bottom, two for the sides. If you are making 8×10, your top and bottom peices will be 10 inches long and sides will be 8 inches. But wait, you need to account for the overlap at corners, so adjust accordingly.
I usually do simple butt joints for my shadow boxes. Some peoples do miter cuts at 45 degree angles which look nicer but butt joints work perfectly fine for beginners. Dont stress about it.
Step 3: Make a Groove for the Front
This is the trickiest part of shadow box woodworking for beginners. You need a small groove near the front edge of your wood peices to slide the acrylic sheet into. If you have a router table, this is super easy. Just run each peice through with a straight bit.
But if you dont have a router, you can use a hand saw to carefully cut two parallel lines and chisel out the wood between them. Its slower but it works. Or honestly, you can skip the groove completely and just glue the acrylic to the front after assembling the box. I have done that many times and it holds fine.
Step 4: Assemble the Box
Apply wood glue on the edges and press the four sides together. Use nails or brad nails to hold them while the glue drys. If you have a strap clamp, wrap it around the whole box to keep everything tight and square.
Check the corners with a small square tool or even a book corner to make sure everything is at 90 degrees. This is important because if your box is not square, the acrylic and back panel wont fit right.
Step 5: Attach the Back
Cut a thin plywood peice or even thick cardboard for the back panel. I usually use 1/4 inch plywood. You can either cut a rabbet on the inside back edge to set the panel into, or simply place it on the back and secure with small screws. Screws are better than nails for the back because you will want to open it later to put items inside or change the display.
Step 6: Sand and Finish
Sand the whole box with 150 grit first, then go over with 220 grit for a smooth feel. Now here comes the fun part. You can paint it, stain it, or leave it natural. For a rustic look, I like using dark walnut stain on pine. It gives that expensive look without the expensive price tag.
If you want a painted finish, white or black looks very clean and modern. Two coats of paint and one coat of clear finish on top and your shadow box woodworking project will look like something from a fancy store.
How to Make Your Shadow Box Look Expensive on a Budget
Ok so this is the secret that most peoples dont talk about. The wood and the box itself is just half the story. What makes a shadow box look proffesional is the background and the arrangement inside.
For the background, use a piece of fabric. Felt works amazingly. You can get a sheet of felt from any craft store for like 1 dollar. Just cut it to size and glue it to the back panel. Black felt makes everything inside pop out nicely.
You can also use burlap for a rustic farmhouse look, or scrapbook paper for something colorful and fun.
When placing items inside, start with the biggest peice first and arrange smaller things around it. Dont overcrowd the box. Leave some empty space. It looks way better with breathing room than stuffing everything in.
Use small dots of hot glue or double sided tape to hold items in place. For heavier things like coins or medals, museum wax or sticky putty works great. You dont want things falling down every time someone walks by the wall right?
The presentation is what takes your shadow box woodworking from average to wow. Seriously, I have seen peoples make the most simple boxes but with great arrangement inside, they look stunning.
Shadow Box Ideas That Cost Almost Nothing
Let me give you some ideas that I have actually made or seen peoples make. These are all super budget freindly.
A travel memory box. Put your flight tickets, hotel cards, small souvenirs and a photo from each trip. This makes an amazing living room display.
A baby memory box. First shoes, hospital bracelet, birth announcement card, and a small photo. New parents absolutely love getting these as gifts.
A military or achievement box. Medals, badges, certificates folded small, rank patches. This is actually one of the most popular uses for shadow box woodworking in the USA. According to Family Handyman, shadow boxes are great for displaying memorabilia and awards in a safe way.
A wedding keepsake box. Dried flowers from the bouquet, invitation card, a small photo, maybe the cake topper. Such a romantic gift idea na?
A sports memorabilia box. Game tickets, trading cards, a signed baseball, team pins. Sports fans go crazy for this stuff.
The beauty of shadow box woodworking is that you can customize each box for the person or occasion. Every single one becomes unique and personal.
Common Mistakes I Made So You Dont Have To
Ok let me save you some pain here. These are the actual mistakes I made when I started shadow box woodworking.
First mistake was not measuring the acrylic before cutting the wood. I made the box, felt so proud, then realized the acrylic sheet was slightly bigger than the opening. Had to redo the whole thing. So always buy or cut your acrylic first, then build the box around it. Trust me on this.
Second mistake was using too much glue. When you squeeze the box together, extra glue oozes out and if it drys on the wood surface, the stain wont absorb there properly. You get ugly light patches. Wipe off excess glue immediately with a damp cloth. Dont be lazy about this.
Third mistake was not letting the finish dry completly before putting the back on. I was so excited to see the finished thing that I closed it up too soon and the back stuck to the wet finish. Patience is important in shadow box woodworking. Let every coat dry fully.
Fourth mistake was hanging it with just one nail. The box fell down after two days and the acrylic cracked. Use proper picture hanging hardware with two points. Or use a french cleat which is much more secure. You can make one from scrap wood in like 5 minutes.
Cost Breakdown: What I Actually Spent
Let me give you the real numbers from my last shadow box woodworking project. This was an 8×10 inch box.
Pine 1×3 board, 4 feet long. Around 3 dollars. 1/4 inch plywood cutoff for back panel. 2 dollars or free if you have scraps. Acrylic sheet 8×10. About 4 dollars from Lowes. Wood glue, sandpaper and small nails. I already had these but if buying fresh, maybe 5 to 7 dollars. Stain, small can. Around 5 dollars but you will have plenty left for future projects. Felt fabric for background. 1 dollar.
Total cost for one shadow box? Roughly 15 to 20 dollars if you are buying everything new. Compare that to buying a readymade shadow box from Amazon which costs 25 to 50 dollars for a decent one. Plus yours will be handmade with love and you can brag about it to everyone haha.
If you use scrap wood and leftover supplies, you can make one for literally 5 dollars or less. Shadow box woodworking free of high costs is totally possible when you use materials you already have at home.
Shadow Box Woodworking as a Gift Idea
I want to quickly talk about this because I think shadow box woodworking is one of the best gift ideas ever. Like ever ever. The box itself costs almost nothing to make, but the thought and effort behind it? Priceless.
For my sister’s wedding anniversary, I made a shadow box with her wedding invitation, a dried flower from her bouquet, and a small photo of the couple. She keeps it right in her bedroom and shows it to every guest who visits.
For Father’s Day, I made one with old family photos and my dad’s army service badge. He was speechless when he opened it.
This is what shadow box woodworking does. It takes simple materials and turns them into something deeply emotional and personal. You dont need to be a master woodworker to do this. You just need some basic tools, a little patience, and a heart full of memories to display.
Final Thoughts on Shadow Box Woodworking
So yeah thats basically everything I know about shadow box woodworking for beginners on a tight budget. Its one of those projects that gives you maximum satisfaction with minimum investment. The skills you learn here, measuring, cutting, glueing, finishing, these will help you in every future woodworking project too.
Dont worry about making it perfect. My first few shadow boxes were not perfect either. The corners had small gaps, the stain was uneven in some places, but they still looked beautiful on the wall. Nobody examines your shadow box with a magnifying glass ok? They look at whats inside and the story it tells.
If you been thinking about getting into shadow box woodworking, just start. Go grab a cheap pine board this weekend and make your first one. Follow my steps above or find some shadow box woodworking pdf guides online for more detailed measurements. Either way, just begin. You will thank yourself later.
And hey, if you make one, send me a photo. I would love to see what you create. Happy building freinds!
Frequently Asked Questions
What wood is best for making a shadow box on a budget?
Pine is the cheapest and easiest wood for shadow box woodworking beginners. It cuts smooth, takes stain nicely, and costs only a few dollars per board.
Can I build a shadow box without a table saw?
Yes absolutely. You can make a shadow box with just a hand saw, some wood glue and basic tools. A table saw makes it faster but is not needed at all.
How deep should a shadow box be for displaying objects?
For most items like photos, medals and small keepsakes, a depth of 2 to 3 inches works great. Use a 1×3 or 1×4 board for the sides to get that depth.
Where can I find shadow box woodworking plans free?
Many woodworking websites and forums offer shadow box plans PDF free download. YouTube also has tons of free video tutorials with measurements and cut lists you can follow.