
Hey freinds, Udit here. So let me tell you something honestly, when I first started doing wood projects at home, the dust situation was out of controll. Like I am not joking, evrything in my small workshop and even in other rooms was covered with this fine powder. My wife was not happy at all. Thats when somebody on a woodworking forum told me about downdraft dust woodworking and honestly my freind, it changed the whole scene for me.
I never thought a simple downdraft dust woodworking setup could make this much diffrence in a small home workshop. But it did and now I cant imagine working without one.
Today I want to share with you how I made my own downdraft table dust collector at home spending almost nothing. We talking about under 30 dollars. Yes thats it. And the best part? You dont need proffesional skills or expensive tools for this build.
Before jumping into the steps, let me be real with you. I messed up so many things on my first try. But you know what, those mistakes taught me alot and now I want to help you avoid all of that. So stay with me till the end ok?
What is a Downdraft Table for Woodworking Anyway?
Ok so lets start from zero because when I first heard this word I was so confused. Like downdraft? What even is that no?
Think about it like this. You know your kitchen chimney right? It pulls smoke up. A downdraft table does the opposite thing actually. It pulls the dust going downwards instead of upwards. Simple as that. This is the basic idea behind every downdraft dust woodworking system out there.
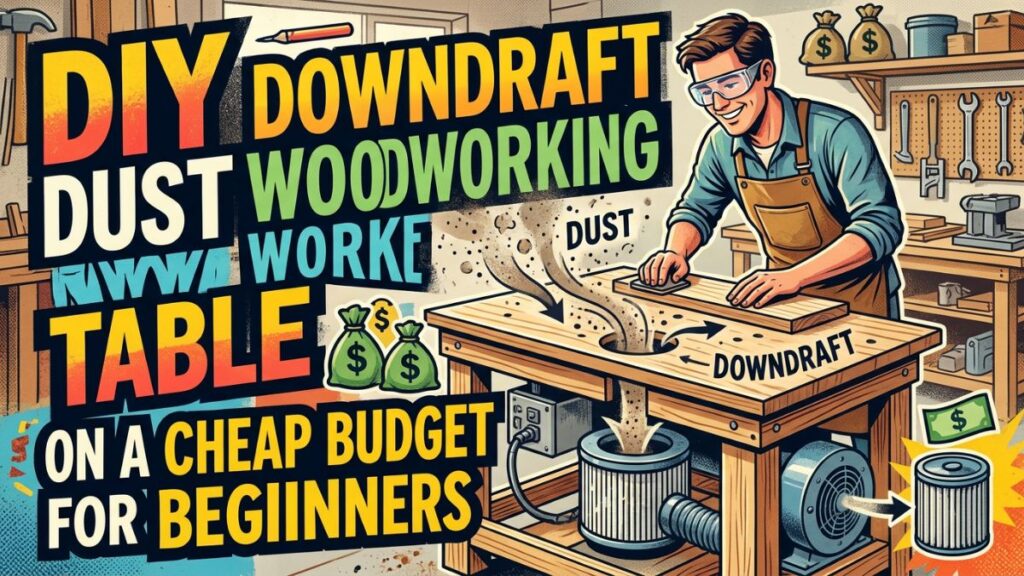
So basically you got a table surface with tiny holes on the top. Below that surface there is a hollow box connected to your shop vacuum or dust collector. When suction is turned on, all that sawdust gets pulled down through the holes instead of floating around in your room and going into your lungs.
And let me tell you freinds, wood dust is not just some annoying mess. Over long time it can actually cause serious health problems. I wish someone had told me this properly when I was starting out. Your lungs are way more important than any wood project you will ever make. Thats exactly why downdraft dust woodworking matters so much.
Why I Went the DIY Downdraft Dust Woodworking Route
So here is what happened. I was looking at downdraft dust woodworking for sale options online. And I almost had a small heart attack seeing those prices. Some commercial downdraft tables from companies like Rockler were costing hundreds of dollars. And the big industrial ones? Those were going for thousands. Like literally 9000, 11000 dollars for a proper sanding station.
I looked at my wallet and then looked at the screen and said to myself, Udit bhai you are a DIY person. Why not just build one yourself?
But I wont lie to you. I was very scared at first. Because evryone online was talking about CFM and air velocity and static pressure and all these big words. My brain was spinning like a ceiling fan. But then I realized the core idea behind diy downdraft dust woodworking is actually so so simple. Just a box with holes that sucks air down. Thats it.
Materials You Will Need for This Budget Build
Ok so here comes the exciting part. I am keeping this super pocket freindly because I know the struggle of wanting to build stuff when you dont have big money. This is probably the cheapest downdraft dust woodworking kit you will ever find.
For the main box you need half inch MDF or plywood pieces. Most of us DIY people already have leftover scraps from previous projects laying around. Then one piece of pegboard around 18 by 24 inches. Some wood glue and brad nails or screws. One 4 inch dust port fitting which costs about 5 to 8 dollars. And some caulk for sealing the edges.
For suction your regular shop vacuum works totally fine. Or if you already have a small dust collector thats even better.
See? Nothing fancy at all. My total cost for the first build was around 7 dollars because I used scrap wood I already had. The only thing I bought new was the dust port. Can you believe that?
If you enjoy making things on budget, you might also want to check my guide on easy DIY wood projects to make money. Building a downdraft sanding table DIY is actually a great starter project for someone who is just beginning.
Step by Step How I Built My Downdraft Dust Woodworking Table
Alright lets get into the actual building part now. I am going to explain evrything in the most simple way I can so even if this is your very first project ever you can follow along without any confusion. Well maybe a little confusion because thats how I explain things haha. These are my own downdraft dust woodworking plans that worked perfectly for me.
Cutting the Pegboard Top
First thing you gotta do is cut your pegboard to the right size. I went with roughly 18 by 24 inches and honestly that gave me a really nice area for sanding work. Not too big and not too small.
Now here is something very very important that nobody told me. Dont go too large with the surface if you are using a shop vac for suction. I made my first table way too big thinking bigger means better. But when I turned on the vacuum there was almost zero pull on the surface. I was so frustrated I wanted to throw the whole thing out.
The reason is simple. A shop vac does not move enough air volume for a large area. Keep it small and your downdraft dust woodworking setup will work much better.
Building the Box Frame
Cut your MDF or plywood into strips about 5 to 6 inches wide. You need two long pieces and two short pieces. Just a simple rectangular box nothing complicated at all.
Join them together using glue and brad nails. Place the pegboard on top while assembling to make sure evrything is straight and square. If the box is not square then the pegboard wont sit properly on top and you will have air gaps which means less suction.
Adding the Dust Port on the Side
On one of the short sides mark the center point. Drill a small starter hole and then use a jigsaw to cut out a circle for your 4 inch dust port fitting. Position the port about 1 inch up from the bottom of the box.
Now listen carefully because this is where alot of beginers mess up. I saw a person on a woodworking forum sharing how they put the hose connection on the bottom of the box. Even though they had good suction right at the port, the dust collection from the top surface was very poor. Putting it on the side works much much better in my experience.
The Secret Ramp Inside the Box
This is the part that most downdraft dust woodworking plans you find online dont tell you about properly and it makes a HUGE diffrence.
Cut a thin piece of plywood and fix it at an angle inside the box. One end should sit higher on the side opposite from where your dust port is, and then slope downwards toward the port opening.
What this sloped piece does is two things. First it pushes the airflow towards your dust port so nothing gets stuck and sitting in the corners. Second and more importantly it makes the suction more even across the whole top surface. Without this ramp the suction will only be strong near the port and very weak on the far side.
I learnt this the hard way after building my first table without a ramp. The diffrence after adding one was like night and day honestly.
Support Strips for the Pegboard
Around the top edge of the box glue and nail some small wooden strips. These strips act like a shelf that holds the pegboard in place so it sits nice and flush with the top edge. The board should rest on these cleats without any wobbling or movement.
Seal Evrything Up Tight
This step is super super important and I almost skipped it my first time. Use caulk or silicone sealant to close all the inside corners and edges of the box. You want the thing to be completely airtight.
Any small air leak means less suction at the top surface which means dust is not getting collected like it should. Even tiny gaps can mess up the whole downdraft dust woodworking performance. Take your time with this part and dont rush.
Connect Your Vacuum and Test It
Hook up your shop vac hose to the dust port. Turn it on. Put your hand flat over the pegboard holes. Can you feel the pull? If yes then congrats your best downdraft dust woodworking setup is ready to go.
If the suction feels weak dont get upset right away. Sometimes there are too many open holes for the amount of suction you have. You can cover some of the holes with tape to make the pull stronger on the ones that are still open. Start by taping over the edges and leave the center area open. This trick alone can make a massive improvment.
Common Mistakes in Downdraft Dust Woodworking Builds
Let me share the biggest blunders that I see people making over and over again with downdraft dust woodworking setups. And yes I made most of these myself.
Going too big with the table. Your shop vacuum simply does not have enough air moving power for a really large surface. For beginers just keep it around 18 by 24 inches. Thats like the sweet spot in my opinion.
Not making the holes bigger. Standard pegboard holes can be quite small. I drilled every third hole a little bit larger on my table and the air flow improved noticeably after that. Something worth trying for sure.
Forgetting side walls. Commercial downdraft tables have raised walls on the sides and back for a good reason. Those walls help contain dust and direct the airflow properly. Even simple removable panels made from thin plywood make a big difference. Think of it like putting walls around a sand pit.
Never cleaning the inside. Dust builds up inside the box over time and if you dont clean it out the suction gets weaker and weaker. Make sure you can remove the pegboard top easily for cleaning every few weeks.
When Do You Actually Need a Downdraft Table Dust Collector?
This is a question I get asked alot and I want to give an honest answer.
If you only use power sanders that have built in dust bags or ports connected to a vacuum, you might survive without a downdraft table for a while. But here is the thing. Even the best sander with good dust collection will let some particles escape. And what about hand sanding? There is no dust port on your hand right?
I personally feel every woodworker should have some kind of downdraft dust woodworking solution. Specially if you work in a small closed room like I do. Before building my table I used to cough for hours after a sanding session. Now the air in my workshop is so so much better. My wife is happy too because the dust doesnt travel to other rooms anymore.
But if you work in an open garage with good natural ventilation and you always use a sander connected to a vacuum, maybe you can wait on this project. Just please wear a dust mask at minimum ok?
If you want to learn more about keeping your workspace organised and safe, check out my beginner guide on woodworking fasteners which also covers basic workshop setup tips.
Should You Build or Buy Your Downdraft Dust Woodworking Setup?
Ok so this is a big debate in the woodworking world and I have seen people argue about it for hours on forums.
Some experienced woodworkers say just buy a good commercial one because the engineering behind them is proper and tested. And honestly they have a point. Ready made downdraft dust woodworking kit options from known brands do perform really well right out of the box.
But here is my honest take as a budget DIY guy.
If you are just starting out and working on small home projects then building your own makes total sense. You save hundreds of dollars. You learn something new. And you can make it whatever size fits your workspace. Thats the beauty of diy downdraft dust woodworking projects.
But if you are doing proffesional level work and sanding stuff all day every day, then maybe investing in a commercial setup makes more sense for the long run. Depends on your situation really.
Extra Tips After One Year of Using My Table
I have been using my homemade downdraft sanding table DIY setup for more than a year now and here are some things I picked up along the way.
Put a rubber mat on top of the pegboard. It protects your workpiece from getting scratch marks and the holes in the mat still let air pass through. I cut up an old yoga mat for this and it works great. Really great actually.
If your shop vac noise is driving you crazy and it probably will, try getting a longer hose and keeping the vacuum in the the next room or outside. Suction stays the same but noise goes way down.
Add casters or small wheels on the bottom of your downdraft table. This way you can push it around when you need the space for something else. A workshop that moves with you is a happy workshop I always say.
For super fine dust from high grit sanding paper the downdraft alone wont catch evrything. Even Bill Pentz who is a well known dust collection researcher points out that downdraft tables have some limitations with the finest particles. So wearing a proper dust mask is still important even when you have a downdraft dust woodworking table running. Safety first always.
Understanding Suction Power for Your Downdraft Table for Woodworking
This topic confuses so many beginers. Let me try to break it down real easy.
For a small downdraft dust woodworking table around 18 by 24 inches your regular shop vac will do the job just fine. It gives enough pull for that kind of area.
But if you want to go bigger like 24 by 36 inches or even larger, then you need a proper dust collector. Something that moves at least 650 CFM of air. CFM is just a fancy way of saying how much air the machine pulls per minute.
The key is matching your table size with your suction source. Too big surface with a small vacuum means no pull. Too small surface with a massive collector means you wasted money on power you dont need. Finding the balance is the trick and honestly you might need to experiment a little bit.
You can always cover extra holes with tape to increase suction strength on the remaining open ones. I do this all the time depending on what size piece I am working on that day.
My Honest Review After Using It for Over a Year
So its been more than one year now since I built my downdraft table dust collector and I want to share the good and the not so good parts honestly.
The workshop cleanliness has improved like crazy. Before this table a simple sanding job would create a dust fog that would hang around for hours in the room. Now most of that stuff goes straight down into the collector. My breathing is better and the time I spend cleaning up after work has been cut by atleast half.
But I wont pretend its perfect. The super fine invisible particles still escape sometimes. For those I still rely on a good dust mask and I also hung a basic air filter from the ceiling. And the shop vac noise, well I already told you about that problem. Its loud. Very loud.
Would I recommend building your own? One hundred percent yes. This is one of the best downdraft dust woodworking investments I have ever made for my workshop and more importantly for my health.
FAQs About Downdraft Dust Woodworking
Can a regular shop vacuum work for a downdraft table?
Yes totally. For small tables under 2 feet by 2 feet a shop vac gives enough suction. Just dont make the surface area too large or it wont work well.
What size holes should the top surface have?
Standard pegboard holes work for basic setups. But many woodworkers recommend drilling some holes to 3/8 inch for improved results.
How often do I need to clean inside the box?
Clean it every 2 to 3 weeks depending on how much sanding work you do. Just remove the top panel and vacuum the dust buildup out.
Is MDF better than plywood for making the box?
Both are perfectly fine. MDF is smoother and costs less but its heavier. Plywood weighs less and holds up better over time but costs a bit more.
Can I build this without any power tools at all?
It will be difficult but not imposible. You need atleast a hand saw and a drill. A jigsaw makes cutting the dust port hole much easier though.
Do I still need to wear a dust mask with a downdraft table?
Yes please dont skip the mask. A downdraft table catches alot of dust but not 100 percent. The finest particles can still get into the air.
Final Thoughts on Downdraft Dust Woodworking
So there you have it freinds. That is my complete guide on building a budget freindly downdraft dust woodworking table right at home. The whole project took me about 3 hours and costed less than 30 dollars total. And the benifit to my lungs and to my workshop cleanliness has been absolutly worth every single minute I spent on it.
If you are a beginer just getting into woodworking please please dont ignore the dust collection part. I know it feels boring compared to making cool furniture and stuff. But your lungs will thankyou later trust me on this. Downdraft dust woodworking is one of those things where once you start using it you genuinly wonder how you ever managed without it before.
Go ahead try building one this weekend. Start small and use whatever scrap materials you already got. And dont forget to let me know in the comments how your build went. I would love to see what you guys come up with.
Happy building freinds and always stay safe in your workshop!


Pingback: Best Woodwork Machine for Beginners on a Tight Budget