Okay so let me be honest with you. When I first started doing butt joint woodworking in my small room here in India, I had no idea what I was doing. I thought joinery was only for those proffesional guys with big workshops and expensive machines. But then I tried making a simple wooden box one day and I realised, oh wait, I have already been doing butt joint woodworking all this time without even knowing the name of it.
So if you are a total beginner and you just want to understand what is butt joint, how to make it strong, and when to actually use it in your DIY projects, then you are in right place my freind. Let me explain everything in simple words, no complicated terms, no boring theory.
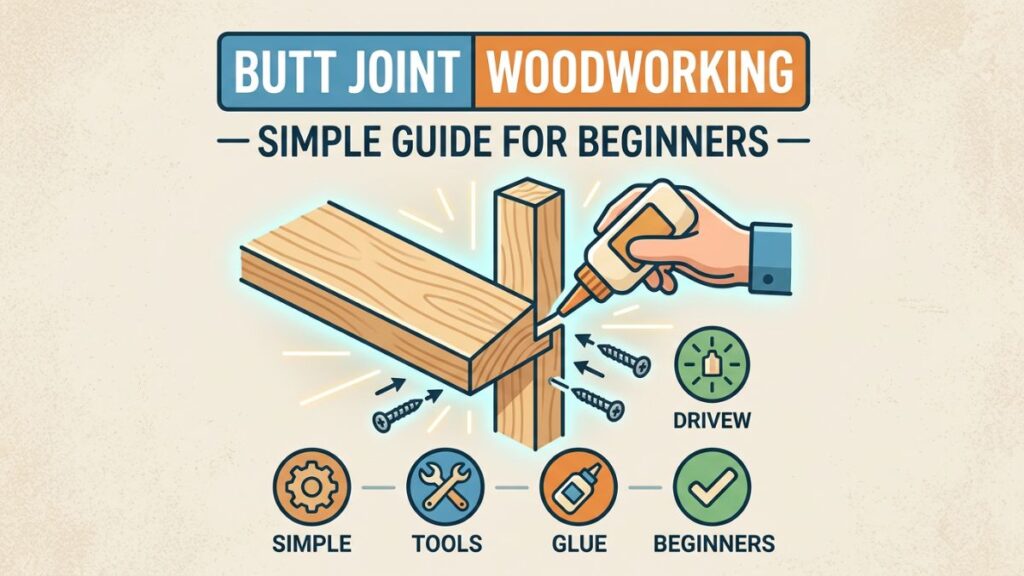
What Is Butt Joint in Woodworking? Let Me Explain Simply
So what is butt joint? Basically, a butt joint woodworking joint is when you take one piece of wood and just press its end flat against another piece of wood. That’s it. No fancy cutting, no complicated shape. Just two boards touching each other, usually at 90 degree angle, and then you hold them together with glue or screws or nails.
I know it sounds too simple right? But actually, butt joint woodworking is used everywhere. In house construction, furniture, shelves, boxes, picture frames, small DIY projects. Everywhere you look, someone is using this joint.
The butt joint is considered the most basic and easiest joint in all of woodworking. But here is the honest truth, it is also the weakest joint if you dont reinforce it properly. So yes, butt joint woodworking has both good and bad sides. We will talk about all of that below.
Types of Butt Joint You Should Know About
Not all butt joints are same. There are actually a few different types of butt joint that beginners should know before starting any project.
1. Plain Butt Joint (End to Face) This is the most basic one. You just press the end of one board flat against the face or edge of another board. Very common in box making and shelf building. The butt joint woodworking beginner always starts from this type only.
2. Edge to Edge Butt Joint Here you join two boards side by side along their long edges. This is how people make wider table tops or panels. When wood glue is applied on long grain surfaces like this, it actually becomes quite strong. Even stronger than the wood itself sometimes.
3. End to End Butt Joint Two boards joined end to end to make a longer piece. This is actually the weakest type of butt joint. Not recommended for any project that will hold weight.
4. Mitered Butt Joint Now this one is a little different. In a mitered butt joint, each piece is cut at 45 degree angle at the corner. So when you join them, you get a clean corner with no raw wood end showing. This is used in picture frames and decorative trim work. Looks much nicer than a plain butt joint but it is slightly harder to cut properly.
5. Face to Face Butt Joint This is when you stack two boards flat on top of each other and glue them together. Used when you need a thicker piece of wood. Pretty simple and very strong because of the long grain contact.
So now you know the different types of butt joint. Good. Moving ahead.
Butt Joint Uses in Real Projects (The Practical Part)
Now let us talk about where butt joint woodworking is actually used in real life. Because knowing the theory is one thing but seeing how it fits into actual projects is different.
Here are the common butt joint uses:
Picture Frames — Very common use. You take four pieces, cut them to length, and join the corners with glue and small nails. Mitered butt joint looks best for frames.
Simple Wooden Boxes — When I made my first small wooden box for storing small tools, I used butt joint woodworking. Just four side pieces joined at corners. Added screws for strength. Worked perfectly.
Shelving Units — Side panels and top bottom panels of bookshelves or storage shelves. Butt joint with screws and wood glue is used very commonly here.
Cabinet Frames — The front frame of kitchen or storage cabinets often uses butt joint woodworking reinforced with pocket screws or dowels.
Wall Framing in Construction — When wall studs are joined to the top and bottom horizontal plates, that connection is basically a butt joint woodworking joint in construction. Very common in USA homes.
Decking and Floor Framing — Floor joists meeting rim joists in deck building also use this type of joint. Metal joist hangers are added for extra support.
DIY Furniture on Budget — This is my favourite butt joint use honestly. When you are working on a tight budget, butt joint woodworking saves you so much time and money. No need for complex tools, no mortise chisel, nothing. Just a hand saw, some wood glue, and screws.
Butt Joint Advantages and Disadvantages (Honest Review)
Okay now let me give you the real picture. Here are the butt joint advantages and disadvantages so you can decide when to use it and when not to.
Advantages
Very Fast to Make — You dont need to spend hours cutting complicated shapes. Just cut square and join. Done.
Beginner Friendly — Anyone can do butt joint woodworking. No special skills are needed at starting stage. Perfect for your first few projects.
Budget Friendly — No expensive jigs or special tools. Just a saw, glue, and screws. That is it. Very cheap to do.
Flexible and Versatile — Works for small decorative items, large furniture frames, and even home construction. Butt joint woodworking fits into so many different project types.
Can Be Made Strong — With the right reinforcement like pocket screws, dowels, or wood glue on long grain, butt joint woodworking can actually be quite strong.
Disadvantages
Weakest Joint by Itself — Without reinforcement, butt joint woodworking gives you a very weak connection. The end grain does not hold glue well because glue gets absorbed into the grain without bonding properly on surface.
Not Always Pretty — The raw end grain of wood is visible in most plain butt joints. If you want a clean looking project, you need to either use a mitered butt joint or cover it somehow.
Can Slip When Gluing — This is something that drove me crazy when I was starting out. When glue is wet, the two boards can slide around very easily. Very frustrating if you are working alone.
Not Suitable for Heavy Load — If your project needs to hold heavy weight or resist pulling forces, then butt joint alone will not be enough. You need stronger joints for that.
Butt Joint vs Lap Joint — Which One Should You Pick?
A lot of beginners get confused between butt joint woodworking and lap joint. So let me explain this simply.
In a butt joint, the two pieces of wood are just touching each other at their surfaces or ends. One piece ends and another begins from that point.
In a lap joint, one piece of wood slightly overlaps the other. Material is removed from each piece so they interlock a little bit. This gives the lap joint more surface area for glue which means it is stronger than a basic butt joint.
So if you need more strength and you dont mind a bit more work, go for lap joint. But if you are doing a quick simple project on budget, butt joint woodworking is your best option. For beginners, I always suggest starting with butt joint first because it teaches you the basics without overwhelming you. You can always level up to lap joint or other joints later.
If you want to explore more beginner projects that use simple joinery like this, you should definitely check out our guide on beginner woodworking projects and free tutorials on easydiywood.com.
A Quick Word About Butt Joint Welding vs Woodworking
People sometimes search for butt joint welding when they actually mean woodworking butt joint. So just to clear this up, butt joint welding is something that happens in metalwork. It is when two pieces of metal are placed end to end and welded together along that seam. The concept is similar but the material and process is completely different from woodworking.
So if you typed butt joint welding and landed here, well now you know the difference. You are in the woodworking world now. Welcome!
How to Make a Strong Butt Joint Woodworking Connection (Step by Step)
Here is how I do butt joint woodworking in my simple home setup. No expensive tools needed at all.
Step 1 — Measure and Mark Take your tape measure and mark the length you want on the wood. Use a pencil. Then align a speed square or any right angle tool with your mark and draw a clear line all the way across the board.
Step 2 — Cut Square This is very important. Your cut must be perfectly square at 90 degree for butt joint woodworking to work properly. Use a miter saw if you have one. If not, a hand saw works too, just take it slow and stay on your line.
Step 3 — Sand the Ends Lightly sand the cut ends with medium grit sandpaper. This removes rough fibres and helps glue sit better. I learned this the hard way after my first two boxes fell apart!
Step 4 — Apply Wood Glue Apply wood glue generously on the end grain of the piece that will be butting against the other board. End grain soaks up glue fast, so apply a little extra. Wait 30 seconds and apply a second thin coat.
Step 5 — Join and Clamp Press the two pieces together. If you have clamps, use them. If you dont have clamps, just press firm and use tape temporarily. Make sure the pieces are aligned properly.
Step 6 — Add Screws or Nails Dont rely only on glue for butt joint woodworking. Pre-drill pilot holes first then drive screws through one piece into the end of the other. This gives you the mechanical strength the joint needs. For beginners, 1.5 to 2 inch screws work well for most projects.
Step 7 — Wipe Extra Glue Wet cloth, wipe any squeezed out glue immediately before it dries. Dried glue looks messy and it blocks stain from absorbing properly later.
That is literally it. Butt joint woodworking is that simple!
Butt Joint Drawing — How to Visualize It
For those who learn better visually, imagine a simple butt joint drawing like this:
Think of the letter “L” or “T” shape. In an L joint, one board goes horizontal and another board stands vertically on its end against the horizontal one. The vertical board’s end is touching the face of horizontal board. That point of contact is your butt joint woodworking connection.
In a T shape butt joint, one board crosses the middle of another board. Again the end of the crossing board sits flat against the face of the main board.
If you search for butt joint drawing online you will find many diagrams like this. But honestly, once you try it with actual wood pieces in your hand, it becomes 100 times easier to understand than any drawing.
Want to start with a simple beginner project that uses butt joint woodworking? Try making a small wooden drying rack at home. It is easy, cheap, and practical. You can find a full guide on our woodworking drying rack budget beginner guide page.
Ways to Reinforce Butt Joint Woodworking (Make It Actually Strong)
Here are the popular methods to make your butt joint woodworking connections stronger:
Wood Glue — Always use it. Even if you are adding screws also, glue adds bonding strength. Long grain glue joints are actually incredibly strong.
Screws — Most reliable and easy reinforcement for butt joint woodworking. Pre-drill always to avoid splitting.
Pocket Hole Screws — Drill at an angle into one board and screw into the other. Much better holding power than straight screws. A Kreg jig makes this very easy. You can learn more about pocket hole joinery at Woodworkers Guild of America which has some really good free tutorials.
Dowels — Small wooden pins are inserted into aligned holes drilled in both pieces. Adds both strength and helps with alignment. Good choice for furniture.
Biscuits — Small oval shaped wood pieces that fit into matching grooves cut in both boards. Works great for edge to edge butt joint woodworking like making wide panels.
Corner Brackets — Metal L shaped brackets screwed on inside corners. Very cheap and adds good strength to box type butt joint woodworking projects.
Wooden Gussets — A small triangular piece of plywood glued and screwed into the inside corner of a butt joint. Very strong reinforcement. Good for beginners.
For more information about different types of fasteners used in woodworking projects, also check Family Handyman’s beginner resources at familyhandyman.com which explains hardware options in very simple way.
Common Mistakes Beginners Make With Butt Joint Woodworking
Let me share some mistakes I made, so maybe you dont have to repeat them.
Mistake 1 — Not cutting square. This is the biggest one. If your cut is even slightly off angle, the butt joint will have a visible gap. Always check with a square before cutting.
Mistake 2 — Relying on glue alone. End grain does not hold glue as well as long grain. Always add screws or some mechanical fastener.
Mistake 3 — Skipping pilot holes. Driving screws into wood without drilling pilot holes first causes splitting. Especially in thinner boards or near edges.
Mistake 4 — Not clamping while glue dries. Wet glue is slippery. Boards move around. I have had joints that looked great but shifted slightly while drying and the final result was crooked. Use clamps or tape.
Mistake 5 — Using wrong wood. Very thin or very low quality wood splits easily in butt joint woodworking. Start with pine or plywood which is forgiving and cheap.
Butt Joint Woodworking on a Budget — My Personal Tips
I know cost is a big concern for beginners. So here are some real budget tips for butt joint woodworking from my experience:
Use pine boards or plywood offcuts from hardware stores. They are very cheap and easy to cut. A 2×4 pine board is usually very affordable at US lumber stores.
You dont need a Kreg jig from the start. Just use regular screws with pilot holes for butt joint woodworking. Only buy the jig later when you feel ready.
A simple hand saw is enough for most butt joint woodworking cuts. No need for miter saw in beginning.
Titebond II wood glue is very popular, reasonably priced, and works great for butt joint woodworking. One bottle lasts many projects.
Old metal L brackets from kitchen or hardware section of any store work great as corner reinforcement. Costs very little.
Start with a simple box project. Four sides of wood joined at corners with butt joints. Add a bottom panel. Done. That is a real functional project you can make in your first week.
Butt Joint Woodworking — Conclusion
So now you know everything important about butt joint woodworking that a beginner actually needs. You know what is butt joint, the different types of butt joint, the real butt joint uses in projects, the butt joint advantages and disadvantages, and how to make it strong without spending a lot of money.
Remember butt joint woodworking is not perfect. It is not the strongest joint. It wont win any joinery contest. But for beginners who just want to start making things without spending big money on tools or spending weeks learning complicated techniques, butt joint woodworking is honestly the best starting point.
I started with butt joint woodworking in my tiny room with almost no tools and limited budget. And look, I am here now sharing projects on easydiywood.com. So trust me, just start. That first simple butt joint you make with your own hands will feel so satisfying.
Now go pick up some wood and try it yourself. And if you have any questions about butt joint woodworking or your first DIY project, drop a comment below. I read every single one.
Happy building everyone!
FAQs About Butt Joint Woodworking
Q1: What is a butt joint in woodworking and where is it used?
A butt joint is when you press the end of one wood piece flat against another piece and fix them with glue, screws, or nails. It is used in boxes, shelves, frames, and basic furniture projects.
Q2: Is butt joint woodworking strong enough for furniture?
On its own it is weak, but when you reinforce it with pocket screws, dowels, or biscuits plus wood glue, butt joint woodworking becomes strong enough for many furniture pieces like bookshelves and simple tables.
Q3: What is the difference between a butt joint and a lap joint?
In a butt joint the two boards just meet at their surfaces without overlapping. In a lap joint one board slightly overlaps the other giving more glue surface and better strength overall.
Q4: Can a beginner do butt joint woodworking without expensive tools?
Yes absolutely. A hand saw, pencil, wood glue, and screws is all you need to start butt joint woodworking as a complete beginner. No expensive machine required at all.