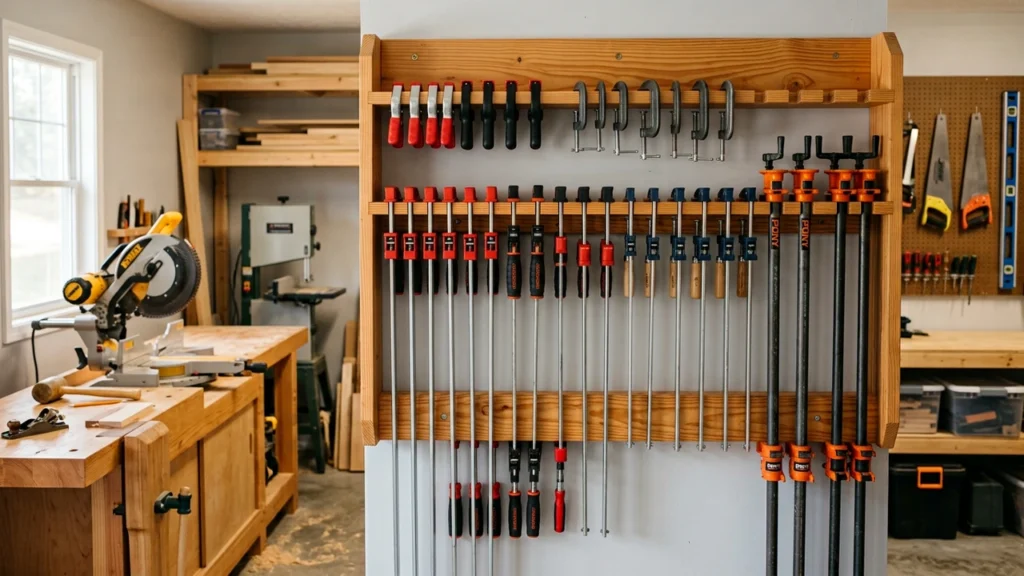

Hey friend, Udit here again from easydiywood.com. Today I want to show you how to build a wood clamp rack because honestly, my own clamps were just lying around my small shop like a big mess. If you also have clamps thrown everywhere on floor or table, then this guide on how to build a wood clamp rack is going to help you a lot, I promise.
I am not some big carpenter with fancy degree, I just learn by doing mistakes in my own garage, so this is going to be very beginner friendly, no complicated language, nothing.
Why You Even Need A Wood Clamp Rack
See, when I started woodworking, I use to keep all my clamps in one bucket. Sounds smart na? But it was actually the worst idea ever because finding the right clamp size was taking me 5 to 10 minutes every single time.
That is exactly why learning how to build a wood clamp rack changed my whole workshop life. Once you build one, all your clamps sit nicely in a row, you just grab and go, no searching, no time waste.
Also this project is super good for beginners because it dont need any advance tool or expensive wood. You can literally use scrap wood pieces lying in your garage.
Tools And Material You Will Need
Before we jump into how to build a wood clamp rack, let me quickly tell you what things you will need. Dont worry, all of these are cheap and easily available.
Materials:
- One sheet of 3/4 inch plywood (or any scrap wood you already have)
- Wood screws (1 1/4 inch works fine)
- Wood glue
- Sand paper (120 grit is okay)
Tools:
- Circular saw or hand saw
- Drill machine
- Measuring tape
- Pencil
- Square tool (for straight marking)
If you already own a good pair of f clamps for woodworking then even better, you can use them while gluing your rack pieces together.
Honestly speaking, you dont need to buy new wood at all for this project. That is the whole point of a budget friendly how to build a wood clamp rack plan, use what you already got.
Step By Step: How To Build A Wood Clamp Rack
Okay now the real part. Let me break down how to build a wood clamp rack into small steps so even a complete beginner (like I was few years back) can follow easily.
Step 1: Measure Your Clamps First
This step people usually skip and later regret it. Before cutting any wood, lay down 2 or 3 of your biggest clamps side by side and measure the gap you will need between each slot.
Most beginners just guess the spacing, but trust me, measuring first will save your whole project. For most standard bar clamps, keeping around 1 to 1.5 inch gap between slots works nicely.
Step 2: Cut Your Wood Pieces
Now cut your plywood into these rough pieces:
- One long piece for the back board (this will touch the wall)
- One piece for the front where slots will be cut
- Two side pieces to give it support and depth
Dont worry if your cuts are not 100% perfect, this is a workshop project, not furniture for living room. A little rough edges are totally fine here.
Step 3: Mark And Cut The Slots
This is the heart of learning how to build a wood clamp rack. Take your front board, mark the spacing you decided in step 1, then drill a hole at the end of each mark and cut a straight line down to that hole using your saw.
These slots is where your clamp bar will actually hang, so make the width just slightly bigger than your clamp bar thickness, not too loose otherwise clamp will wobble around.
Step 4: Assemble The Rack Frame
Now attach the front slotted board to the side pieces using wood glue plus screws. I always add glue first then screw, it just holds stronger for years.
Once side pieces are attached, fix the back board behind everything. This back board is what actually takes the screw when you mount it to wall, so make sure it feels sturdy, not shaky at all.
If you are worried about wood splitting while driving screws, I already wrote a full guide on how to screw into wood without splitting it which really helps in projects like this.
Step 5: Mount It To The Wall
Final step of how to build a wood clamp rack is hanging it up. Always find a wall stud before screwing, because clamps are heavy and drywall alone cannot hold that weight for long time.
You can use a simple stud finder tool for this, most hardware stores in USA sell cheap ones. Once stud is located, screw your rack directly into it using long screws, at least two points for safety.
Budget Tips For How To Build A Wood Clamp Rack
Since our whole angle here is budget friendly, let me share few money saving tips I personally use.
First, always check your scrap wood pile before buying anything new. Second hand pallet wood works surprisingly well too, just sand it properly first.
Second, you dont need branded screws, normal hardware store screws work just fine for this kind of project. Save your money for actual clamps instead.
Third, if you want quality plywood without spending too much, checking a store like Rockler sometimes gives good scrap bin deals on wood cutoffs, which is perfect for how to build a wood clamp rack projects.
Common Mistakes Beginners Make
I made few of these mistakes myself when I was learning how to build a wood clamp rack, so let me save you the trouble.
Mistake one, not measuring clamps before cutting slots. This leads to super tight or super loose slots later.
Mistake two, mounting the rack without finding a wall stud. Trust me, one day the whole rack falls with all your clamps, happened to my friend actually, not fun to watch.
Mistake three, using very thin wood for the back board. Always keep it atleast 3/4 inch thick, thinner wood bends under weight over time.
Mistake four, ignoring safety glasses while cutting wood. Even for small project like this, wearing basic eye protection matters, you can check general workshop safety tips from resources like OSHA eye protection guide just to stay safe while cutting and drilling.
Why This Project Is Perfect For Complete Beginners
Honestly, if you are asking yourself how to build a wood clamp rack as your very first woodworking project, I would say go for it. It dont require any joinery skill, no fancy tools, just basic cutting and screwing.
This is also a good confidence booster project. Once you finish it and see all your clamps hanging neatly, you feel like a real woodworker, even if the rack is little wonky in one corner, nobody is going to judge.
I remember when I finished my first rack, I actually stood there for 5 minutes just looking at it like some kind of achievement, silly I know, but that is the joy of doing things with your own hand.
Final Thoughts
So thats basically everything about how to build a wood clamp rack on a budget. It is honestly one of the easiest shop project you can start with, specially if you already have some scrap wood laying around your garage or basement.
Dont overthink the measurements too much, just keep it functional first, pretty later. Once you understand how to build a wood clamp rack once, you can literally make different versions for different clamp types, bar clamps, spring clamps, pipe clamps, whatever you own.
If you are just starting your woodworking journey and want more simple ideas like this, do check my other beginner guides on the blog, I keep adding new budget friendly projects every week.
Let me know in comments if you tried building this rack, or if you got stuck somewhere, I read every comment and try to reply within a day or two.
FAQs
How far apart should slots be in a clamp rack? Usually 1 to 1.5 inch gap works fine for most standard bar clamps, but always measure your own clamps first before cutting.
What type of wood is best for a clamp rack? Plain plywood, atleast 3/4 inch thick, works perfectly, no need for expensive hardwood for this project.
Do I really need to hit a wall stud for mounting? Yes, clamps are heavy together, so mounting into a stud keeps your rack safe from falling down later.
Can beginners really build this without any woodworking experience? Absolutely yes, this is one of the simplest first projects, mostly just cutting straight lines and screwing pieces together.